Updated March 31, 2023

Introduction to JavaFX ImageView
The JavaFX ImageView is a class used for painting images and loading the images with Image class. ImageView class is allowing a user to resize the displayed image by without effecting the aspect ratio and also without effecting the image pixels. In JavaFX before creating ImageView class, we must create Image class to load this object into image view class. ImageView class is available in scene.image.ImageView package, to make use of it we must import it. Image class is available in javafx.scene.image.Image package, to make use of it we must import this as well.
Advantage: We can add the images without effecting its pixel size or aspect ratio.
Constructors:
- ImageView(): Create an ImageView object wihout constructor argument.
- ImageView(Image image): Create an ImageView object with Image as argument to a constructor.
- ImageView(String url): Create an ImageView object with string image url as argument to a constructor.
Frequently used methods:
- setImage(image): setImage() is used to set the image object.
- setFitWidth(width): setFitWidth() is used to set the image width.
- setPreserveRatio(true/false): setPreserveRatio() is used to set the image preserved ratio. Default value is false.
- setSmooth(true/false): setSmooth() is used to set the image smoothness. Default value is false.
- setCache(true/false): setCache() is used to set the image cache. Default value is false.
- setFill(Color.BLACK): setFill() is used to set the image color fill.
- add(): add() is used to add the JavaFX elements.
- show(): show() is used to show the output.
How to Create ImageView in JavaFX?
Accessing JavaFX features user defined class must extends Application
Step 1: Image can instantiate by using new
Image image=new Image();Step 2: Creating ImageView and setting image to the image view is second step.
ImageView  imageView=new ImageView()
ImageView.setImage(image);
Step 3: Create VBox or any other display(like TilePane or HBox as per requirement) class to add the items is third step.
VBox vBox=new VBox (imageView); //Gives vertical boxStep 4: Creating scene for apply show method on to it.
Scene screen = new Scene(vBox, length, width);Step 5: Adding Scene reference screen to the Stage object reference is fifth step. Adding output screen to Stage. We will get this stage object reference from start predefined JavaFX method.
stage.setScene(screen);Step 6: Showing output to the end user by applying show() method on the scene object.
stage.show();Examples to Implement JavaFX ImageView
Here are the example mentioned below:
Example #1
ImageView with default constructor and add it to HBox
Code:
package com.imageview.image;
import javafx.application.Application;
import javafx.scene.Scene;
import javafx.scene.image.Image;
import javafx.scene.image.ImageView;
import javafx.scene.layout.HBox;
import javafx.stage.Stage;
public class DefaultImageView extends Application {
@Override
public void start(Stage primaryStage) {
// setting the title of application
primaryStage.setTitle("Default ImageView with Image");
// Create a image object
Image image=new Image("1.jpg");
//creating ImageView for adding image
ImageView imageView=new ImageView();
imageView.setImage(image);
imageView.setFitWidth(400);
imageView.setPreserveRatio(true);
imageView.setSmooth(true);
imageView.setCache(true);
//creating HBox to add imageview
HBox hBox=new HBox();
hBox.getChildren().add(imageView);
//adding scroll pane to the scene
Scene scene = new Scene(hBox, 400, 400);
primaryStage.setScene(scene);
//showing the output
primaryStage.show();
}
public static void main(String[] args) {
//invoking main method from JVM
launch(args);
}
}
Output:
Explanation: We have added a CARONA virus image to the image view by using HBox and shown the output by using show() method.
Example #2
Adding multiple images vertically with scroll bar
Code:
package com.imageview.image;
import javafx.application.Application;
import javafx.scene.Scene;
import javafx.scene.control.ScrollPane;
import javafx.scene.image.Image;
import javafx.scene.image.ImageView;
import javafx.scene.layout.VBox;
import javafx.stage.Stage;
public class AddingMultipleImages extends Application {
@Override
public void start(Stage primaryStage) {
// setting the title of application
primaryStage.setTitle("Multiple ImageViews with Muliple Images");
// Create image objects
Image image1=new Image("2.jpg");
Image image2=new Image("3.png");
Image image3=new Image("4.jpg");
Image image4=new Image("5.jpg");
//creating ImageView for adding images
ImageView imageView1=new ImageView();
imageView1.setImage(image1);
imageView1.setFitWidth(600);
imageView1.setPreserveRatio(true);
imageView1.setSmooth(true);
imageView1.setCache(true);
ImageView imageView2=new ImageView();
imageView2.setImage(image2);
imageView2.setFitWidth(600);
imageView2.setPreserveRatio(true);
imageView2.setSmooth(true);
imageView2.setCache(true);
ImageView imageView3=new ImageView();
imageView3.setImage(image3);
imageView3.setFitWidth(600);
imageView3.setPreserveRatio(true);
imageView3.setSmooth(true);
imageView3.setCache(true);
ImageView imageView4=new ImageView();
imageView4.setImage(image4);
imageView4.setFitWidth(600);
imageView4.setPreserveRatio(true);
imageView4.setSmooth(true);
imageView4.setCache(true);
//creating VBox to add image views
VBox vBox=new VBox();
vBox.getChildren().add(imageView1);
vBox.getChildren().add(imageView2);
vBox.getChildren().add(imageView3);
vBox.getChildren().add(imageView4);
//scroll pane for scrolling the images if we more width and height
ScrollPane scrollPnae=new ScrollPane();
scrollPnae.setContent(vBox);
//adding scroll pane to the scene
Scene scene = new Scene(scrollPnae, 700, 700);
primaryStage.setScene(scene);
//showing the output
primaryStage.show();
}
public static void main(String[] args) {
//invoking main method from JVM
launch(args);
}
}
Output:
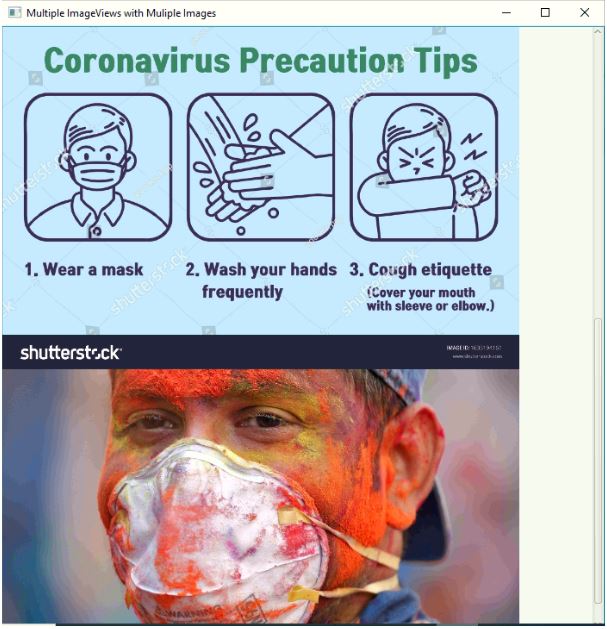
Explanation: We have added a CARONA precautions multiple images to the multiple image views vertically by using VBox and, scroll pane and shown the output by using show() method.
Example #3
Adding Multiple images horizontally
Code:
package com.imageview.image;
import javafx.application.Application;
import javafx.scene.Scene;
import javafx.scene.control.ScrollPane;
import javafx.scene.image.Image;
import javafx.scene.image.ImageView;
import javafx.scene.layout.HBox;
import javafx.stage.Stage;
public class AddingMultipleImagesHorizontally extends Application {
@Override
public void start(Stage primaryStage) {
// setting the title of application
primaryStage.setTitle("Multiple ImageViews with Muliple Images");
// Create image objects
Image image1=new Image("2.jpg");
Image image2=new Image("3.png");
Image image3=new Image("4.jpg");
Image image4=new Image("5.jpg");
//creating ImageView for adding images
ImageView imageView1=new ImageView();
imageView1.setImage(image1);
imageView1.setFitWidth(400);
imageView1.setFitHeight(600);
imageView1.setPreserveRatio(true);
imageView1.setSmooth(true);
imageView1.setCache(true);
ImageView imageView2=new ImageView();
imageView2.setImage(image2);
imageView2.setFitWidth(400);
imageView2.setFitHeight(600);
imageView2.setPreserveRatio(true);
imageView2.setSmooth(true);
imageView2.setCache(true);
ImageView imageView3=new ImageView();
imageView3.setImage(image3);
imageView3.setFitWidth(400);
imageView3.setFitHeight(600);
imageView3.setPreserveRatio(true);
imageView3.setSmooth(true);
imageView3.setCache(true);
ImageView imageView4=new ImageView();
imageView4.setImage(image4);
imageView4.setFitWidth(400);
imageView4.setFitHeight(600);
imageView4.setPreserveRatio(true);
imageView4.setSmooth(true);
imageView4.setCache(true);
//creating HBox to add image views
HBox hBox=new HBox();
hBox.getChildren().add(imageView1);
hBox.getChildren().add(imageView2);
hBox.getChildren().add(imageView3);
hBox.getChildren().add(imageView4);
//scroll pane for scrolling the images if we more width and height
ScrollPane scrollPnae=new ScrollPane();
scrollPnae.setContent(hBox);
//adding scroll pane to the scene
Scene scene = new Scene(scrollPnae, 800, 400);
primaryStage.setScene(scene);
//showing the output
primaryStage.show();
}
public static void main(String[] args) {
//invoking main method from JVM
launch(args);
}
}
Output:
Explanation: We have added a CARONA precautions multiple images to the multiple image views horizontally by using HBox and, scroll pane and shown the output by using show() method.
Conclusion
ImageView is used to add single or multiple images by using any JavaFX element. We can also add scroll bar to our images either vertically or horizontally. ImageView can’t change its aspect ratio or pixel size.
Recommended Articles
This is a guide to JavaFX ImageView. Here we discuss the introduction to JavaFX ImageView, how to create it with steps, examples with codes and outputs. You can also go through our other related articles to learn more –


