Introduction to JavaScript Auto Complete
The following article provides an outline for JavaScript AutoComplete. The Auto Complete is one of the features and widget of JavaScript. It provides the user suggestions while they are typed in the values which they are seeing in the input UI fields in the front end then the values are connected through the backend. They need some data source to connect them even though javascript has the space to provided the user fields to the widget using the source options. They used the array concept to match the fields to the data source it may have many ways to complete the feature in JavaScript.
Syntax and Parameters:
In JavaScript each feature have their own syntax and format for utilising the web pages. So that we can create the web pages more easily and sophisticated from both the user and client side.
<html>
<head>
</head>
<body>
<script>
function name()
{
var v=["".""…]; //variable name initialisation using array format
----some javascript logics-----
}
</script>
<input type=”text” list=”datalist” onkeyup=”name()”>
<datalist id="datalist">
<options value=""></option>
<options value=""></option>
</datalist>
</body>
</html>
The above codes are one of the basic syntax for Auto complete feature in JavaScript we may also use jquery JavaScript framework classes used for reduce the coding lines and added some additional functionalities of the web pages. Here the datalist is one of the feature and we have passed the values as set of arguments in the web page.
How Auto Complete is done in JavaScript?
The JavaScript we can validate the client side request the user can use any number of input fields like UI tags that is text box, scroll box etc. Whatever the user using the input fields the values are fetching automatically in the db or any other memory storages but these values are only used in the drop down menu types so the it takes auto complete as the time utilising. Mostly we used auto complete feature in <div> tag using the # symbol with the help of id the values are retrieved from the storage and it will display and its behind the type of transparent input elements.
They have so preciously for each and every characters for user types in the ui text box and it must be overlapped with the similar set of characters using the div html tags. Whenever the user types the character in the text boxes we can add the same type of input characters in the div tags. It can help the user for searching possible suggestions starting with the user characters and displayed that on the div tags. Using the JavaScript event functions for performing the user operations in the backend the “keyup” is one of the event for detecting the keys pressed in the user input and changed the html div tag elements and contents to be updated.
The event also does not really cut the element values and also when the user input is null or empty it has been weird with some delay sequence is performed for div tag elements is updated in the web pages the user aimed of the input datas are behind with the placeholder type in the web pages. So we can avoid the above scenario with the help of “keydown” event also whenever the input fields are almost empty and will keep on the backspace key is pressed it will update the values automatically and instantly to the div tag as empty. If suppose the html form as having the autocomplete feature also it could have the huge set of lists and it will show the user relevant informations. We do not load the all datas in the feature the results also display it into the html page.
Examples of JavaScript Auto Complete
Given below are the examples of JavaScript Auto Complete:
Example #1
Code:
<!DOCTYPE html>
<html>
<head>
<title>Welcome To My Domain</title>
</head>
<body>
<script type="text/javascript">
var t = [
"siva",
"raman",
"sivaraman",
"arun",
"kumar",
"arun kumar",
"suresh",
"logesh",
"srinath",
"mahendran",
"emaya",
"sasi",
"deva"
];
var nam= t.length;
function demo(value) {
document.getElementById('datalist').innerHTML = '';
list=value.length;
for (var i = 0; i<nam; i++) {
if(((t[i].toLowerCase()).indexOf(value.toLowerCase()))>-1)
{
var n = document.createElement("option");
var v = document.createTextNode(t[i]);
n.appendChild(v);
document.getElementById("datalist").appendChild(n);
}
}
}
</script>
<input type="text" list="datalist" onkeyup="demo(this.value)">
<datalist id="datalist">
<option value="siva"></option>
<option value="raman"></option>
<option value="sivaraman"></option>
<option value="arun"></option>
<option value="kumar"></option>
<option value="arun kumar"></option>
<option value="suresh"></option>
<option value="logesh"></option>
<option value="srinath"></option>
<option value="mahendran"></option>
<option value="emaya"></option>
<option value="sasi"></option>
<option value="deva"></option>
</datalist>
</body>
</html>
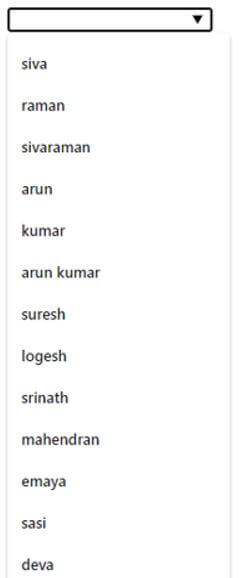
Output:
Example #2
Code:
<!doctype html>
<html lang="en">
<head>
<meta charset="utf-8">
<meta name="viewport" content="width=device-width, initial-scale=1">
<title>Welcome To My Domain</title>
<link rel="stylesheet" href="//code.jquery.com/ui/1.12.1/themes/base/jquery-ui.
css">
<link rel="stylesheet" href="https://cdn.educba.com/resources/demos/style.css">
<script src="https://code.jquery.com/jquery-1.12.4.js"></script>
<script src="https://code.jquery.com/ui/1.12.1/jquery-ui.js"></script>
<script>
$( function() {
var t = [
"siva",
"raman",
"sivaraman",
"arun",
"kumar",
"arun kumar",
"suresh",
"logesh",
"srinath",
"mahendran",
"emaya",
"sasi",
"deva"
];
$( "#t" ).autocomplete({
source: t
});
} );
</script>
</head>
<body>
<div class="ui-widget">
<H3>Please Enter the user inputs:</H3>
<input id="t">
</div>
</body>
</html>
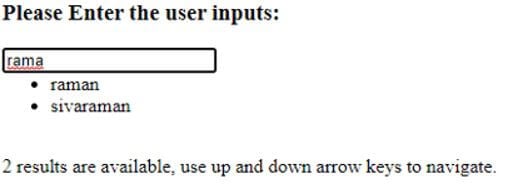
Output:
Example #3
Code:
<!DOCTYPE html>
<html>
<head>
<title>Welcome To My Domain</title>
<link rel="stylesheet" href="https://cdn.educba.com/resources/demos/style.css">
<style>
.sample {
width: 103%;
padding: 28px;
background-color: yellow;
color: blue;
font-size: 27px;
box-sizing: border-box;
}
</style>
</head>
<body>
<script type="text/javascript">
var t = [
"siva",
"raman",
"sivaraman",
"arun",
"kumar",
"arun kumar",
"suresh",
"logesh",
"srinath",
"mahendran",
"emaya",
"sasi",
"deva"
];
var nam= t.length;
function demo(value) {
document.getElementById('datalist').innerHTML = '';
list=value.length;
for (var i = 0; i<nam; i++) {
if(((t[i].toLowerCase()).indexOf(value.toLowerCase()))>-1)
{
var n = document.createElement("option");
var v = document.createTextNode(t[i]);
n.appendChild(v);
document.getElementById("datalist").appendChild(n);
}
}
}
</script>
<input type="text" list="datalist" onkeyup="demo(this.value)" class="sample">
<datalist id="datalist">
<option value="siva"></option>
<option value="raman"></option>
<option value="sivaraman"></option>
<option value="arun"></option>
<option value="kumar"></option>
<option value="arun kumar"></option>
<option value="suresh"></option>
<option value="logesh"></option>
<option value="srinath"></option>
<option value="mahendran"></option>
<option value="emaya"></option>
<option value="sasi"></option>
<option value="deva"></option>
</datalist>
</body>
</html>
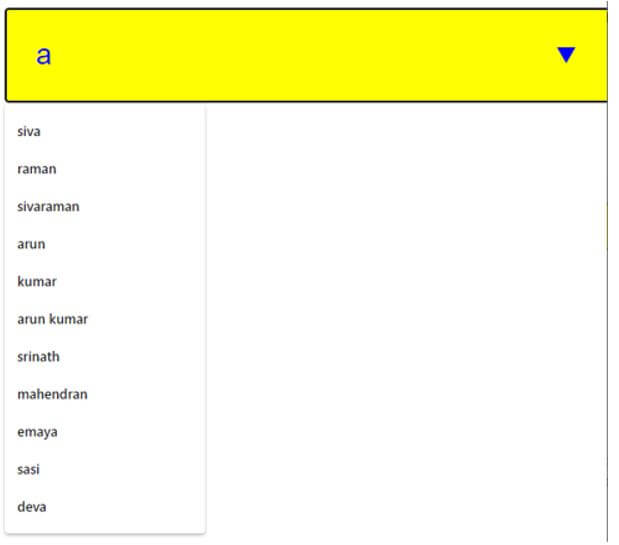
Output:
The above examples we used JavaScript and its libraries called jquery used it on the functionality of the auto-feature web pages. We used keyup event functionality in the first and third example the jquery is used in second example.
Conclusion
In JavaScript(js) have many different features available in the market for each standard with different competitor in the industry. Among these we can handle some of the standardized features are make it them useful for creating the web based applications with more sophisticated. The Auto Complete feature is more comfortable and browser-compatibility with user Environment.
Recommended Articles
This is a guide to JavaScript Auto Complete. Here we discuss the introduction, how auto complete is done in JavaScript? and examples. You may also have a look at the following articles to learn more –


