Updated December 14, 2023
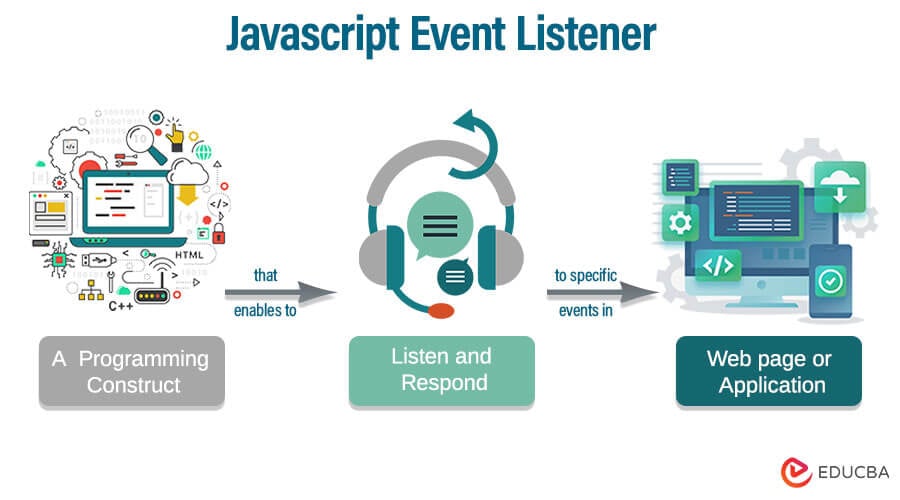
Table of Content
- Introduction
- Types of Event Listeners
- Examples
- How to Remove Event Listener?
- Event Bubbling
- Event Capturing
- Event Delegation
Introduction to JavaScript Event Listener
JavaScript Event Listener is a method in JavaScript that waits for an event to occur. Event Listener is an interface representing an object that handles events dispatched by Event Object. Events are essential to JavaScript, as web pages respond based on the events.
Here’s a basic JavaScript syntax for adding an event listener to an HTML element:
Syntax
element.addEventListener(event, listener);Parameters
- element: The HTML element to which the event listener should be attached.
- event: The type of event to listen for (for example, “click”, “submit”, or “mouseover”).
- function: The function that should be executed when the event is triggered.
Example
<!DOCTYPE html>
<html>
<body style="background-color: lightcyan;">
<h2>Delete this message</h2>
<p>Message deleted permanently from everyone</p>
<button id="btn1">ok</button>
<script>
document.getElementById("btn1").addEventListener("click", () => {
alert("Your message has been Deleted");
});
</script>
</body>
</html>
Output:
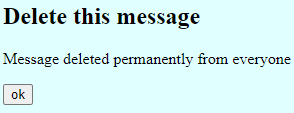
When you click the OK Button.
When the user clicks the button with the ID “btn1”, the system will display an alert message saying, “Your message has been deleted.” The JavaScript code uses a document.getElementById(“btn1”) to select the button element by its ID.
Types of Event Listeners in JavaScript
Here are some common types of JavaScript event listeners:
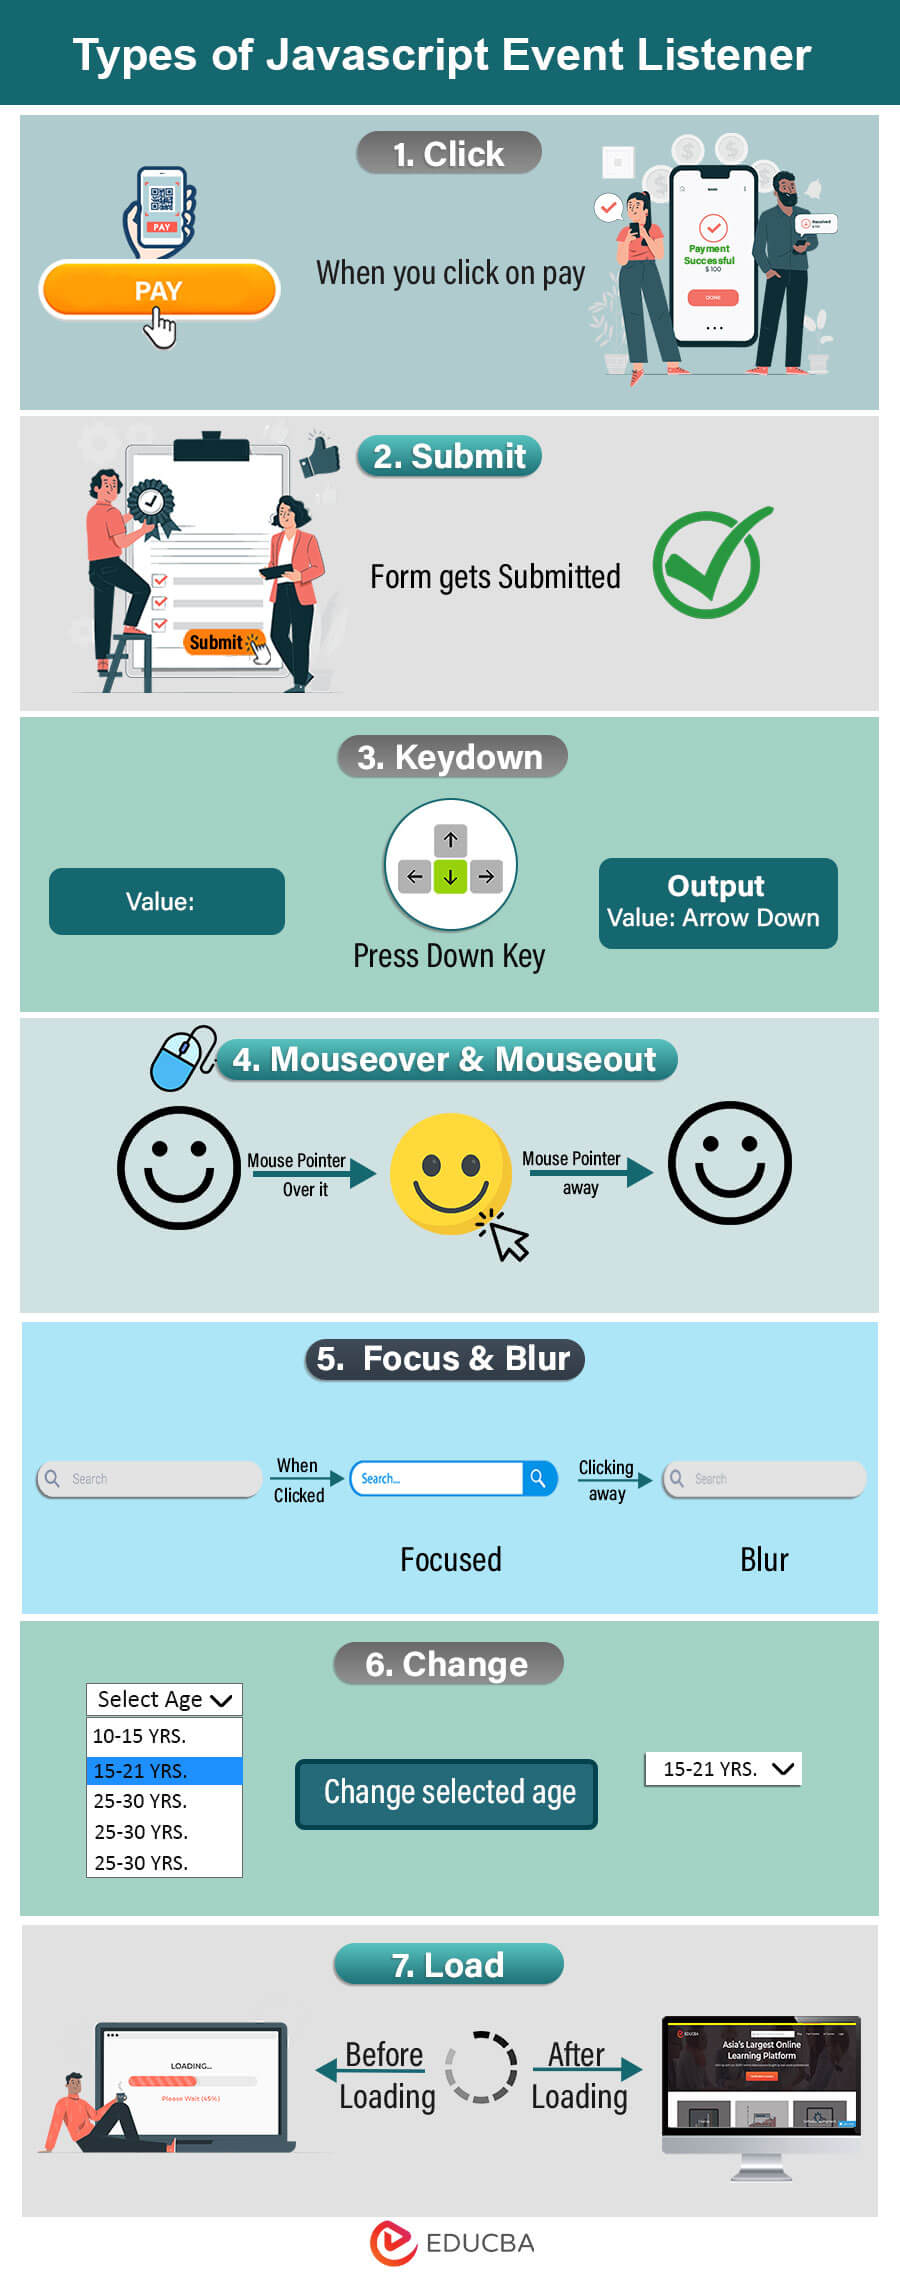
1. Click Event Listener
In JavaScript, the Click Event Listener responds to mouse clicks on a web page element. It is one of the most widely used event listeners, and it is frequently used to make web pages interactive by initiating activities when users click on specific elements such as buttons, links, or other clickable components.
Event: Click
Description: The click event is triggered when a user clicks on an element (for example, a button or a link). A Click Event Listener can respond to this event by showing/hiding information, submitting a form, moving to a new page, or performing some other activity.
2. Submit Event Listener
In JavaScript, the Submit Event Listener responds to HTML form submissions. It captures the moment a user submits a form, generally by clicking a submit button or pressing the Enter key while focusing on an input field within the form. This event can validate form data, prevent the default form submission behavior, and respond to form submissions with custom actions.
Event: Submit
Description: The submit event is triggered when a user initiates submitting an HTML form. This event is typically used to validate forms, process data, and handle form submissions.
3. Keydown/Keyup Event Listener
The Event of Keydown and Keyup Listeners are used in JavaScript to respond to keyboard input events. These events occur when a user hits or releases a key on their keyboard (Keydown or Keyup). Web applications use Keydown and Keyup events to record user input, implement keyboard shortcuts, and manage interactive elements.
Events:
- Keydown Event: A key on the keyboard is pressed, triggering this event.
- Keyup Event: This event occurs when a key on the keyboard is released after being pressed.
Description: The Keydown and Keyup events allow you to interact with keyboard input. These event listeners can be used to determine which key was pushed or released and perform specific actions in response to the user’s keyboard activities.
4. Mouse Event Listeners
Mouse Event Listeners in JavaScript respond to various mouse-related behaviors on web components. These interactions include clicking, moving the mouse, entering and exiting elements, etc. Mouse event listeners enable developers to construct interactive and dynamic web apps by responding to user mouse actions.
Events: Some of the most common ones include:
- Mouseover: When the mouse is moved over an element.
- Mouseout: When the mouse pointer moves away from a component.
Description: Mouse Event Listeners are required to develop interactive web applications because they allow developers to construct responsive UI components, animations, and other interactive features depending on mouse interactions. These listeners allow you to engage users and improve the general usability of your websites.
5. Focus and Blur Event Listeners
JavaScript uses Focus and Blur Listeners events to respond to changes in the focus state of HTML elements such as input fields, text boxes, and buttons. Developers rely on these events to create user-friendly forms, validate user input, and enhance the user experience by providing feedback when elements are focused or lose attention.
- Focus Event
Event: focus
Description: When an element obtains focus, it becomes the currently selected or active element capable of receiving user input. Commonly used form elements, such as input fields and text boxes, exemplify this behavior.
- Blur Event
Event: blur
Description: The blur event occurs when an element loses focus, typically when the user clicks outside the element or navigates to another page section. It finds frequent use in input validation and providing user feedback.
6. Change Event Listener
The Change Event Listener in JavaScript is used to respond to changes in the value of HTML form elements, namely input fields, select elements, and textareas. It enables you to detect when a user adjusts the content or selection of an input element and takes actions depending on those changes. The Change Event Listener is often used in forms to capture user input and trigger certain behaviors or validations.
Event: change
Description: When a user interacts with a form element and changes its value, it triggers the change event. This event is a frequent choice for monitoring changes in text input fields, checkboxes, radio buttons, dropdowns, and text areas.
7. Load Event Listener
In JavaScript, developers use the Load Event Listener to respond to the successful loading of external resources such as pictures, scripts, stylesheets, and iframes, as well as when the entire web page and its related resources have finished loading. This event benefits operations that require the DOM and all external assets to be fully loaded and prepared for manipulation.
Event: load
Description: Before executing specific actions, the Load Event Listener ensures that your web page and related resources are fully loaded and ready for interaction. It can be useful in situations where timing is essential, and you must ensure that resources are available before proceeding
JavaScript Event Listener Examples
Below are the different examples:
Example #1 – Focus Event and Blur Event
Code:
<!DOCTYPE html>
<html>
<head>
<title>Focus and Blur Events Example</title>
</head>
<body style="background-color: lightblue;">
<input type="text" id="myInput" placeholder="Enter your Feedback">
<p id="message"></p>
<script>
// Get the input element and message element
const input = document.getElementById('myInput');
const message = document.getElementById('message');
// Add event listeners for focus and blur
input.addEventListener('focus', function() {
// When the input is focused
message.textContent = 'Focused Input';
});
input.addEventListener('blur', function() {
// When the input loses focus
message.textContent = 'Blur Input';
});
</script>
</body>
</html>Output:
When you run this code and interact with the input field by clicking inside it or clicking away from it, the console will log the respective messages (“Focused Input” or “Blur Input”). You can modify the event listener functions to perform different actions based on the focus state of the input field.
Example #2 – Submit Event
Code:
<!DOCTYPE html>
<html>
<head>
<title>Simple Submit Event Listener Example</title>
</head>
<body style="background-color: lightcyan;">
<form id="myForm">
<label for="reviewInput">Review:</label>
<input type="text" id="reviewInput">
<button type="submit">Submit</button>
</form>
<script>
// Get the form element
const form = document.querySelector('#myForm');
// Define the event listener function
function handleSubmit(event) {
event.preventDefault(); // Prevent form submission
// Retrieve form input values
const review= document.querySelector('#reviewInput').value;
// Perform any actions you want with the form data
console.log('Review:', review);
alert('Form submitted!');
}
// Add the submit event listener to the form
form.addEventListener('submit', handleSubmit);
</script>
</body>
</html>
Output:
After executing the code, the system will stop form submission and display the name value in the console if you click the “Submit” button or press Enter while typing in the input field. You can customize the handleSubmit function to suit your specific form submission requirements.
Example #3 – Change Event
Code:
<!DOCTYPE html>
<html lang="en">
<head>
<meta charset="UTF-8">
<meta name="viewport" content="width=device-width, initial-scale=1.0">
<title>JavaScript change Event</title>
</head>
<body style="background-color: lightcyan;">
<select id="lang">
<option value="">Select Country</option>
<option value="India">India</option>
<option value="Australia">Australia</option>
<option value="Italy">Italy</option>
<option value="United States">United States</option>
<option value="France">France</option>
</select>
<p id="result"></p>
<script>
let select = document.querySelector('#lang');
let result = document.querySelector('#result');
select.addEventListener('change', function () {
result.textContent = this.value;
});
</script>
</body>
</html>
Output:
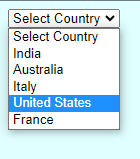
When you run this code and select a different Country from the dropdown, the console will log the selected country value. You can modify the handle change function to perform other actions based on the chosen value and customize the behavior according to your needs.
A Select Country dropdown Box will Appear.
Choose your country
It will display the country you chose.
Example #4 – Mouseover and Mouseout
Code:
<!DOCTYPE html>
<html>
<head>
<title>Mouseover and Mouseout Event Listeners Example</title>
<style>
.highlight {
background-color: pink;
font-weight: bold;
}
</style>
</head>
<body style="background-color: lightcyan;">
<p id="myText">Touch Here.</p>
<script>
// Get the text element
const text = document.querySelector('#myText');
// Define the event listener functions
function handleMouseOver() {
text.classList.add('highlight');
}
function handleMouseOut() {
text.classList.remove('highlight');
}
// Add the event listeners to the text
text.addEventListener('mouseover', handleMouseOver);
text.addEventListener('mouseout', handleMouseOut);
</script>
</body>
</html>
Output:
When you run this code and move the mouse pointer over Touch Here, the element’s background color will change to pink. When you move the mouse pointer out of the element, the background color will change to white. You can modify the event listener functions and the CSS styles to achieve different effects based on the mouseover and mouseout events.
- For Mouseout
- For Mouseover
Example #5 – Load Event
Code:
<!DOCTYPE html>
<html>
<head>
<title>Load Event</title>
</head>
<body>
<p>The page will redirect to a new website when it loads.</p>
<script>
// Add a load event listener to the window object
window.addEventListener('load', function() {
// Replace "https://www.example.com" with the desired URL you want to redirect to
window.location.href = 'https://www.educba.com';
alert('Your page is loading')
});
</script>
</body>
</html>
Output:
In this example, enclose the JavaScript code within the <script> tag and place it right before the closing of the </body> tag. When we use the code “window.addEventListener(‘load’, function() { … })”, it means we have attach an event listener to the browser window object. This event listener executes a function that runs once the entire webpage has finished loading.
A notification will pop up saying your page is loading.
When you click on OK, the EDUCBA website will be loaded.
Example #6 – Keydown
Code:
<!DOCTYPE html>
<html>
<head>
<title>Keydown Event Example</title>
</head>
<body style="background-color: lightcyan;">
<h1>Press any Key</h1>
<p>Get key Code and Value</p>
<input type="text" id="output" readonly>
<script>
const outputElement = document.getElementById('output');
document.addEventListener('keydown', function(event) {
// Get the key code and key value from the event
const Code = event.keyCode;
const Value = event.key;
// Display the key code and key value in the output element
outputElement.value = `Code: ${Code}, Value: ${Value}`;
});
</script>
</body>
</html>
Output:
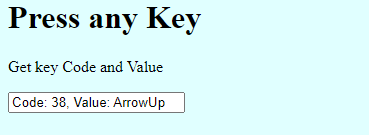
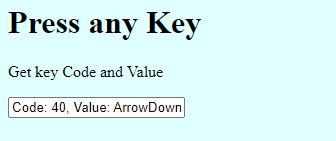
In this example, a simple webpage with an input field and a <script> tag holds JavaScript code. The JavaScript code adds a keydown event listener to the document object. Whenever you press any key on your keyboard while the page is active, the event listener will detect the key press and showcase the key code and value in the input field under the heading.
- When you press the Keyup button code:38 and value: Arrowup will appear.
- It will appear when you press the Keydown button code: 40 and value: Arrowdown.
How to Remove Event Listener in JavaScript?
To remove an event listener in JavaScript, you can use the removeEventListener method. Here’s the general syntax:
element.removeEventListener(event, callback);- element: The HTML element from which you want to remove the event listener.
- event: The event for which you want to remove the listener.
- callback: The function or code initially attached as the event listener.
Remember to use the same function reference that you used when adding the listener to remove it. It is important to remember this detail. You cannot remove inline functions or anonymous functions.
Here’s an example that demonstrates how to remove an event listener on a button:
<button id="myButton">Click me!</button>
<script>
function handleClick() {
console.log('Button clicked!');
}
const button = document.getElementById('myButton');
// Add event listener to the button
button.addEventListener('click', handleClick);
// Remove event listener from the button
button.removeEventListener('click', handleClick);
</script>
To activate, click the button. When you execute the code above, it will trigger the handleClick function. We attach this function as the event listener using addEventListener. Later, we remove the event listener using removeEventListener with the same event (‘click’) and the same function reference (handleClick).
It’s essential to ensure that the function reference passed to removeEventlistener matches the function reference passed to addEventListener to remove the correct event listener.
Event Bubbling
Event bubbling refers to the process by which an event propagates from the target element to its parent elements in the DOM hierarchy. When an event occurs on an element, it triggers the event handlers attached to that element first, then propagates to its parent element and continues up the DOM tree until it reaches the document’s root.
For example, consider the following HTML structure:
<div id="parent">
<div id="child">
<button id="button">Click me!</button>
</div>
</div>
Output:
If we attach a javascript event listener click on the button element, and click on it, the event will first trigger the button’s event handler. Afterward, it will propagate up the DOM tree, triggering the event handlers of the child div and the parent div in that order.
Event bubbling allows us to handle events more conveniently and flexibly. Instead of attaching event listeners to every element, we can attach a single event listener to a common parent element and handle events for all its descendants.
Event Capturing
Event capturing is the opposite of event bubbling. In event capturing, the document’s root initially captures the event and then propagates it down the DOM tree to the target element. Event capturing involves capturing events from the top-most ancestor and moving toward the target element.
To use event capturing, we can pass a third parameter to the addEventListener() method, specifying true to enable event capturing. For example:
element.addEventListener('click', eventHandler, true);Typically, developers attach event listeners during the bubbling phase when they do not specify the third parameter or set it to false. Knowing that event capturing has limited browser support and that most events naturally trigger during the bubbling phase is crucial.
FAQ’s
Q1. Can you attach multiple event listeners to the same element?
Answer: Yes, you can attach multiple event listeners to the same element. Call the addEventListener method for the same element numerous times with a different event type and listener function.
Q2. How can I access event properties and information in an event listener?
Answer: The event handling function creates an event object and passes it as an argument when an event occurs. This event object contains properties and methods that provide information about the event, such as the event type, target element, mouse coordinates, and more.
Q3. What are some best practices for working with event listeners?
Answer:
- Attach event listeners after the DOM has fully loaded.
- Use external event-handling functions for better code organization.
- Consider event delegation to handle events for multiple elements efficiently.
- Remove event listeners when you no longer need them to avoid memory leaks.
- Be mindful of event propagation and use event.stopPropagation() or event.preventDefault() when necessary.
Conclusion
This article explored the basics of JavaScript event listeners, including adding event listeners, defining event handling functions, removing event listeners, and utilizing event delegation. With this knowledge, you can leverage event listeners’ power in your JavaScript projects.
Keep experimenting with event listeners, mastering their usage, and exploring advanced event-handling techniques to unlock the full potential of JavaScript in creating dynamic and engaging web experiences.
Recommended Articles
We hope that this EDUCBA information on “Javascript Event Listener” was beneficial to you. You can view EDUCBA’s “recommended articles for more information.
