Updated May 12, 2023

Introduction to JavaScript onsubmit
JavaScript onsubmit is one of the event-handling functions used for performing the operations in web-based applications. The purpose of data validation is to ensure that the data submitted by the client user to the server is valid and meets the specified criteria. In HTML form controls, the validation process is commonly employed. To trigger data validation before sending the request to the server, the submit event is utilized. If the user forgets to submit the required fields in the form, they can cancel the submission within the onsubmit event.
Syntax:
Every event-handling function must have its syntax and rules in the JavaScript code.
<html>
<head>
<script>
function  functionName()
{
--some javascript logic codes—
}
</script>
</head>
<body>
<form id="" method="" action="" onsubmit="functionName()">
---some html input tags and elements---
</form>
</body>
</html>
The above code is the basic syntax for using onsubmit().
How onsubmit Event work in JavaScript?
We can also use it in the web application creation and send the user data to the servers, which helps in our own HTML forms. The two ways to submit the HTML forms to the servers are first when the user clicks the submit button if the input type is in either submit form text or image format. The next one is to add the data in the input field on the web page using enter key with the help of the keyboard.
If there are errors, we can call and use the function called event.preventDefault() method. With the help of this method, the user data is not sent to the server side if the data contains some errors. Whenever the form-based applications, we should enter the input field in text format and press the enter button to continue the following label fields in the text boxes, or we want to perform the following button events like submit and submit functions in the HTML with JavaScript.
We can call the submitted form data manually, like the form. When invoking the submit() function, it does not generate the current event. Instead, the submit attribute is used to define a script that will be executed when the submit event occurs. The submit() function does not directly submit the data to the server.
Examples of JavaScript onsubmit
Given below are the examples of JavaScript onsubmit:
Example #1
Code:
<!DOCTYPEhtml>
<html>
<body>
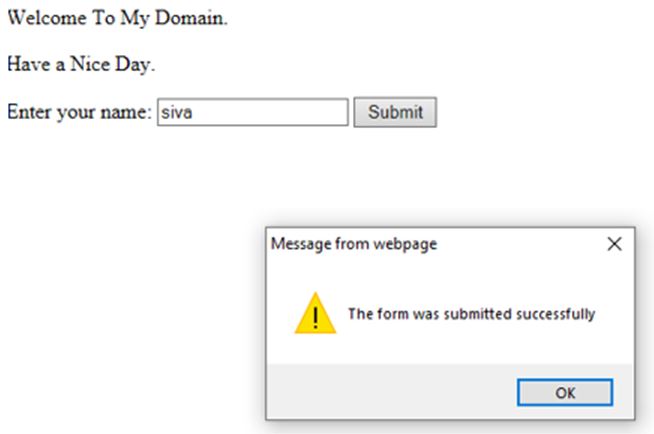
<p>Welcome To My Domain.</p>
<p>Have a Nice Day.</p>
<form id="first" action="first.jsp">
Enter your name: <input type="text" name="fname">
<input type="submit" value="Submit">
</form>
<script>
document.getElementById("first").onsubmit = function() {demo()};
functiondemo() {
alert("The form was submitted successfully");
}
</script>
</body>
</html>
Output:
Example #2
Code:
<!DOCTYPE html>
<html lang="en"><head>
<meta charset="utf-8">
<title>Registeration form</title>
</head>
<body onload="document.registration.userid.focus();">
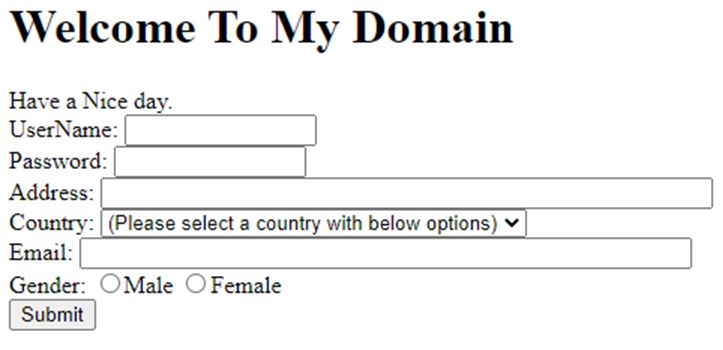
<h1>Welcome To My Domain</h1>
Have a Nice day.
<form name='reg' onsubmit="return demo();">
<label for="user">UserName:</label>
<input type="text" name="user" size="13" /><br>
<label for="pass">Password:</label>
<input type="password" name="pass" size="13" /><br>
<label for="add">Address:</label>
<input type="text" name="add" size="53" /><br>
<label for="count">Country:</label>
<select name="count">
<option selected="" value="Default">(Please select a country with below options)</option>
<option value="In">India</option>
<option value="USA">America</option>
<option value="ch">China</option>
<option value="JN">Japan</option>
<option value="PK">Pakistan</option>
</select><br>
<label for="email">Email:</label>
<input type="text" name="email" size="53" /><br>
<label id="gend">Gender:</label>
<input type="radio" name="m" value="Male" /><span>Male</span>
<input type="radio" name="f" value="Female" /><span>Female</span><br>
<input type="submit" name="submit" value="Submit" />
</form>
<script>
function demo()
{
var username = document.registration.user;
var pass = document.registration.pass;
var address = document.registration.add;
var country = document.registration.count;
var emails = document.registration.email;
var male = document.registration.m;
var female = document.registration.fsex; if(user_validation(username,6,13))
{
if(pass_validation(pass,8,11))
{
if(numeric(address))
{
if(countries(country))
{
if(emailvalidation(emails))
{
if(gendervalidation(male,female))
{
}
}
}
}
}
}
return false;
}
function user_validation(username,x,y)
{
varuserlength = username.value.length;
if (userlength == 0 || userlength>= y || userlength< x)
{
alert("User Name should not be empty please enter the characters and length between "+x+" to "+y);
username.focus();
return false;
}
return true;
}
function pass_validation(pass,x,y)
{
varpasslength = pass.value.length;
if (passlength == 0 ||passlength>= my || passlength< mx)
{
alert("Password should not be empty please enter password and length between "+x+" to "+y);
passid.focus();
return false;
}
return true;
}
function numeric(address)
{
var let = /^[0-9a-zA-Z]+$/;
if(address.value.match(let))
{
return true;
}
else
{
alert('User address must have alphanumeric characters please enter the input as alphanumeric format');
address.focus();
return false;
}
}
function countries(country)
{
if(country.value == "Default")
{
alert('Choose your country from the given list');
country.focus();
return false;
}
else
{
return true;
}
}
function emailvalidation(emails)
{
var mf = /^\w+([\.-]?\w+)*@\w+([\.-]?\w+)*(\.\w{2,3})+$/;
if(emails.value.match(mf))
{
return true;
}
else
{
alert("Please enter valid email address!");
emails.focus();
return false;
}
}
function gendervalidation(male,female)
{
x=0;
if(male.checked)
{
x++;
} if(female.checked)
{
x++;
}
if(x==0)
{
alert('Select the gender either Male/Female');
male.focus();
return false;
}
else
{
alert(' Given data is Submitted Successfully');
window.location.reload()
return true;}
}
</script>
</body>
</html>
Output:
Example #3
Code:
<!DOCTYPEHTML>
<html>
<head>
<title>Welcome To My Domain</title>
</head>
<body>
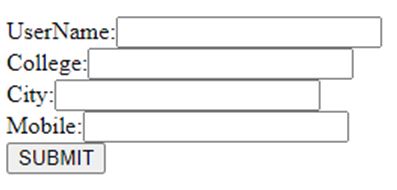
<form onsubmit="alert('Registration Form Submitted Successfully!')">
UserName:<input type="text" name="user"><br/>
College:<input type="text" name="colg"><br/>
City:<input type="text" name="city"><br/>
Mobile:<input type="text" name="mob"><br/>
<input type="submit" value="SUBMIT">
</form>
</body>
</html>
Output:
Conclusion
The submit () method we used in the different scenarios. Still, mainly, it will focus on HTML form-based web applications because, in 90% of the web applications, we use forms for navigating the pages in applications.
Recommended Articles
We hope that this EDUCBA information on “JavaScript onsubmit” was beneficial to you. You can view EDUCBA’s recommended articles for more information.


