Updated April 14, 2023
Introduction to Jenkins Backup
Jenkins backup is a solution for keeping the backup of critical configuration settings related to Jenkins. Jenkins has a backup plugin that can used to backup. Jenkins Backup and restore refers to services and practices for making periodic copies of data like configuration and access rights settings. All the backup data which includes setting related to IAM (Identity Access Management), plugin, artifacts archives and build logs saved inJENKINS_HOME directory. The easiest way to backup is just to set the new folder with new backup and just copy it back whenever it’s required the same.
For any organization Backing up data is crucial to any business and Jenkins is not an exception. If you have right back up, it provides great confidence to any business in case of recovery needed with any unexpected situations like datacenter outage, Jenkins system failure, or accidental deletion of data.
There are multiple methods to back up the Jenkins configurations such as:
1. using thin backup
2. using the git repo
The easiest approach which is mostly used that is a Jenkins plugin for the backup.
For example, for any organization the setting access rights and the job configuration by selecting the necessary plugin is quite a time taken the job, so it’s a good idea to organize regular backups of all the necessary settings and parameters. The Jenkins directory contains a list of build jobs configured and all the related settings for these jobs. Also, one of the Jenkins features provides an option for renaming an existing job at any time. We need to click on the reload config from the Jenkins home page to reflect the applied changes. Since Jenkins has several plugins that make it exceedingly useable many times by the users. It’s already has a plugin that can be used for the backup management i.e. “Thin Backup plugin”.
Process of Setting up a Backup and Restore Jenkins
We will consider the process of setting up a backup and restore Jenkins to a new server step by step:
Login to Jenkins UI
Step 1: Manage Jenkins ->manage plugins -> click on available ->select “Thin Backup”->install without start.
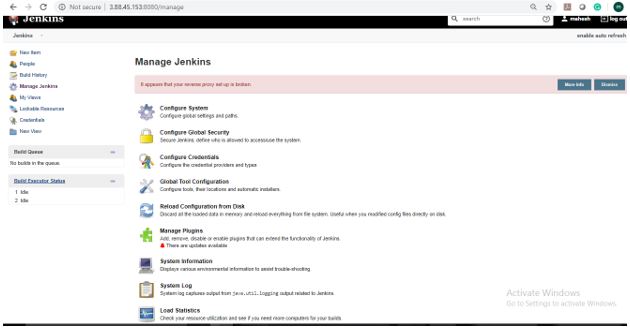
Step 2: By clicking on the manage Jenkins from the Jenkins home page redirected to the next page which is having an option for Manage plugins. On the next page, we can see the available tab, now select Thin Backup plugin and click on Install without restart button.
We can see the plugin installed successfully after restarting Jenkins. We can found the newly installed plugin “Thin Backup plugin “under Manage Jenkins link.
Jenkins Thin Backup Setting
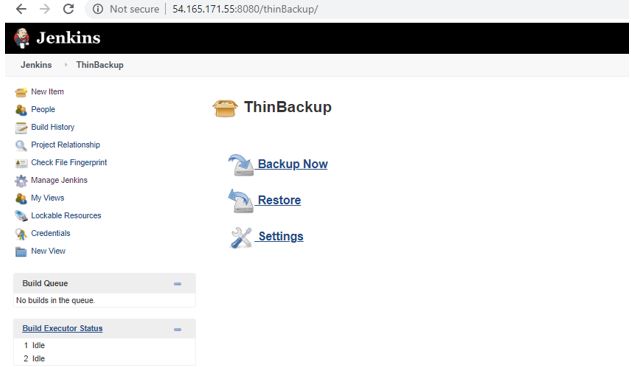
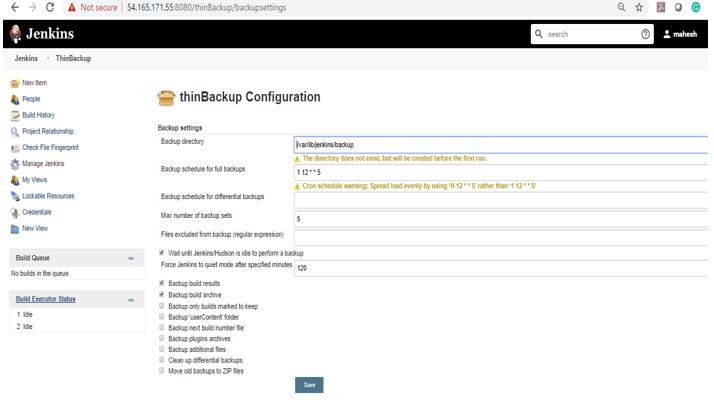
Step 1: After installing the plugin first thing we have to is the “Thin Backup” configurations ->manage Jenkins ->Thin Backup->setting
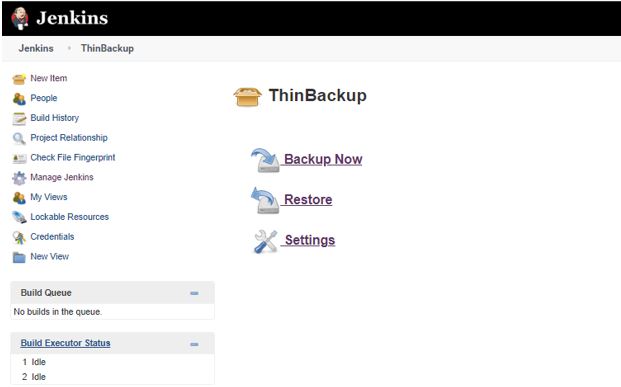
We can see backup configuration settings are available below. The user who is running the Jenkins services is responsible to define all the below configuration. The first configuration to define the directory where all the settings and configurations related to Jenkins are going to store. We can also schedule the backup for time to time update.
Performing Backup
Step 1: To test whether the above configured backup setting is working or not, we have an option available“Backup Now”. Post clicking the Backup Now option, basically it creates a backup of Jenkins data and setting based on the below-configured directory. Generally backup will be trigger automatically as per the configured time in the backup schedule. We can also trigger the backup manually by following the below steps:
Restoring Backup
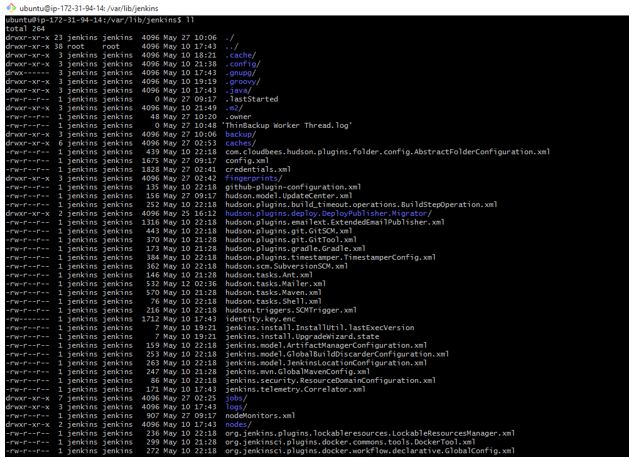
The best way to check your backup data is, navigate to the specified back up directory. You could see the backup is created with the attached timestamp to the folder name. You can also find your old backup file which is available based on your retention policy settings.
Output directory where backup generated
ubuntu@ip-172-31-94-14:/var/lib/jenkins/backup$ ls -lrth
total 4.0K
drwxr-xr-x 4 jenkinsjenkins 4.0K May 27 10:06 FULL-2020-05-27_10-06
ubuntu@ip-172-31-94-14:/var/lib/jenkins/backup$Let’s take a scenario where I have deleted some files from Jenkins directory and recovered it from the backup.
rm/Jenkins/hudson.plugins.git.GitTool.xml
rm: remove regular file ./lenkIns/hudson.plugins.git.GitTool.xml’? y
ls -l /Jenkins/hudson.plugins.git.GitTool.xml
ls: cannot access /jenkins/hudson.plugins.git.GitTool.xml: No such file or directory
Post deletion of some files, we have restored the data from the backup.
For restoring
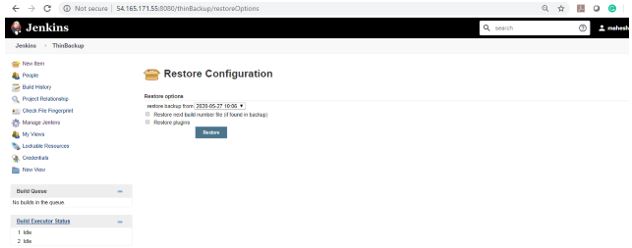
Step 1: Manage Jenkins -> Thin Backup -> Restore
Step 2: Select the backup point from which you want to restore it back.
Now we have run the command to verify the file which was deleted is successfully restored or not.
Type the command “ls –l /apps/jenkins/hudson.plugins.git.GitTool.xml” verify the file.
rm /aaps/jenkins/hudson.plugins.git.GitTool.xml
rm: remove regular file ‘/apps/jenkins/hudson.plugins.git.GitTool.xml’? y
ls -l /apps/jenkins/hudson.plugins.git.GitTool.xml
ls: cannot access /apps/jenkins/hudson.plugins.git.GitTool.xml: No such the or directory
ls -l /apps/jenkins/hudson.plugins.git.GitTool.xml
-rw-r–r–. 1 Jenkins Jenkins 370 May 27 04:31 /apps/jenkins/hudson.plugins.git.GitTool.xml
Using the git repo
Let’s suppose in any organization, it has followed the devops practice and configured Jenkins as part of their build process. Basically DevOps team wants to configure a process and as part of process to set up a periodic backup for any disaster.
Pipeline Script to take backup
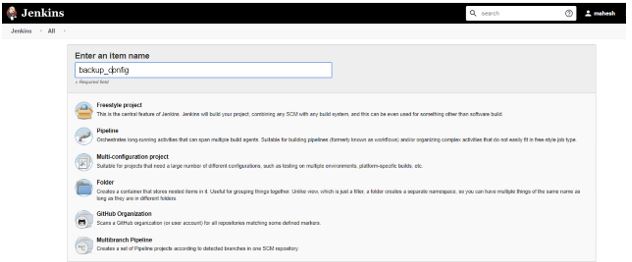
Step 1: Create a new Jenkins Job. You should choose Freestyle project
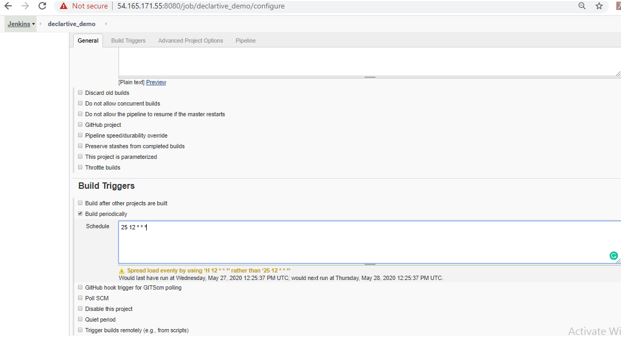
Step 2: Let’s add a job that will completely backup Jenkins including all jobs, playbooks, whatever else you have there. It will backup everything located at /var/lib/Jenkins. Select the “Build Periodically” build trigger and configure to run as frequently as you like.
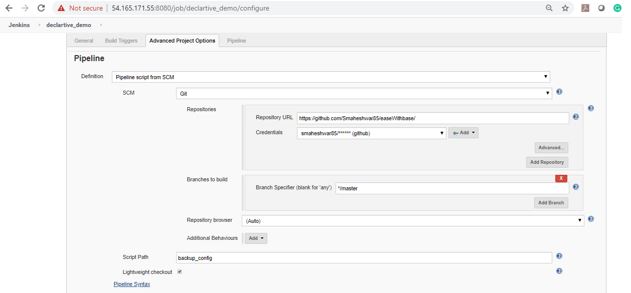
Create a new file Backup_config and add the below script. Once the script added commit the file into source code repository.
Code:
pipeline {
agentany
stages {
stage("BACKUP"){ steps{
sh """#!/bin/bash
pushdbackup_config
sudogitconfig --local user.email "mahes.sharma23@gmail.com"
sudogitconfig --global user.name "Smaheshwar85"
find .|xargsgitrm
popd
cp -v var/lib/jenkins/*xml $WORKSPACE/backup_config
pushdvar/lib/jenkins/
fori in \$( find jobs|grep config.xml ); do
mkdir -p $WORKSPACE/backup_config/`dirname \$i`
cp \$i $WORKSPACE/backup_config/`dirname \$i`
done
popd
cp -rfvvar/lib/jenkins/secret* $WORKSPACE/backup_config/
cp -rfvvar/lib/jenkins/user* $WORKSPACE/backup_config/
pushdbackup_config
find .|xargsgit add
sudogit commit -a -m"Jenkins Backup Job"
"""
}} //steps // stage
stage("PUSH"){ steps{
sshagent(["$GIT_CREDENTIAL_ID"]) {
sh "cdbackup_config&&git push origin HEAD:$BACKUP_BRANCH"
} // sshagent
}} //steps // stage
}} //stages // pipeline
Output:
Once you have triggered the building backup is generated.
Recommended Articles
We hope that this EDUCBA information on “Jenkins Backup” was beneficial to you. You can view EDUCBA’s recommended articles for more information.

