Updated April 3, 2023
Introduction to Jenkins Reporting
Jenkins’s reporting is a piece of information. It is really responsible for representing the data that is investigated, or one has observed in a structured and graphical way. It has a detailed description of the Jenkins job. The purpose of Jenkin’s reporting is in one sense straightforward and self-evident so that it’s easy to understand for business or Jenkins users. Jenkins Reporting has a combination of different purposes to wrap information and drafted about the jobs. It is a detailed analysis or reflection of the information which is generated while running the job. As an output, Jenkin’s job provides detailed information and delivers them to Jenkin’s user in a well-aligned and descriptive form with respect to the subject.
Let’s take an example where my organization needs to configure the JUnit test for the code. Also, looking for a JUnit report generated in xml format with the help of Jenkins.
As per these use case, we are following the below steps:-
Jenkins Build tools typically automate the following activities for this give use cases:-
- Organize project-specific files
- Compile the source code
- Generates documentation for the source code
- Runs Junit and integration test cases
- Generate the JUnit test report
Why JUnit?
Junit is a framework for automating unit testing; whenever we add new features to the software, we need to retest and write Junit test cases with all functionalities.
So, please find the below configurations to set the JUnit test report in xml format:-
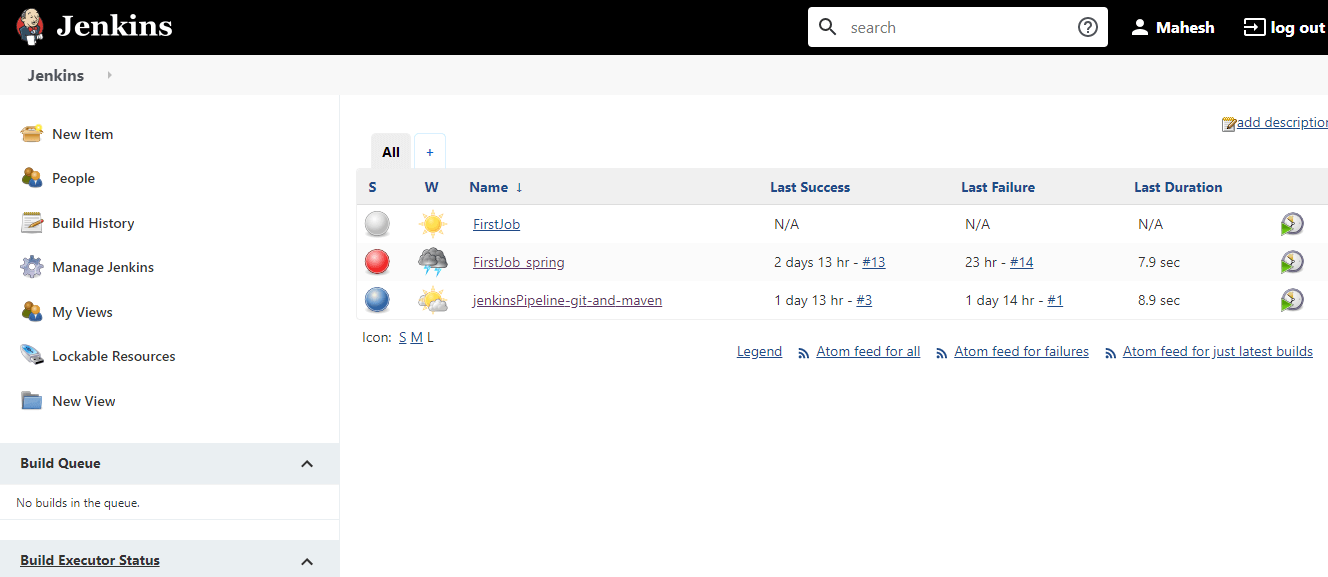
Log in to the Jenkins account with admin credentials and click the Manage Jenkins link:-
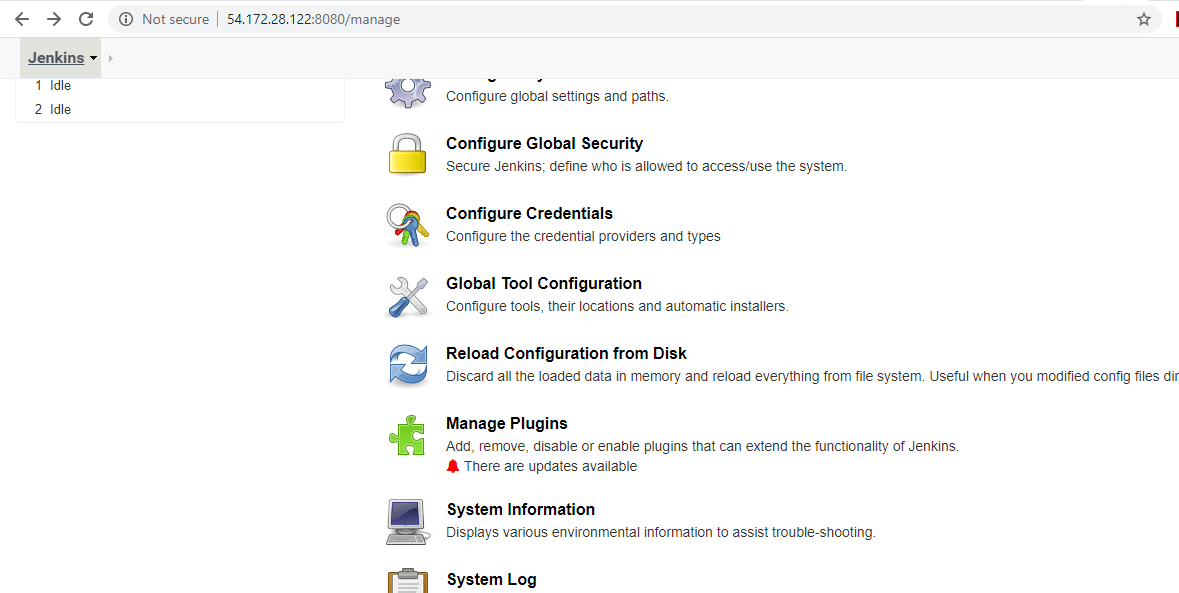
Now, you can see the screen below. Clicked into manage plugins and verify if the JUnit plugin was installed properly.
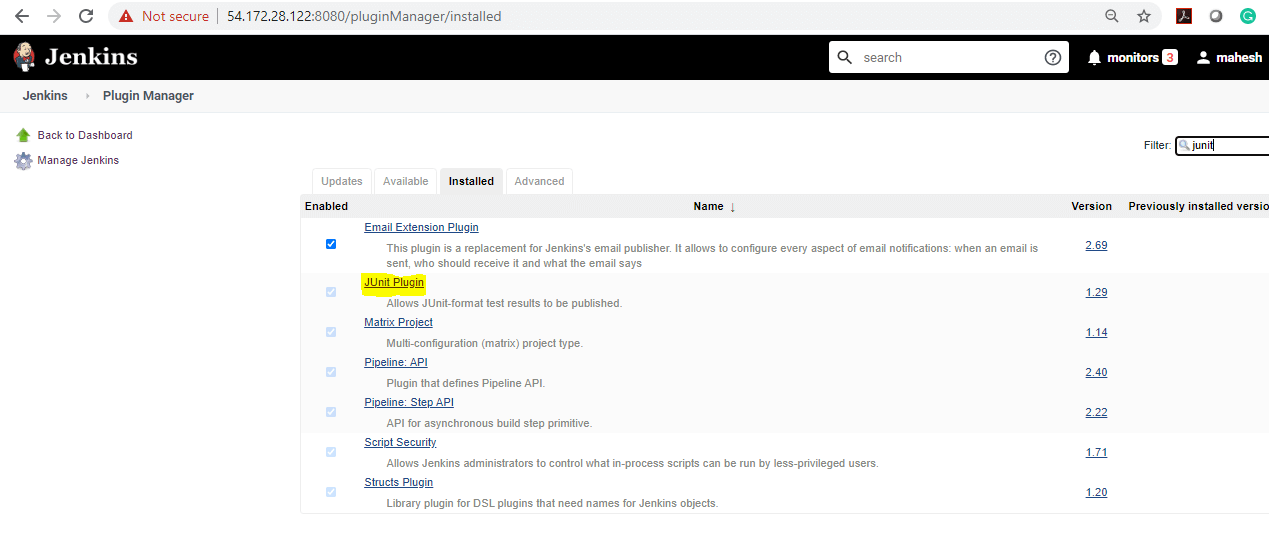
We can verify whether the Junit plugins is installed successfully or not by navigating to the installed tab.
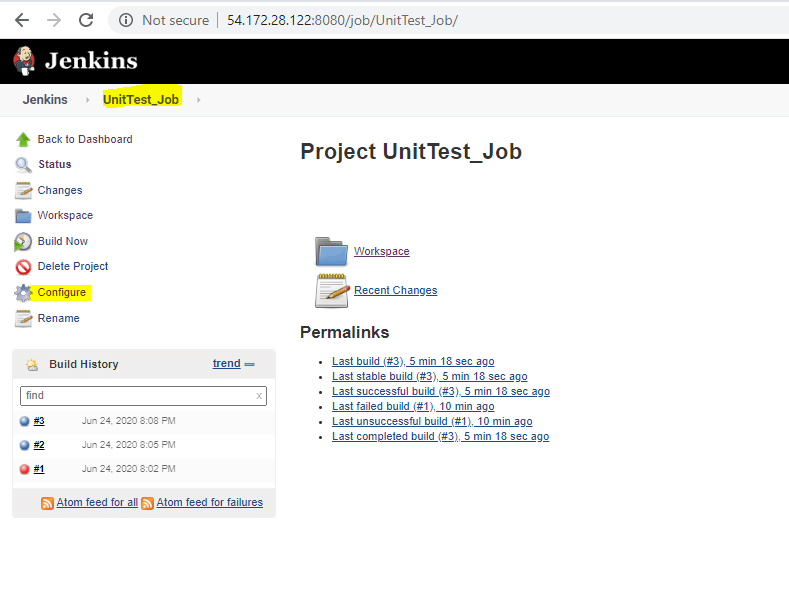
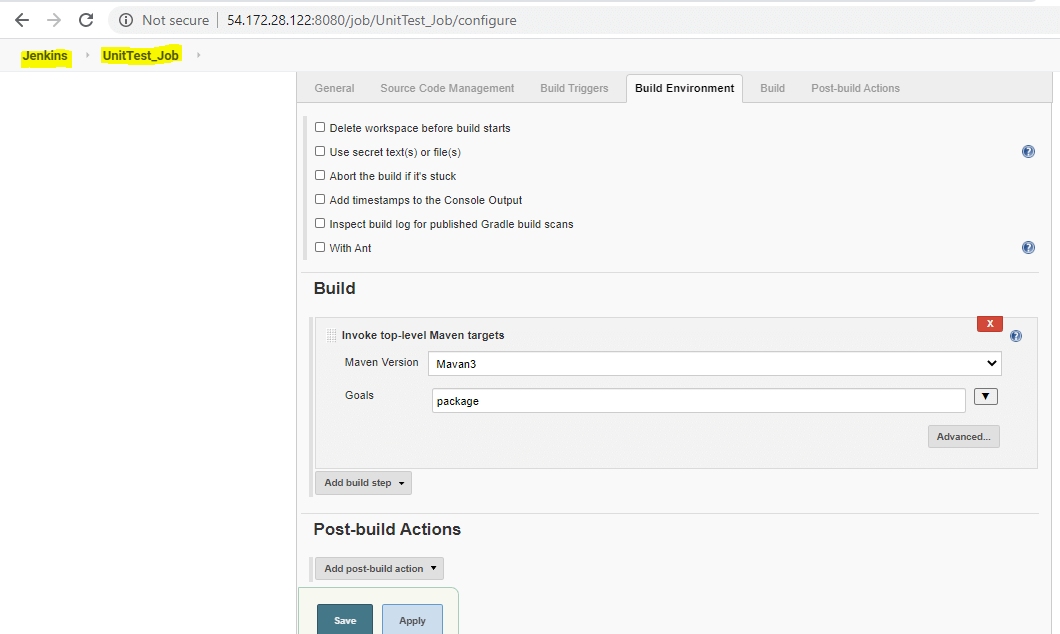
Post successful installations of ju*9/1nit plugins, Goto the job by clicking the Jenkins header. Once you are navigated to your job click on to the configure link
Select the source code management and define the repository details for the code where the code is available. Since we are generating the report based on the maven project, please find the below configuration in pom.xml for the junit test:-
<dependency>
<groupId>junit</groupId>
<artifactId>junit</artifactId>
<version>4.12</version>
<scope>test</scope>
</dependency>
Just we need to run the build job, which is produced xml file, and then we can provide the path. The path means the path of the xml that will produce the JUnit report after the test case is executed.
For this maven user, it uses the surefire plugins for JUnit testing.
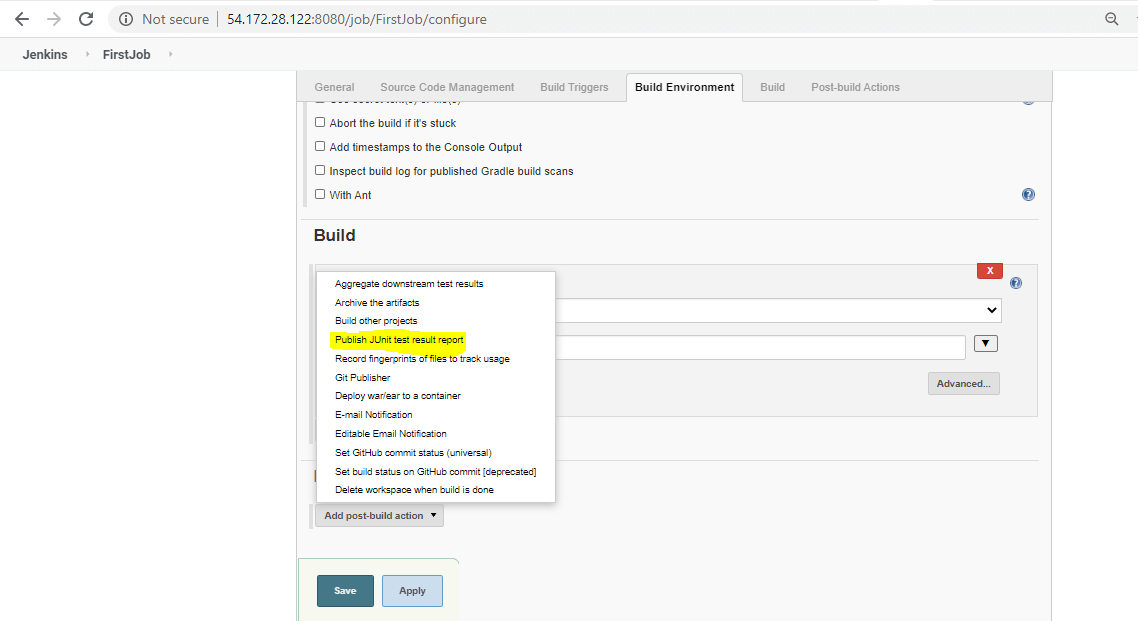
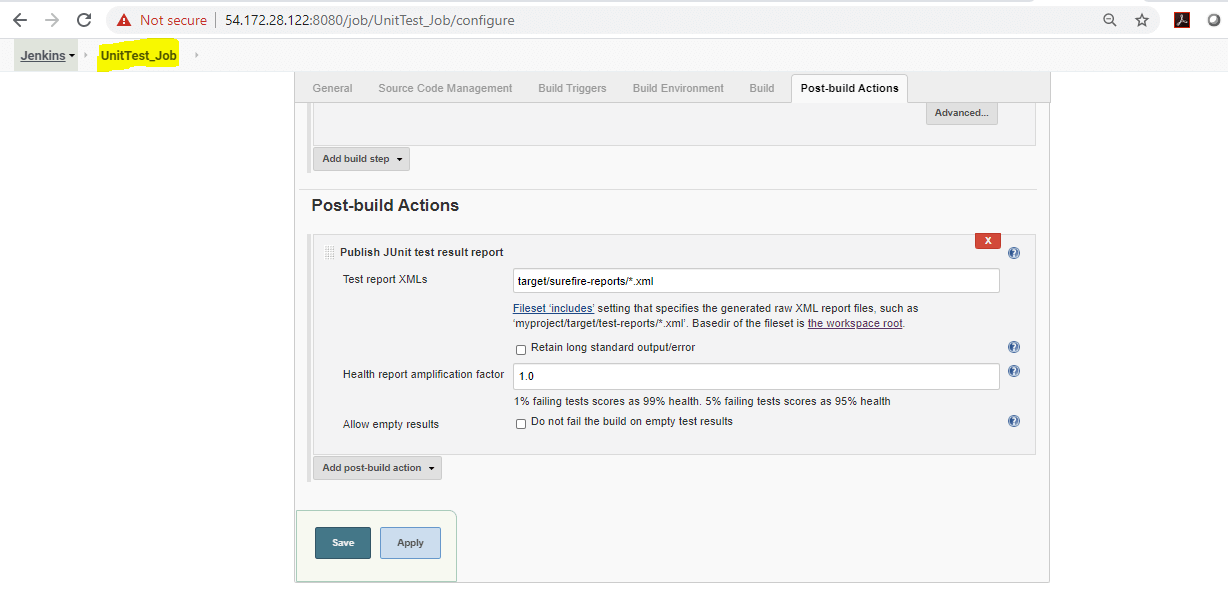
In Post-build Actions, click on Add post-build action, select “Publish JUnit test result report.” We have to specify the directory under Test report XMLs where all your xml reports are getting generated. For i.e. : target/surefire-reports. Hence specify the path as reports/*.xml to include all the xml files present inside the reports. So, we have specified the location to the customer workspace; inside this workspace, Jenkins will look for the reports folder, and inside the reports folder, it will look for the xml files. Apply and Save the changes.
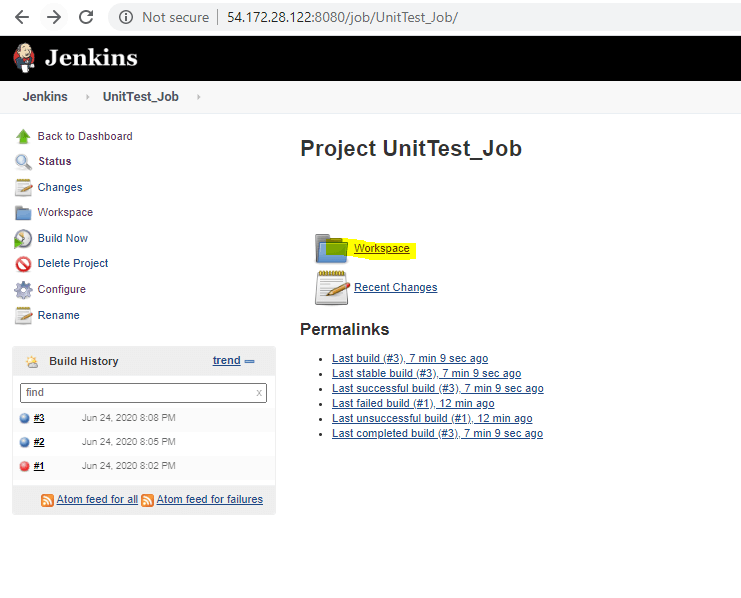
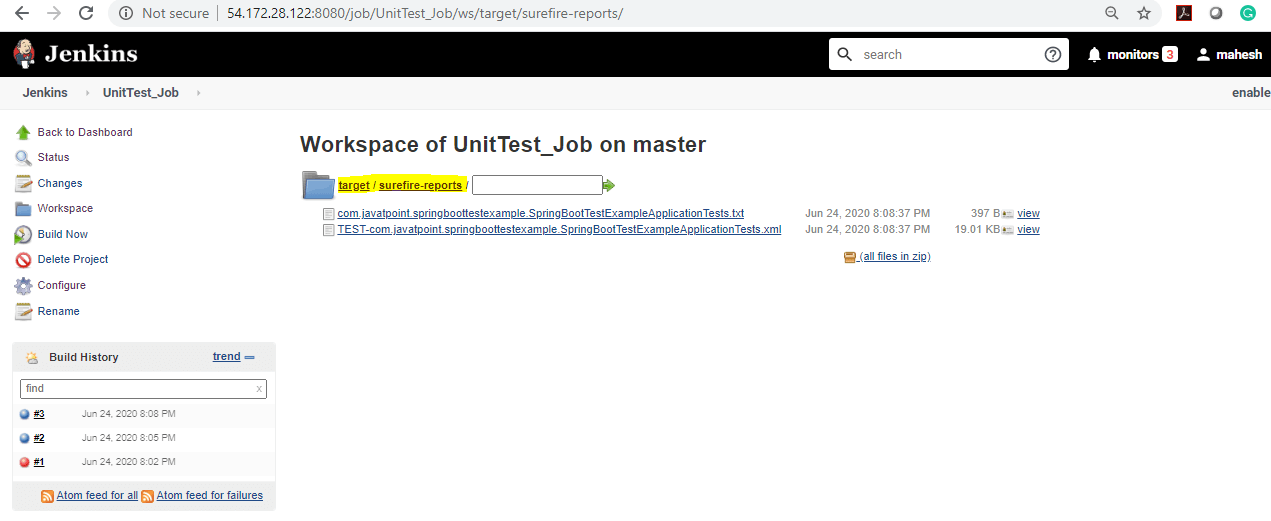
Once the build has been completed, by following the path mentioned in the below screenshot, you can get the XML used to contain the report and summarize the same. Next, we need to redirect the target folder where mave produces binaries or jar or ear post successful build.
Need to configure target/surefire reports into the publish JUnit test result report section. This is basically a path for Test report XML.
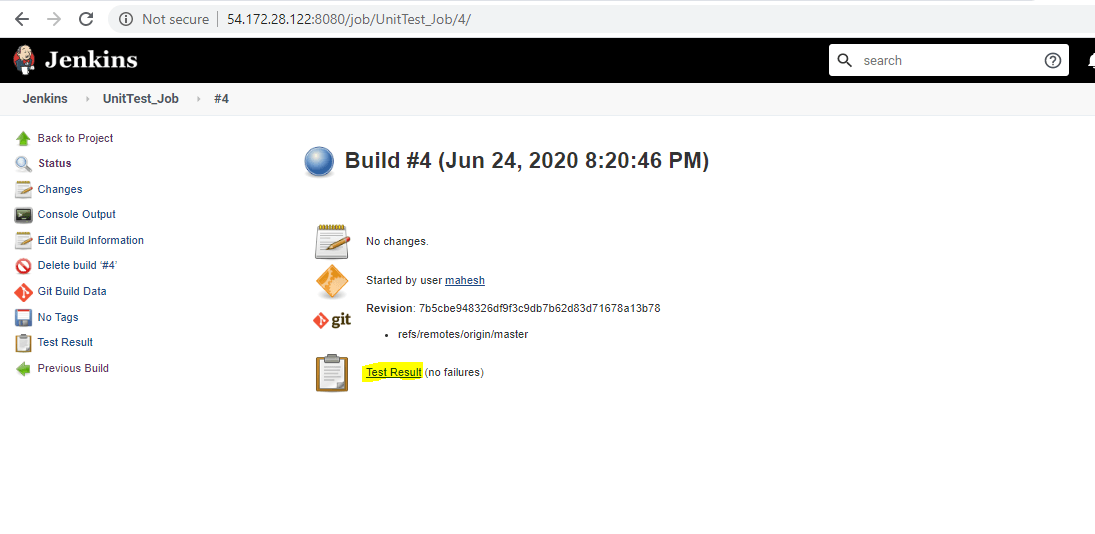
Navigate to your job in Jenkins, you will see any link to the reports, but once you do a Build Now, you would see a new link generated “Latest Test Result” and a chart showing the test failures.
We can see the xml which contains the JUnit report where all the pass and fail records available based on the test cases.
Please find the test code below for which the Junit report has been generated:-
import org.springframework.boot.SpringApplication;
import org.springframework.boot.autoconfigure.SpringBootApplication;
@SpringBootApplication
public class SpringBootTestExampleApplication
{
public static void main(String[] args)
{
SpringApplication.run(SpringBootTestExampleApplication.class, args);
}
}
Please find the sample xml code where usually the test case is expected.
import org.junit.jupiter.api.Test;
import org.springframework.boot.test.context.SpringBootTest;
@SpringBootTest
class SpringBootTestExampleApplicationTests
{
@Test
void contextLoads()
{
}
}
Please find the pom.xml code form where the report generated
<?xml version="1.0" encoding="UTF-8"?>
<project xmlns=http://maven.apache.org/POM/4.0.0 xmlns:xsi="http://www.w3.org/2001/XMLSchema-instance"
xsi:schemaLocation="http://maven.apache.org/POM/4.0.0 https://maven.apache.org/xsd/maven-4.0.0.xsd">
<modelVersion>4.0.0</modelVersion>
<parent>
<groupId>org.springframework.boot</groupId>
<artifactId>spring-boot-starter-parent</artifactId>
<version>2.2.2.BUILD-SNAPSHOT</version>
<relativePath/><!-- lookup parent from repository -->
</parent>
<groupId>com.point</groupId>
<artifactId>spring-boot-example</artifactId>
<version>0.0.1-SNAPSHOT</version>
<name>spring-boot-example</name>
<description>Demo project for Spring Boot</description>
<properties>
<java.version>1.8</java.version>
</properties>
<dependencies>
<dependency>
<groupId>org.springframework.boot</groupId>
<artifactId>spring-boot-starter</artifactId>
</dependency>
<dependency>
<groupId>org.springframework.boot</groupId>
<artifactId>spring-boot-starter-parent</artifactId>
<version>2.2.1.RELEASE</version>
<type>pom</type>
</dependency>
<dependency>
<groupId>org.springframework.boot</groupId>
<artifactId>spring-boot-starter-web</artifactId>
</dependency>
<dependency>
<groupId>org.springframework</groupId>
<artifactId>spring-webmvc</artifactId>
</dependency>
<dependency>
<groupId>org.springframework.boot</groupId>
<artifactId>spring-boot-starter-test</artifactId>
<scope>test</scope>
<exclusions>
<exclusion>
<groupId>org.junit.vintage</groupId>
<artifactId>junit-vintage-engine</artifactId>
</exclusion>
</exclusions>
</dependency>
</dependencies>
<build>
<plugins>
<plugin>
<groupId>org.springframework.boot</groupId>
<artifactId>spring-boot-maven-plugin</artifactId>
</plugin>
</plugins>
</build>
<repositories>
<repository>
<id>spring-milestones</id>
<name>Spring Milestones</name>
<url>https://repo.spring.io/milestone</url>
</repository>
<repository>
<id>spring-snapshots</id>
<name>Spring Snapshots</name>
<url>https://repo.spring.io/snapshot</url>
<snapshots>
<enabled>true</enabled>
</snapshots>
</repository>
</repositories>
<pluginRepositories>
<pluginRepository>
<id>spring-milestones</id>
<name>Spring Milestones</name>
<url>https://repo.spring.io/milestone</url>
</pluginRepository>
<pluginRepository>
<id>spring-snapshots</id>
<name>Spring Snapshots</name>
<url>https://repo.spring.io/snapshot</url>
<snapshots>
<enabled>true</enabled>
</snapshots>
</pluginRepository>
</pluginRepositories>
</project>
Please find the few points below to understand pom.xml:-
groupId: This reflects the client’s information for whom we are developing this project. Technically we can put any value in this, but we follow the following convention.
By convention, it should be a company name or reverse domain name of the company as follows
<groupId>xxxxxx</groupId>artifactId: This represents the project name, some examples
<artifactId>xxxxxxx</artifactId>packaging: This represents the software package format that needs to be created by maven, a few examples
<packaging>war</packaging>version: current version of the project
<version>1.7.2</version>Recommended Articles
We hope that this EDUCBA information on “Jenkins Reporting” was beneficial to you. You can view EDUCBA’s recommended articles for more information.
