Updated June 29, 2023
Introduction to Jenkins User
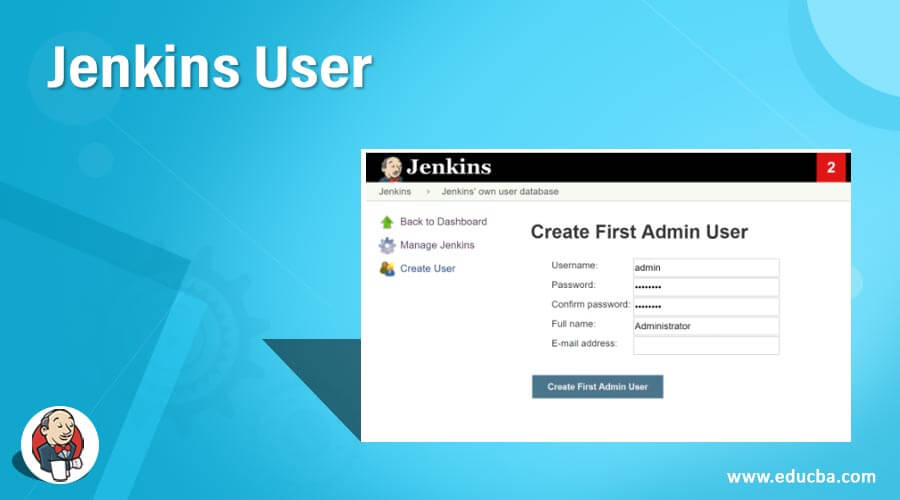
Jenkins users can be “Admin” users or “system” users. The Jenkins Admin users have a user id that can be used for login. The Jenkins admin users usually have authenticated to do all the critical configuration settings related to Jenkins. The Jenkins admin user has command over the services, which includes setting associated with IAM (Identity Access Management), plugins, artifacts archives, and build logs. The Jenkins system users typically have the user id and have a login with limited access to the Jenkins services. For example, the Jenkins system users only do an action like start, stop, and restart if they have given action to do so.
For example, an organization has ten team members, including a developer, tester, DevOps engineer, and some manager. So here, the admin user is a DevOps engineer, and the manager who is an admin user as he/she needs to trigger the build and has to do many other tasks in a highly secured production environment with other lower environments like (the QA environment and developer environment). Also, the developer and tester are system users with limited access to the lower environment and can do specific tasks.
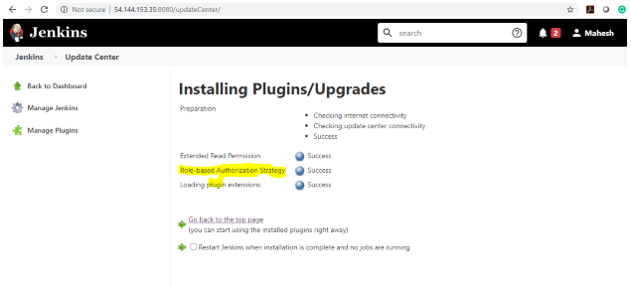
If we want to assign different roles and privileges to other users in Jenkins, we must install the Role Strategy Plugin.
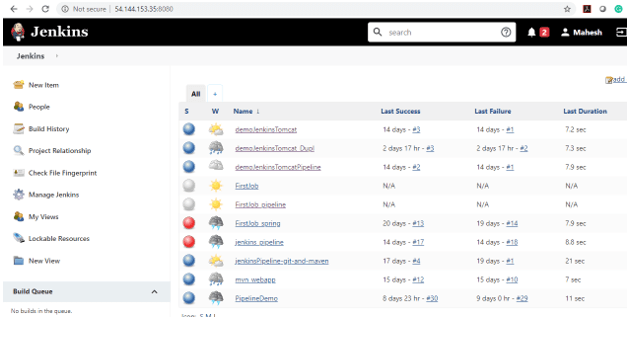
Login to your Jenkins dashboard.
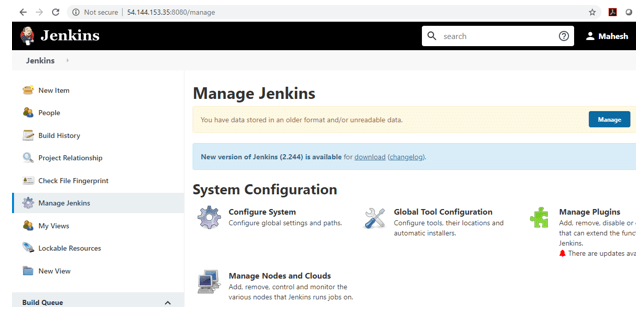
I clicked on ‘Manage Jenkins and then clicked on Manage plugin.
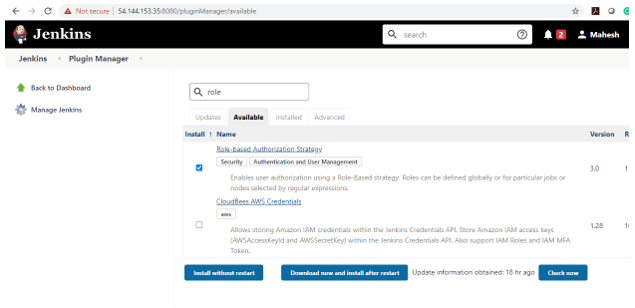
Once you are in the plugin manager section, there are different tabs like Updates, available, installed, and advanced.
Clicked on the Available tab and searched for the Role-based Authorisation.
Now, select the plugin and click the Install without restart button.
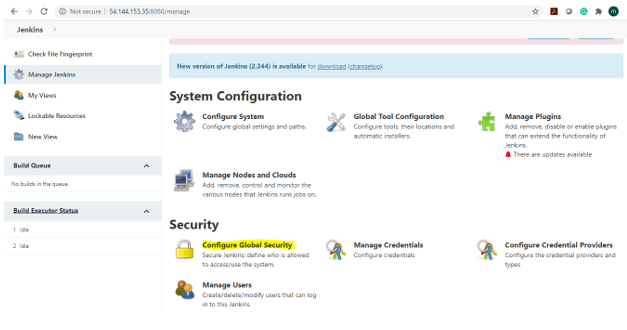
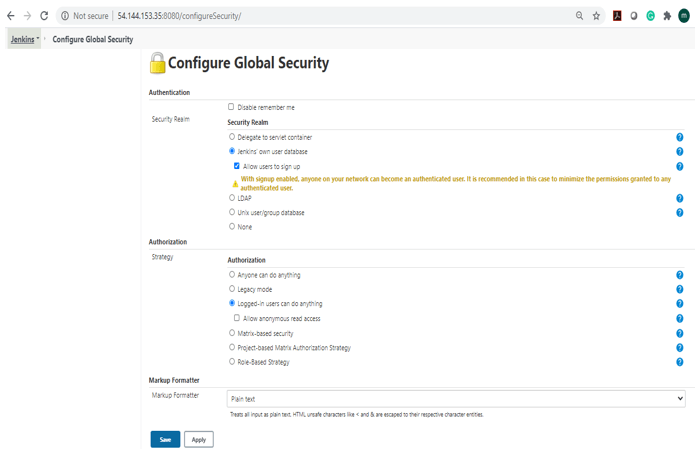
After Plugin installation, click ‘Manage Jenkins’ and click ‘Configure Global Security.’When you click the Configure Global Security option then, you will see the following page:
Once you log in to Jenkins as admin, Manage Jenkins > Configure Global Security, and select the “Enable Security” checkbox. Next, select “Jenkins Own User Database” for the security realm under access control and then select “Logged in Users can do anything” under Authorization and Save it. Please don’t select the ‘users to sign up’ checkbox under the Jenkins Own User Database section; otherwise; it will become a security risk; with signup enabled, anyone on your network can become an authenticated user. In this case, minimizing the permission granted to authenticated users is recommended.
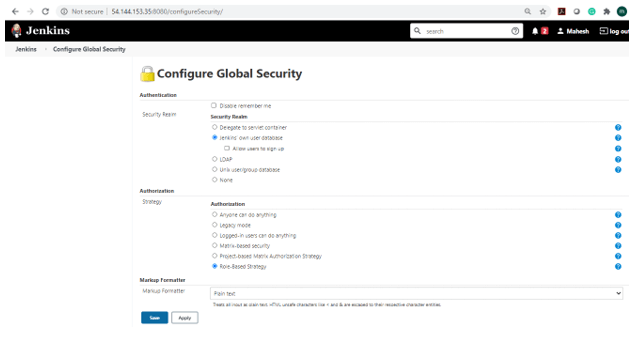
Clicked on ‘Role-Based strategy’ under the Authorization section and clicked the save button.
After successfully saving, you can see the below screen that
Create –
Creating a User on Jenkins
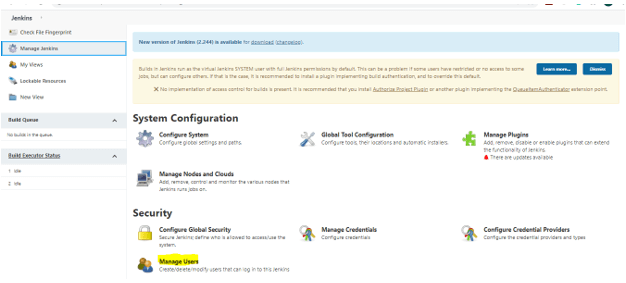
Now you are good to set up your users in the Jenkins system. First, go to Manage Jenkins and scroll down; you will see the ‘Manage Users’ option. Click on this option.
You can be redirected to the direct page as well by following the below steps:-
Login into Jenkins
Clicked on Manage Jenkins
Clicked on Create Users
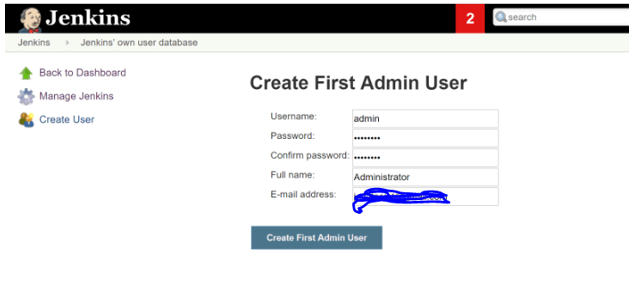
Enter all the details – Username, Password, Confirm password, Full Name, Email.
Select Create User
Post successfully entering details, click on the create user button, and the user will be created.
You can see the below user details below:
Managing User Role
We are configuring the role for a user by following the below steps:
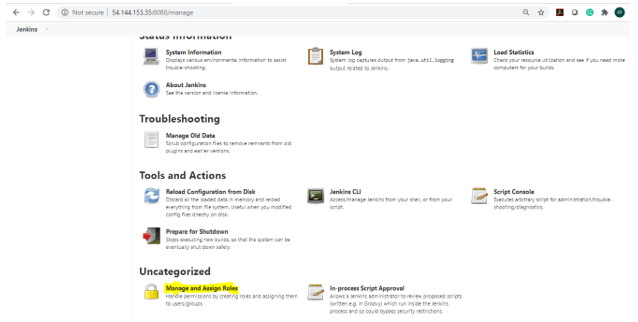
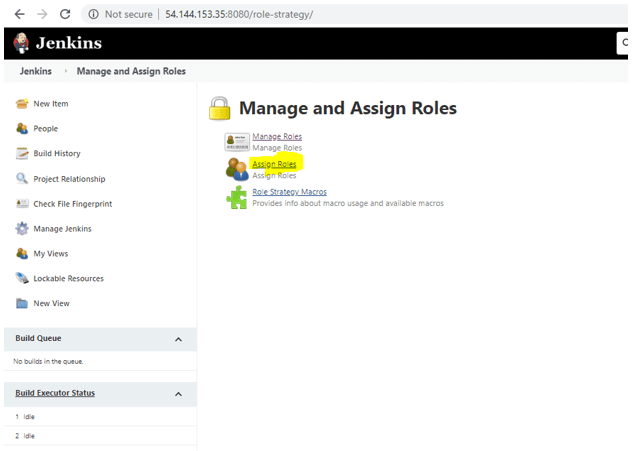
Go to Manage Jenkins. Then Select Manage and Assign Roles. If you have successfully installed the Role strategy plugin, only the Manage and Assign Role options will be available.
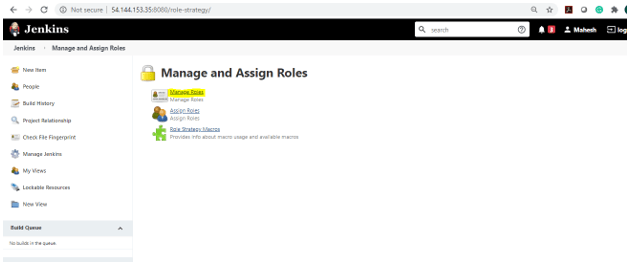
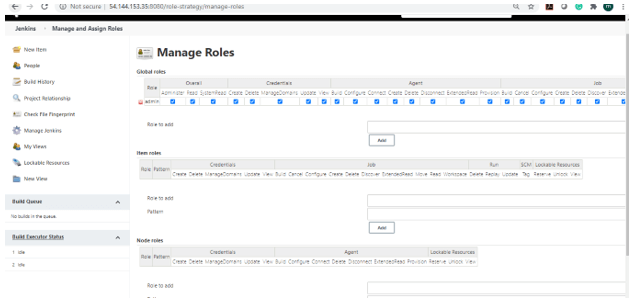
Clicked on the Manage role under Manage and assigned Roles.
For creating the new role called “admin.” Type “admin” in the Role to add an option. Then by clicking the Add button, we create a new role for a user. Now here only, we can assign the role by selecting the appropriate permissions, which are available by saving it successfully. Please find the explanation below screen.
Assigning User Roles in Jenkins
We have created the role above successfully. Now we have to assign these roles to specific users.
Please follow the below steps for assigning the roles:
Clicked on the Manage Jenkins.
Go to the next page and select manage and assign roles. Please find it in the below screenshot.
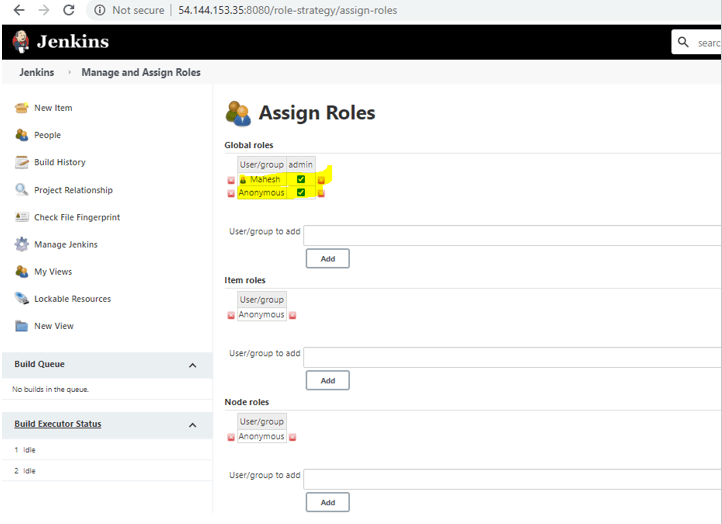
Now click on the assigned roles, do select the checkbox in front of the specific user. Here are the different roles available like global roles, Node roles, and item roles.
Global Roles — provide us access & authorization at the global level.
Node Roles — Create roles specific to a project.
Following the above steps, we can create different users and assign specific roles accordingly.
Recommended Articles
We hope that this EDUCBA information on “Jenkins User” was beneficial to you. You can view EDUCBA’s recommended articles for more information.
