Updated April 4, 2023

Introduction to Jetty Maven plugin
While working on web development related projects in maven, usually the task for testing them becomes very tedious as it involves Coding for the application and then creating the WAR after compiling your project and then deploying it on your server such as tomcat server for testing it. While developing web applications, the developer needs to perform many changes and tested the working. Doing the compiling, creating WAR, and deploying it to test again and again consumes too much time. The Jetty Maven plugin helps in skipping the steps of compiling, WAR creation, and deployment on the server for testing. It helps to run the web application of maven directly on the specified server and port.
How do we use Jetty Maven Plugin in Maven?
In this article, we will learn how we can use the jetty maven plugin in maven web application projects to run your application easily to test the working of your application. We will firstly have a look at a simple maven project using servlets that will be using the jetty plugin in it and then we will create a web application that can be run can be checked using the jetty plugin.
Creating a simple Maven Project Using Jetty Plugin
Below are the Steps of Creating a simple maven project with the jetty plugin in it.
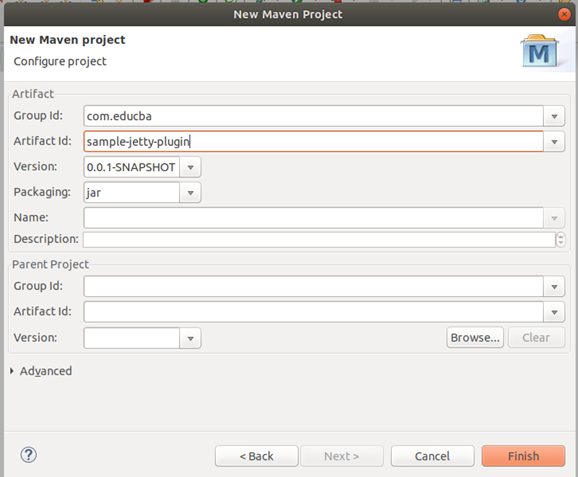
1. Create a new maven project by clicking on File -> others in your eclipse IDE. Then select the maven project by searching for it in the dialog box of others. We will create a new maven project in the following manner with group id as com.educba and sample-jetty-plugin as the artifact id –
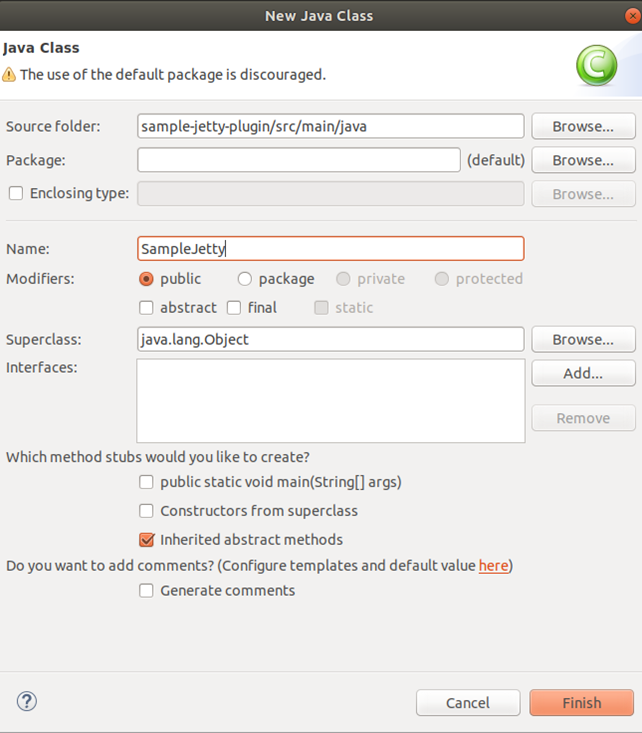
2. Click on the finish button to create the project. Now create a new class file inside the src/main/java named SampleJetty.java by clicking on File -> New -> Class file in the following manner –
3. Now, enter the following code of servlet to print the message saying “This is my first test application using Jetty!” in your web browser on the localhost.
Code:
import javax.servlet.http.HttpServletRequest;
import javax.servlet.http.HttpServletResponse;
import javax.servlet.ServletException;
import java.io.IOException;
import org.eclipse.jetty.server.Server;
import org.eclipse.jetty.server.Request;
import org.eclipse.jetty.server.handler.AbstractHandler;
public class SampleJetty extends AbstractHandler
{
public void handle(String target,
Request baseRequestOfServlet,
HttpServletRequest request,
HttpServletResponse responseOfServlet)
throws IOException, ServletException
{
responseOfServlet.setContentType("text/html;charset=utf-8");
responseOfServlet.setStatus(HttpServletResponse.SC_OK);
baseRequestOfServlet.setHandled(true);
responseOfServlet.getWriter().println("<h1>This is my first test application using Jetty!</h1>");
}
public static void main(String[] args) throws Exception
{
Server serverSample = new Server(8080);
serverSample.setHandler(new SampleJetty());
serverSample.start();
serverSample.join();
}
}
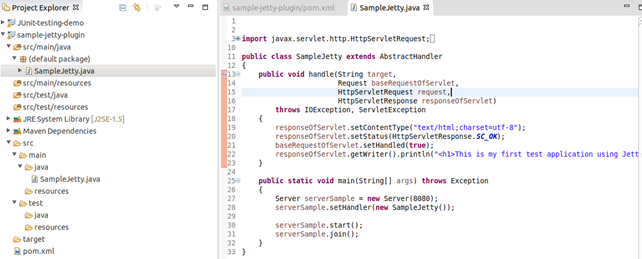
This should be located as shown below :
4. Now, move to pom.xml and open it. We have to add the jetty plugin in the plugins section. Specify the group id, artifact id and other details of your project and mention the plugin as shown below –
Code:
<project xmlns="http://maven.apache.org/POM/4.0.0" xmlns:xsi="http://www.w3.org/2001/XMLSchema-instance" xsi:schemaLocation="http://maven.apache.org/POM/4.0.0 http://maven.apache.org/xsd/maven-4.0.0.xsd">
<modelVersion>4.0.0</modelVersion>
<groupId>com.educba</groupId>
<artifactId>sample-jetty-plugin</artifactId>
<version>0.0.1-SNAPSHOT</version>
<packaging>jar</packaging>
<name>Jetty Sample</name>
<properties>
<jettyVersion>9.3.9.v20160517</jettyVersion>
</properties>
<dependencies>
<dependency>
<groupId>org.eclipse.jetty</groupId>
<artifactId>jetty-server</artifactId>
<version>${jettyVersion}</version>
</dependency>
</dependencies>
<build>
<plugins>
<plugin>
<groupId>org.codehaus.mojo</groupId>
<artifactId>exec-maven-plugin</artifactId>
<version>1.1</version>
<executions>
<execution><goals><goal>java</goal></goals></execution>
</executions>
<configuration>
<mainClass>org.example.SampleJetty</mainClass>
</configuration>
</plugin>
</plugins>
</build>
</project>
Now, we need to clean, compile this maven project. To do so, click on the pom.xml and right-clicking it will provide you with multiple options. Select Run as an option and then select maven clean to clean the project. Further, repeat the same process and run as a maven install to compile your project. Alternatively, you can fire the following command to clean and compile your maven project -mvn clean compile exec: java. Then you can go to the path http://localhost:8080/ to check the output of your project. This should be somewhat like the following output
Output:
5. Now, let us create a web application in eclipse that uses the jetty plugin. For complete information about the configurations, goals, and details about the jetty plugin, refer to the standard website:
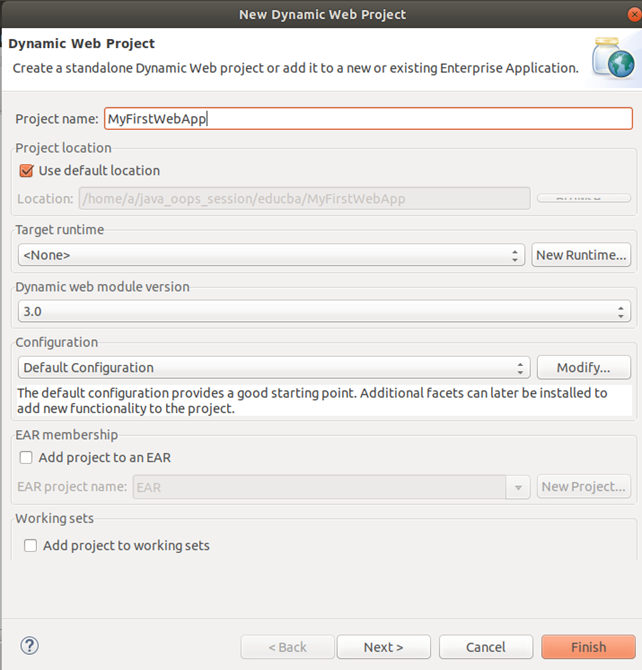
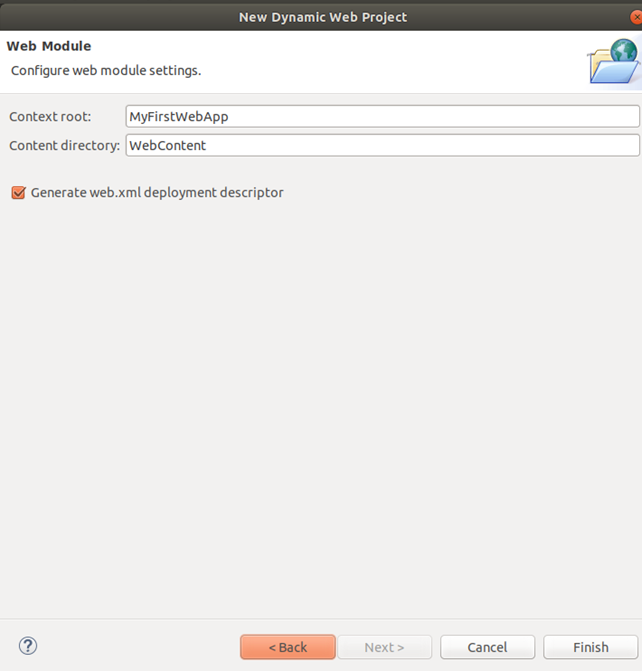
https://www.eclipse.org/jetty/documentation.php. Creating a new web application in eclipse is easy. For this, you will have to click on the File option in the menu bar and then select New. Then select Dynamic Web Project. Then enter the name of the project and click on the Next button. After that click again on the next button and select the option of generating the web.xml file that will lead to the creation of this file automatically by Ide. If you do not click this option and click finish, you will have to create the file named web.xml for your web application configuration. The project structure should resemble the web application with the presence of the WEB-INF folder having web.xml. I will create a new dynamic web application with the name of MyFirstWebApp as shown below –
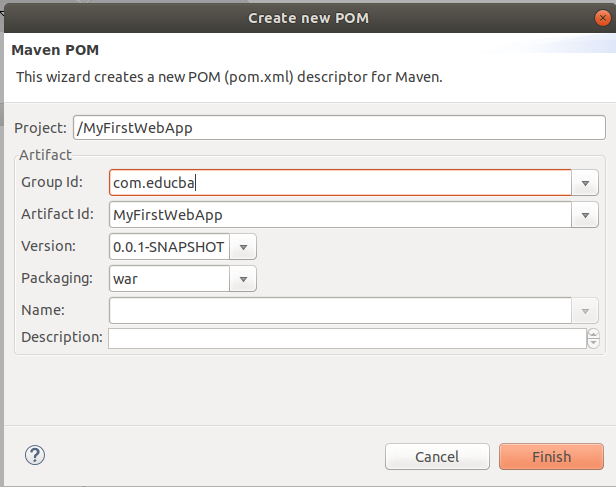
6. Now, we will convert our dynamic web application to the maven project. To do so right-click on your project and select configure option then select convert to maven project option. This will lead to the generation of pom.xml file in your project structure Or you can create a maven project instead of a dynamic web project and specify the archetype of your maven project as a web. It will ask you for the group id, artifact id and other details of maven project if you are converting as shown in the below image:
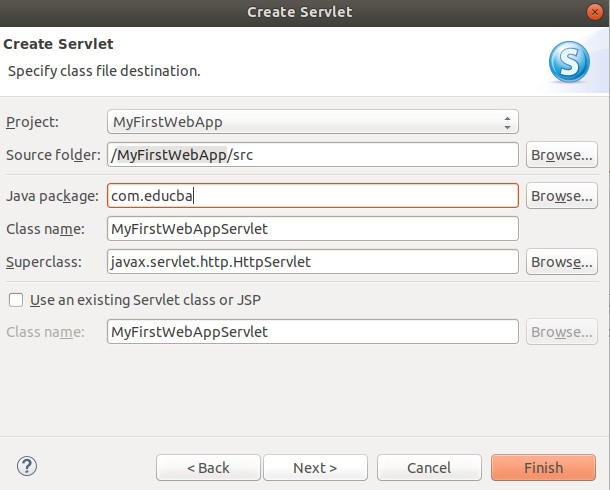
7. Create a servlet file in your java resources by right-clicking on the java resources and selecting new then servlet file and entering the details as shown.
And the contents of the MyFirstWebAppServlet are as follows:
Code:
package com.educba;
import java.io.IOException;
import javax.servlet.ServletException;
import javax.servlet.http.HttpServlet;
import javax.servlet.http.HttpServletRequest;
import javax.servlet.http.HttpServletResponse;
public class MyFirstWebAppServlet extends HttpServlet
{
protected void doGet(HttpServletRequest request, HttpServletResponse response) throws ServletException, IOException
{
response.setContentType("text/html");
response.setStatus(HttpServletResponse.SC_OK);
response.getWriter().println("<h1>This is my sample Web Application using Jetty maven plugin.</h1>");
response.getWriter().println("session=" + request.getSession(true).getId());
}
}
8. Now, create a new HTML file in your same folder where the WEB-INF folder resides that you wish to run. For doing so right-click on WebContent folder and select New, then HTML file that will lead to a new pop-up asking for HTML file details. Enter the name of your HTML file and click on finish. I have created with the name as index.html with following contents –
Code:
<!DOCTYPE html>
<html>
<head>
<meta charset="UTF-8">
<title>Insert title here</title>
</head>
<body>
<h1>This is my sample Web Application using Jetty maven plugin.</h1>
</body>
</html>
Your pom.xml should contain the jetty plugin in it and should be somewhat like follows –
Code:
<project xmlns="http://maven.apache.org/POM/4.0.0" xmlns:xsi="http://www.w3.org/2001/XMLSchema-instance" xsi:schemaLocation="http://maven.apache.org/POM/4.0.0 http://maven.apache.org/xsd/maven-4.0.0.xsd">
<modelVersion>4.0.0</modelVersion>
<groupId>com.educba</groupId>
<artifactId>MyFirstWebApp</artifactId>
<version>0.0.1-SNAPSHOT</version>
<packaging>war</packaging>
<properties>
<jettyVersion>9.4.28.v20200408</jettyVersion>
<java.version>1.8</java.version>
</properties>
<dependencies>
<dependency>
<groupId>javax.servlet</groupId>
<artifactId>javax.servlet-api</artifactId>
<version>3.1.0</version>
<scope>provided</scope>
</dependency>
</dependencies>
<build>
<plugins>
<plugin>
<groupId>org.apache.maven.plugins</groupId>
<artifactId>maven-compiler-plugin</artifactId>
<version>3.8.1</version>
<configuration>
<source>${java.version}</source>
<target>${java.version}</target>
</configuration>
</plugin>
<plugin>
<groupId>org.eclipse.jetty</groupId>
<artifactId>jetty-maven-plugin</artifactId>
<version>${jettyVersion}</version>
</plugin>
</plugins>
</build>
</project>
The web.xml will not contain much data and should be somewhat like follows –
Code :
<?xml version="1.0" encoding="UTF-8"?>
<web-app xmlns:xsi="http://www.w3.org/2001/XMLSchema-instance" xmlns="http://java.sun.com/xml/ns/javaee" xsi:schemaLocation="http://java.sun.com/xml/ns/javaee http://java.sun.com/xml/ns/javaee/web-app_3_0.xsd" id="WebApp_ID" version="3.0">
<display-name>MyFirstWebApp</display-name>
</web-app>
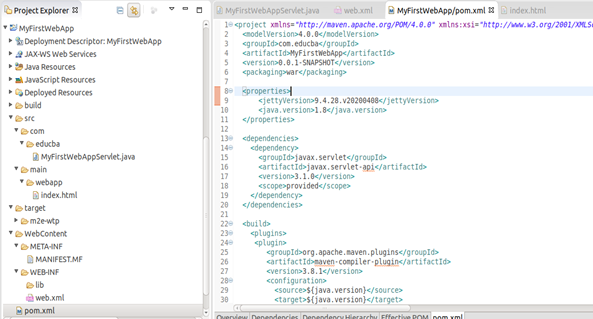
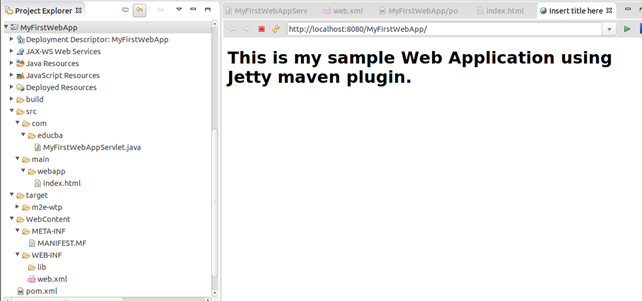
Your project structure should resemble to the following structure as shown –
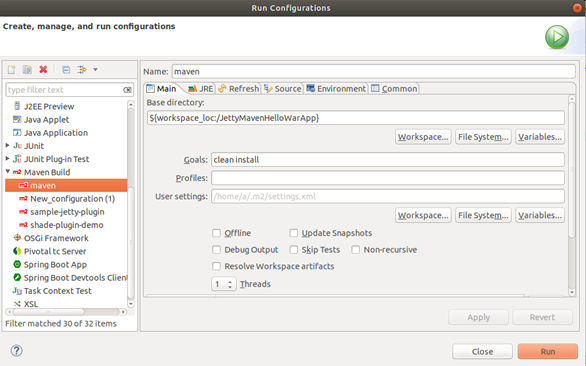
9. Now, you can run your maven project by right-clicking on the project and running configurations option and then specifying the goals of clean and install as shown below:
10. Then you can simply right-click on the project folder then running it on tomcat server if you have configured it on your eclipse or directly entering the url on browse. It should give the output as follows.
Output:
Recommended Article
This is a guide to Jetty Maven plugin. Here we discuss the Introduction and how we Use the Jetty Maven Plugin in Maven along with examples. You can also go through our other suggested articles to learn more –
