Updated March 27, 2023
Introduction to Jira Dashboard
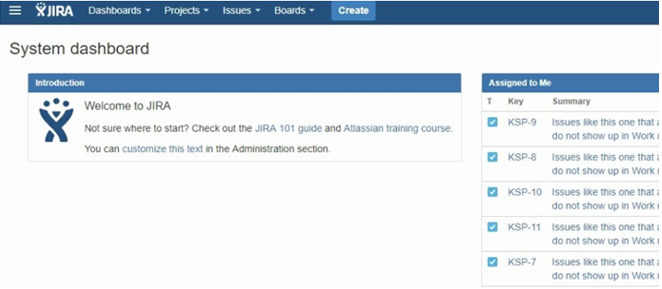
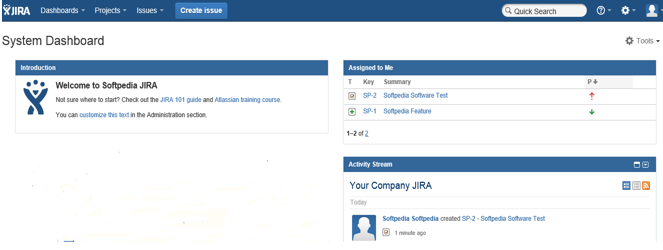
The JIRA Dashboard is a home page of the JIRA software after logging to it i.e. it provides various useful information to the team members, tracks the project development status and is customized by the JIRA administrator. It contains a navigation bar having multiple links like Dashboards, Projects, Issues, Boards and a Create button. Similarly, the system dashboard section contains some default sections like Introduction, Assigned to Me, etc.
How to Add Gadgets in Jira Dashboard?
The Gadget is an application that added to the created JIRA dashboard which provides useful tracking reports of the project development to the team. The examples of Gadgets are such as, Assigned to Me, Issues in Progress, Calendar, Jira Road Map, Pie Chart, Sprint Burndown, etc. The steps to add gadgets in JIRA dashboard are given below:
- Step 1: You Login the JIRA application as an Administrator.
- Step 2: Click on the “Dashboards” link on the navigation bar and go to the dashboard.
- Step 3: On the “dashboard”, click on the “Add Gadget”.
- Step 4: You choose your required Gadget from the list of multiple gadgets.
How to Create a Dashboard in Jira?
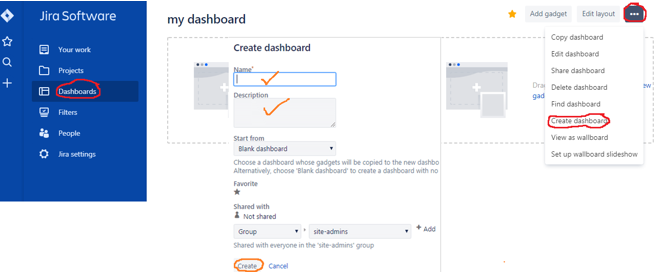
The JIRA dashboard can be created and customized by the JIRA administrator. The steps to create a dashboard in JIRA are given below:
- Step 1: Click on “Dashboards” link in JIRA dashboard/home page.
- Step 2: Click on the right side corner on … and choose to Create a dashboard Option.
- Step 3: Fill the name of the Dashboard, Description, Access, and Shared with, etc.
- Step 4: Click on the “Create” or “Save” button.
Various Operations Performed in Jira Dashboard
There are various operations are performed on the JIRA dashboard. Such as,
1. Dashboards
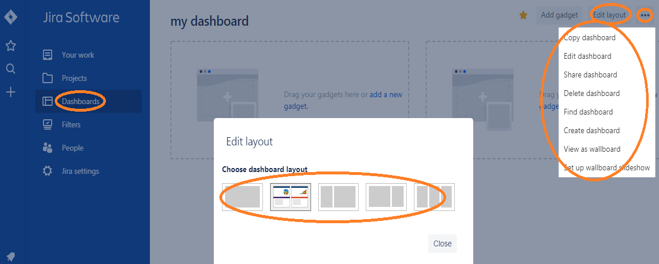
This is one of the best operations in the JIRA dashboard/ homepage. By using this link we can Add Gadget to the dashboard, Edit layout (choose different dashboard layout), Copy dashboard, Edit dashboard, Create a dashboard, Find dashboard, Delete dashboard, Share dashboard, View as wallboard, Set up wallboard slideshow, etc.
2. Projects
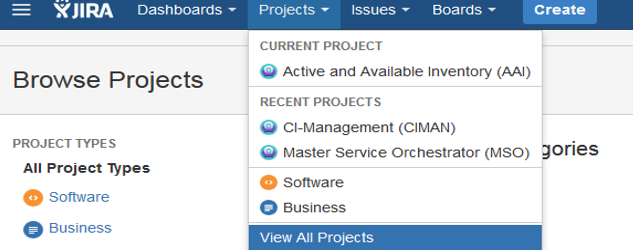
This Project provides the link, it provides multiple sub-links related to the project work i.e. it shows the Current project with status, recent project, Software, Business (business project type), view all the projects and create the project, etc.
3. Issues
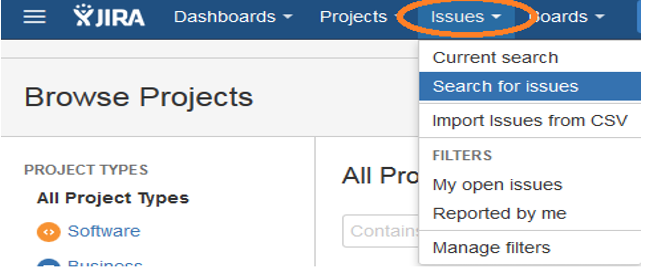
This link provides different sub links related to the Issues towards the project i.e. it shows the search for Issues, Recent Issues, reported by me, my open Issues and manage filters.
4. Boards
This link provides the board followed by the project. It shows the agile board or Kanban board as per the project development methodology. It has two sub-links such as the recent board and Views all boards.
5. Create
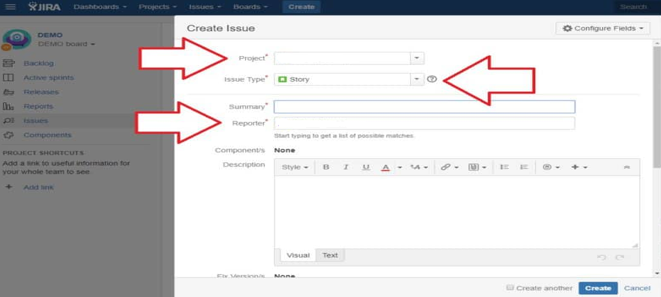
It is a button, which is used to create or logging a Bug/Issue. After clicking it, we will fill some textbox like project name, Issue type, summary, reporter, components and description. Finally, we click on Create to logging a new Issue.
6. Search Filed
In this field, we search for the project or issues or bugs in the JIRA dashboard. It is used to minimize the result to get appropriate requirements.
7. Feedback Link
In this link, we send the own feedback to the JIRA by filling some textboxes like Rate this page, what do you like, what needs to be improving, attach the file, user name, E-mail address and finally click on Submit button. Then the feedback is successfully posted. In a notification, icon provides the notifications regarding project or workflow status.
8. Help Link
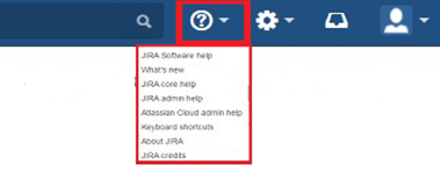
This link provides some useful information about the JIRA tool. It has multiple sub-links like About JIRA, JIRA software help, what’s new, JIRA core help, Jira admin help, Atlassian cloud admin help, keyboard shortcuts, and JIRA credits, etc.
9. User Profile Link
It provides the profile details of the user and also manages the profile of the user with information about the user like the photo, email address, phone number, etc. The Log out option is used to logging off from the JIRA tool.
10. System Dashboard
This is present on the JIRA dashboard home page. It contains mainly three sections such as Introduction (Welcome to JIRA), Assign to Me (tasks assigned to a specific user) and Activity Stream (list of activities done by the users).
Conclusion
In this article, we briefly discuss the JIRA Dashboard along with how to create a dashboard in JIRA, how to add gadgets in the JIRA dashboard and different features in JIRA home pages with proper examples. Depending upon project or Industry the view of dashboard changes. The JIRA administrator takes major roles to create the new dashboard. It provides the proper workflow status of the project to track each member of the team with proper documentation.
Recommended Articles
This is a guide to Jira Dashboard. Here we discuss how to add a gadget, how to add and how to create dashboard and the various operations performed in Jira Dashboard. You can also go through our other related articles to learn more-
