Updated July 3, 2023

Introduction to Jira Scrum Board
The Jira scrum board is the only tool that helps unite the teams to achieve their goals and deliver the product within the scheduled timelines. The Jira scrum board helps the company manage the sprint releases effectively because of its simple UI option(It is very simple to use and easily understood). The Jira scrum board will unite all the teams in the company for the simple agenda and helps the sprint release happen in time and execute the plan smoothly. The word scrum is a very popular framework for implementing the agile software framework.
Components of Jira Scrum Board
In every project, there will be different components. Components are the subsections of the project. This helps group different project issues, divided into different parts. While creating a component, we can assign the default assignee. The project default assignee will be different, and the component default assignee will be different. Component default assignee will over right the project default assignee. The admin will handle the entire component. Admin can be project admin or Jira admin. Both can have managing authority.
There will be a components icon once we open the UI and click on the project. We need to click on that and start creating the new components.
To create the component, we need to fill in the below fields:
- Name
- Description
- Lead
- Default Assignee
- Associated Issues
Admin will have the right to manage (add, edit, and delete) the components from the components page of every project. You can find the components page after opening the project on the sidebar.
Process of Adding the New Component:
- First, we must click Create a Component and give the necessary name based on the project.
- We have the option to give the description.
- A description will help us find the use of the particular component, and we can see the description once we take the mouse to the specific component. It appears as a Tooltip.
- We can also assign the lead to a particular component. Lead means who is responsible for the component.
- We can set the default assignee- The default assignee is the person who supports the project; finally, click on save- Once we click on save, the entire component will get saved with the given data.
Functions of Jira Scrum Board
The functions of the Jira scrum board are listed below:
- Improve team focus and organization.
- Promote sprint planning and iterative development.
- Increase communication and transparency.
- Improve Team Focus and Organization: Normally, teams will not remember the project’s deadlines because of their more work pressure or working simultaneously with different projects. Jira scrum board helps the team members by providing transparency by segregating the work into different stages. They can easily pull the report and check the status.
- Promote Sprint Planning and Iterative Development: The main use of the scrum board is the sprint. This helps give all the teams a fixed amount of time to release the product enhancements or bugs smoothly with fixed timelines. Jira scrum board is mainly designed for teams to organize the teams’ work or make it easy for the teams work to complete in fixed timelines.
- Increase Communication and Transparency: Jira scrum board is the only tool where the team members can access all the teams’ work at any time. This increases transparency and communication among all the team members.
How to Create a Project in Jira Scrum Board?
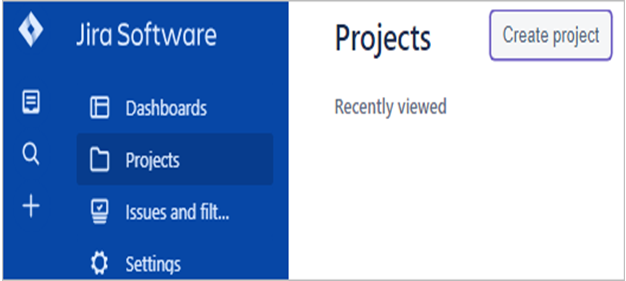
First, open the Jira application, and there you will find the dashboard, Projects, issues, and settings. Select the projects page and click on Create a project. Here we can see all the recently viewed projects also.
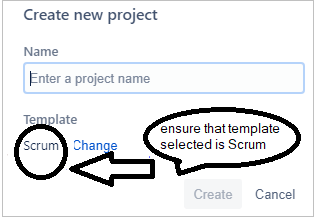
Once we click on the create page new popup window will be opened, and you can see the heading Create a new project. Please be ensure that you are selecting a template in Scrum. If you find any option like project type, then select Scrum software development as the project type.
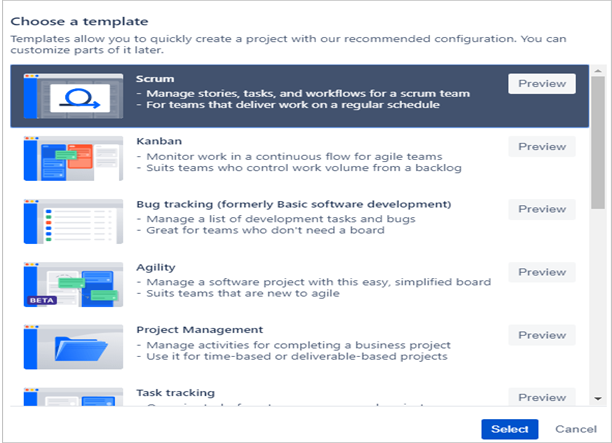
In the above screenshot template selected is scrum, but please make sure that the selected template type is scrum. If the scrum is not selected, please click on change and then select the scrum. Once you click on the change, you will find options shown in the screenshot below.
Select the template and click on Create icon. Then, you can find the newly created project. You can find the fields below once you click on the newly created project.
- Backlog: Different types of Jira issues will be created. The product owner will get all the requirements and bugs from the end users. We can also create newsprints.
- Active Sprints: All the active sprints will be listed here, and we can open and see respective sprints based on the requirement.
- Reports: Reports will provide complete information on the project. We will have different types of reports which can give the status of the project, etc.
- Releases
- Issues and Filters
- Pages: We can create different pages based on the requirement.
- Components
- Add Item
Based on the requirement, we need to use respective pages. For newsprint, we can create new sprints based on the deadlines. We can also make the components and assign the lead if required. We can also assign the default assignee for the components. We can add items if we have the requirement with the help of the add item page.
Conclusion
With the help of the Jira scrum board, we can make all the team’s work easier and more reliable. Normally team members will be allocated different projects because of the workload; they cannot complete the work on time, but with the help of the Jira scrum board, we can divide the work into different stages. Jira scrum board helps find reports of different projects and can track the status.
Recommended Articles
We hope that this EDUCBA information on “Jira Scrum Board” was beneficial to you. You can view EDUCBA’s recommended articles for more information.


