Updated April 7, 2023
Introduction to jQuery disabled checkbox
In jQuery, to disable the checkbox element there are different methods provided which are used for making the checkbox disabled or grayed out which this property returns if the checkbox should be disabled or not. In general, the checkbox disabling in jQuery is defined as disabling the checkbox element which grays out the checkbox element which can either be checked or unchecked when it is disabled by using different methods provided in jQuery such as using a prop() and attr() method and there is also one property which can be applied to the checkbox objects such as using .disabled to this checkbox object.
Syntax:
In jQuery from version 1.5 and below there is no prop() function and therefore the attr() function was used. In version 1.6 and above prop() function was introduced which can be used for disabling the checkbox. In the below section we will see three ways of disabling the checkboxes.
1. Using prop() function
$(selector).prop ("disabled", true | false);This function returns the Boolean value as if the parameter for this prop() function is specified as true then the selected element or checkbox object is disabled else if the parameter is set to false the checkbox object or any other selected element is not disabled.
2. Using attr() function
$(selector).attr('disabled');This function also takes a parameter to specify the property or the task that the selected element or checkbox is applied to. Whereas this function specifies the property for the checkbox object and it is specified as “disabled” for disabling the checkbox object.
3. Using .disabled property
checboxobject.disabled = value;In the above syntax, this is a property that is applied to the checkbox and sets the Boolean values to make the checkbox enable or disable. This syntax returns a Boolean value, such as true or false, where true indicates the checkbox is disabled and false indicates checkbox is not disabled which is a default value for this syntax.
How to disable the checkbox in jQuery with examples?
In this section, we will see examples of all the 3 ways of disabling the checkbox in jQuery according to the above-given syntax.
1. Using prop() function for disabling the checkbox
Example:
<!DOCTYPE html>
<html>
<head>
<title> Disabling checkbox using prop() function in jQuery </title>
<script src="//ajax.googleapis.com/ajax/libs/jquery/2.1.1/jquery.min.js"></script>
<script>
$(function() {
$('input').change(function() {
var val = $(this).val();
if (val == "a") {
$("input[value='b']").prop("disabled", $(this).is(":checked"));
} else if (val == "b") {
$("input[value='a']").prop("disabled", $(this).is(":checked"));
}
});
});
</script>
</head>
<body>
<form>
<p> First checkbox </p>
<input type="checkbox" name="product[]" value="a">
<p> Second Checkbox </p>
<input type="checkbox" name="product[]" value="b">
</form>
</body>
</html>
Output:
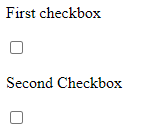
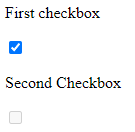
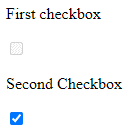
In the above program, we can see that we are disabling the checkbox using the prop() function in jQuery. In this example, we have first created a function named “.change” where we are defining a value that takes the same value that is obtained and checking with the order of the checkbox as we have named two checkboxes with first and second checkbox but when we are comparing them we have assigned each checkbox to the value as “a” and “b” respectively. And then we are applying the prop() function in which we are declaring the value as “disabled” if the other checkbox is checked which means that using prop() function here we are comparing the value if the value is “a” then the second checkbox whose value is “b” will be checked then using prop() the first checkbox will be disabled and it is vice versa when the value is set to “b”. The output can be seen in the above screenshots the first screenshot shows there are two checkboxes where both are unchecked, then in the second screenshot we can see we have first checked the “first checkbox” therefore the second checkbox gets disabled and in the third screenshot, we can see the second checkbox is checked and the first checkbox gets disabled.
2. Using attr() function for disabling the checkbox in jQuery
Example:
<html>
<head>
<title> Disable Checkbox using attr() function in jQuery </title>
<script src = "https://ajax.googleapis.com/ajax/libs/jquery/3.2.1/jquery.min.js"></script>
<script>
$(document).ready(function() {
$("#b").click(function() {
$("#c").attr('disabled', !$("#c").attr('disabled'));
});
});
</script>
</head>
<body>
<p> Disabling or enabling the checkbox </p>
<input type="checkbox" id="c" name= "Checkbox 1" style="width: 25px" value="male" disabled="disabled"/> Checkbox 1
<br>
<br>
<p> Click on the below button to enable or disable the checkbox </p>
<input type="button" id="b" value="Click me " />
</body>
</html>
Output:
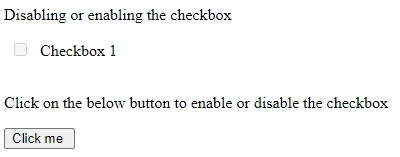
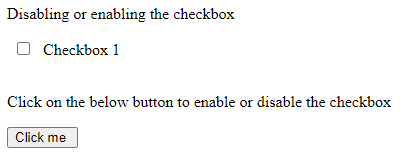
In the above example, we can see we are disabling the checkboxes using the attr() function in jQuery. In this example, we can see we have first made the document ready using the ready() function within which we have defined two elements checkbox and button. The checkbox is considered as input type as we have to check and uncheck the checkbox where the user needs to input it. In this example we are using the attr() function within which by selecting the checkbox selector we are disabling the checkbox and the id name declared for checkbox in HTML code is “c” and for button element the id name declared is “b” therefore the attr() function uses this checkbox id name and declares “disabled” as a value for this id name “c” and for id named “b” which is for button element we have applied the function click() for the button element which means a click event occurs when the button is clicked and here the event is to enable or disable the checkbox specified in this example and according to the attr() function logic where we are disabling whenever the button is clicked.
3. Using .disable property
Example:
<!DOCTYPE html>
<html>
<head>
<title> Disabling checkbox using .disabled property in jQuery </title>
</head>
<body>
Dummy_Checkbox: <input type="checkbox" id="c">
<p> Click on the below disable button to disable the checkbox </p>
<button onclick="disable()"> Disable </button>
<script>
function disable() {
document.getElementById("c").disabled = true;
}
</script>
</body>
</html>
Output:
In the above example, we can see we have written simple jQuery code for disabling the checkbox element, and this element is declared using <input> tag with id name as “c” which will be used in the jquery script tag for applying the “.disable” property. In this we have declared a function disable() within which we are using getElement() property in which we are defining “c” id which is of the checkbox element and we are declaring it as getElement.disable this element.
Conclusion
In this article, we conclude that in jQuery for disabling the checkbox there are different ways to enable or disable the checkbox element. In jQuery, any elements such as radio buttons or checkboxes, or simple buttons can be made enable or disable for the user or as per the requirement. Therefore in jQuery, any of these elements can be disabled or enabled using various jQuery functions.
Recommended Articles
This is a guide to jQuery disabled checkbox. Here we discuss How to disable the checkbox in jQuery with examples along with the outputs. You may also have a look at the following articles to learn more –
