Updated March 23, 2023

Introduction to jQuery insertAfter()
The insertAfter() method is one of the inbuilt functions provided by JQuery, that is used to insert some content after the specified element or set of elements. The insertAfter() method adds up a text or an HTML content with the matched elements. Another JQuery method called, after() method works in the same manner but differs in the precedence and placement of the target elements and the matched elements, that is, they differ in syntax specific difference. The .after() method puts the content after the target method or container. Whereas in the .insertAfter() method, the content is preceding the method, as a selector expression or as a markup created as well and the content is placed after the target element or container.
How to Use jQuery insertAfter() Method?
The insertAfter() method is an inbuilt function in JQuery which is also easy to use. Below is the simple syntax to use the insertAfter() method.
$("HTML Content to be inserted").insertAfter("Target Element / Selector to be inserted after");There is one parameter that is accepted by the insertAfter method. But there is one more element that is an essential part of the insertAfter method. They are Content and Selector.
Parameters:
- Content: One of the important parts of the insertAfter method. The ‘Content’ here is the HTML content that specifies what is to be inserted.
- Selector: The ‘Selector’ is the parameter that tells us which element is the target, that is, after which container or element the ‘Content’ is to be added. This method does not return any value.
Examples to Implement JQuery insertAfter()
Below are some examples of jQuery InsertAfter() which are as follows:
Example #1
Code:
<!DOCTYPE html>
<html>
<head>
<script src="https://ajax.googleapis.com/ajax/libs/jquery/3.4.1/jquery.min.js"></script>
<script>
$(document).ready(function(){
$("button").click(function(){
$("<span>Demo</span>").insertAfter("p");
});
});
</script>
</head>
<body>
<button>INSERT span element AFTER each p element</button>
<p>This is inserAfter Method.</p>
<p>This also insertAfter Method.</p>
</body>
</html>
Output:
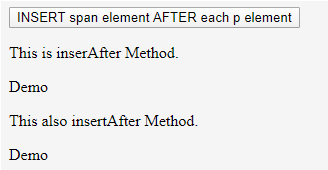
When the above code is executed, the following is the output that we get.
You shall note the following points that can be learned from the above code.
Code Explanation: As shown above, note the usage of $(document).ready function, that makes sure to fire up the event. It starts running the moment, the document object model appears ready for the JavaScript code. The $(“button”).click (function()) used in the above code defines lines of code or instruction to be followed when the button is clicked. Then comes our matter of interest, the insertAfter function. Note, that the HTML content (here, ‘span’ element, ‘Demo’) is being added or INSERT AFTER specified content or TARGET (here, element ‘p’). The HTML element will be added after every instance of the target or specified element.
Example #2
Code:
<!doctype html>
<html>
<head>
<title>insertAfter Method Demo</title>
<script
src="https://ajax.googleapis.com/ajax/libs/jquery/3.3.1/jquery.min.js"> </script>
<script>
$(document).ready(function() {
$("input").click(function() {
// insertAfter
$("<p>is from Marvel World</p>").insertAfter("p");
});
});
</script>
</head>
<body>
<p>Iron Man Series </p>
<p> The Avengers </p>
<input type="button" value="Click to know more"/>
</body>
</html>
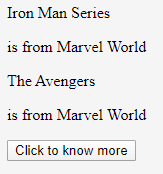
We get the below output when the above code is executed.
Output:
After clicking on the button we will get the following output.
Example #3
Consider another simple example showing the usage of this method.
Code:
<!doctype html>
<html>
<head>
<meta charset="utf-8">
<title>insertAfter Method Demo</title>
<script type = "text/javascript"
src = "https://ajax.googleapis.com/ajax/libs/jquery/2.1.3/jquery.min.js">
</script>
<style>
.source{ margin:10.2px;
padding:12.2px;
width:60px;
border:2px solid #666;
}
.blue{ margin:10.2px;
padding:12.2px;
width:60px;
background-color:blue;
border:2px solid #666
}
.green{ margin:10.2px;
padding:12.2px;
width:60px;
background-color:green;
border:2px solid #666;
}
.red{ margin:10.2px;
padding:12.2px;
width:60px;
background-color:red;
border:2px solid #666;
}
</style>
<script language = "javascript" type = "text/javascript" >
$(document).ready(function() {
$("p").click(function () {
//selecting the HTML content, here, id = source.
$("#source").insertAfter(this);
//and inserting after target element, here any element the user click.
});
});
</script>
</head>
<body>
<p>To see result, click on one of the colred one</p>
<p class = "source" id = "source"></p>
<p class = "blue"></p>
<p class = "green"></p>
<p class = "red"></p>
</body>
</html>
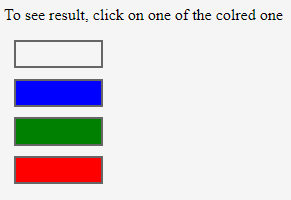
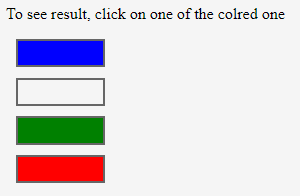
When we execute the above code, the following output is displayed.
Output:
When any of the colored boxes is clicked the ready function executes the lines of code for inserting the empty box after the colored box, the user clicked.
Example #4
The insertAfter method can also be used to add or insert an existing element on the page after another element or the target. Observe the following example to understand more.
Code:
<!doctype html>
<html>
<head>
<meta charset="utf-8">
<title>insertAfter Method Demo</title>
<script src="https://ajax.googleapis.com/ajax/libs/jquery/3.4.1/jquery.min.js"></script>
<script>
$(document).ready(function(){
$("button").click(function(){
$("h1").insertAfter("p");
});
});
</script>
</head>
<body>
<h1>This is a heading</h1>
<p>This is a line.</p>
<p>This is another line.</p>
<button>Click to Move&Insert the Heading element after each Line element</button>
</body>
</html>
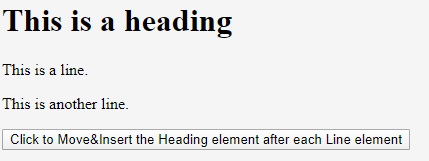
Output:
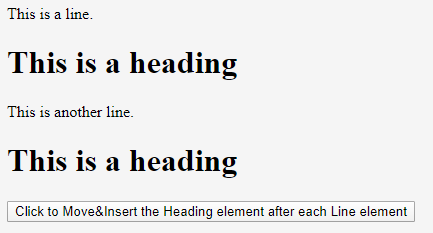
After clicking on the button we will get the following output.
When the insertAfter method is used like this, the HTML Content to be added is an existing content of the HTML page, then it does not simply insert after the target. If an element is selected as we did in the above code, the element will be MOVED and not cloned and the code returns a new set that consists of the newly inserted element.
Also know that if there are more than one position or instance of the TARGET, after which our selected(existing) HTML content is to be added, the cloned instances of the HTML content will be created and inserted after each TARGET element, then the code returns the first set plus the new cloned set.
Conclusion
The insertAfter() method is one of the inbuilt but simple methods that is provided by the JQuery that helps insert HTML elements, whether newly created or are selected from the existing element on the page. There is another function called insertBefore() Function, which you can use, as the name suggests and you must have guessed already, to insert HTML elements BEFORE the selected elements. It works in the same manner as does the insertAfter() method.
Recommended Articles
This is a guide to JQuery InsertAfter(). Here we discuss how to use jQuery insertAfter() method along with examples and code implementation. You can also go through our suggested articles to learn more –

