Updated April 18, 2023

Introduction to jQuery Radio Button
jQuery is a compact and fast JavaScript library. It is rich with lots of new enhanced features. It simplifies HTML document traversal and manipulation, animation, event handling, and Ajax. jQuery has an easy-to-use API that works across cross-browsers. The jQuery radio button is one of the commonly used features which is used to display the radio button based on the checked property. Radio buttons is used to select a single value in a group of different values in any form
Syntax of jQuery Radio Button
The Syntax for using radio buttons in jQuery is as simple as the below syntax which needs to be applied once the document is ready.
$(selector).prop("checked", conditionalValue)Parameters of jQuery Radio Button:
- Selector: The element on which the radio button property needs to be applied. This can be HTML element class or id name
- Checked: By defining this property we are manipulating the radio button value to true or false depending on the requirement
- Conditional Value: This can either TRUE or FALSE Boolean value depending on the requirement. If a developer wants to display the radio button checked then set this value to TRUE. If a developer wants to display the radio button un-checked then set this value to FALSE.
How to Create a Radio Button in jQuery?
Creating a jQuery Radio button is a very simple and straightforward technique. In this initially, we declare few input fields with type a radio in HTML and all these input fields below to on single group so that one single value can be selected at a time. We will also add class names or id names to each of these input fields so that they can be accessed in the script and we can manipulate the checked value for each radio button content. The next piece which needs to be done is to add logic inside the <script> tag where as soon as the document is ready we will look for a click event to be triggered on the radio button from the HTML page and at that moment we will modify the radio button’s checked property to TRUE or FALSE depending on the action performed by the User on User Interface.
Methods of Using jQuery Radio Button
As jQuery is an impact and fast JavaScript library it comes with 2 different techniques by which Radio Buttons can be utilized in an application using jQuery only. Let’s understand each of the technique in detail along with an example of each
Technique 1 – Using .attr
Here In this technique, we will be using .attr function on the selected attribute and then manipulating the radio button value which will eventually reflect in the HTML DOM. This technique is recommended in case your application supports only older versions of jQuery.
$(selector)jQuery Radio Button Firstly we will be accessing the Button field from DOM on which User will perform click and mention the class/attribute name inside the round brackets
$(selector).click()Next on this element, we will add .click event which means whenever this attribute is clicked in the UI then .click event will get triggered and execute whatever is written inside this .click function.
$(selector).attr("checked", conditionalValue)Up next that is inside the click function we will select the input radio button field from DOM and mention the attribute name inside the round brackets and on this element we will call jQuery function .attr which takes 2 parameters. First parameter is constant and value is “checked” and 2nd parameter is the value of this checked field which can be either true or false written in lower case.
$(selector).attr("checked", conditionalValue).click()Once the checked value is manipulated in the script tag then at last we perform a .click() action on this element in order to reflect the newly modified value back in HTML DOM element.
Example of jQuery Radio Button
Below are the examples of jQuery Radio Button:
Code:
<!DOCTYPE html>
<html lang="en">
<head>
<meta charset="utf-8">
<title>Using Radio Buttons in jQuery</title>
<script src="https://code.jquery.com/jquery-3.5.1.min.js"></script>
<script>
$(document).ready(function () {
$(".MUM").click(function () {
$("#mumbai").attr("checked", true).click();
});
$(".NOIDA").click(function () {
$("#noida").attr("checked", true).click();
});
});
</script>
</head>
<body>
<h2> Select Your Location</h2>
<p>
<input type="radio" name="option" id="mumbai">
Mumbai
<input type="radio" name="option" id="bglr">
Banglore
<input type="radio" name="option" id="noida">
Noida
<input type="radio" name="option" id="goa">
Goa
</p>
<p>
<button type="button" class="MUM">
Select Mumbai
</button>
<button type="button" class="NOIDA">
Select Noida
</button>
</p>
</body>
</html>
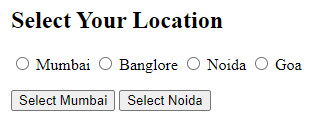
Output:
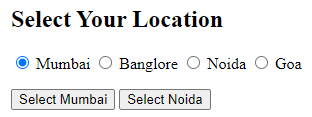
When Clicked on Select Mumbai Button
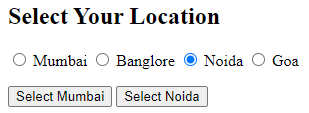
When Clicked on Select Noida Button
Technique 2 – Using .prop
Here In this technique, we will be using .prop function on the selected attribute and then manipulating the radio button value which will eventually reflect in the HTML DOM. This technique is recommended in case your application supports only newer versions of jQuery as well.
$(selector)Firstly we will be accessing the Button field from DOM on which User will perform click and mention the class/attribute name inside the round brackets
$(selector).click()Next on this element we will add .click event which means whenever this attribute is clicked in the UI then .click event will get triggered and execute whatever is written inside this .click function.
$(selector).prop(“checked”, conditionalValue)Up next that is inside the click function we will select the input radio button field from DOM and mention the attribute name inside the round brackets and on this element we will call jQuery function .prop which takes 2 parameters. The first parameter is constant and the value is “checked” and 2nd parameter is the value of this checked field which can be either true or false written in lower case.
Example of jQuery Radio Button
Below are the examples of the jQuery Radio Button:
Code:
<!DOCTYPE html>
<html lang="en">
<head>
<meta charset="utf-8">
<title>Using Radio Buttons in jQuery</title>
<script src="https://code.jquery.com/jquery-3.5.1.min.js"></script>
<script>
$(document).ready(function () {
$(".MUM").click(function () {
$("#mumbai").prop("checked", true);
});
$(".NOIDA").click(function () {
$("#noida").prop("checked", true);
});
$(".unselect").click(function () {
$("#mumbai").prop("checked", false);
$("#bglr").prop("checked", false);
$("#noida").prop("checked", false);
$("#goa").prop("checked", false);
});
});
</script>
</head>
<body>
<h2> Select Your Location</h2>
<p>
<input type="radio" name="option" id="mumbai">
Mumbai
<input type="radio" name="option" id="bglr">
Banglore
<input type="radio" name="option" id="noida">
Noida
<input type="radio" name="option" id="goa">
Goa
</p>
<p>
<button type="button" class="MUM">
Select Mumbai
</button>
<button type="button" class="NOIDA">
Select Noida
</button>
<button type="button" class="unselect">
Unselect All
</button>
</p>
</body>
</html>
Output:
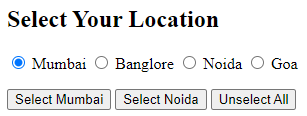
When Clicked on Select Mumbai Button
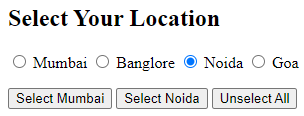
When Clicked on Select Noida Button
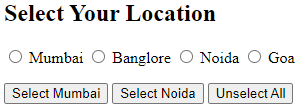
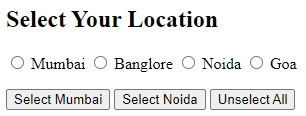
When Clicked on UnselectAll Button
Conclusion
Using jQuery to implement the radio button in your application and manipulating the radio button value inside the script tag is a very easy and simplest approach with 2 different types of methods as mentioned above. Different techniques have different version support and so make sure you are using the correct approach in your application.
Recommended Articles
This is a guide to jQuery Radio Button. Here we discuss a Brief Overview of jQuery Radio Button, syntax, methods and its Examples along with its Code Implementation. You can also go through our other suggested articles to learn more –
