Updated April 12, 2023

Introduction to jQuery Slider
A slider is something which is generally used when we want to select a numeric value from a certain range. This can be achieved by simply dragging a slider. jQuery UI offers a slider() method to achieve the sliding effect in the web pages. slider() method basically changes the appearance of HTML elements in the page and give them the proper styling by adding certain new CSS classes. Benefit of using a slider over a text input is any value selected by the user is valid without leaving any chance of selecting an invalid value.
Syntax of jQuery Slider
There are two ways in which slider() method can be used.
$(selector, context).slider(options);Where, options refer to an object specifying appearance and behavior of the slider. More than one options can be used at a time using a JavaScript object. In such a case, options can be separated using a comma as shown below.
$(selector, context).slider({option1:value1, option2:value2……..});slider(options): specifies that an HTML element should be managed as a slider.
Note: Some of the options which can be used with the slider() method are as follows:
animate, disabled, max, min, orientation, range, step, value, values.
$(selector, context).slider("action", params);This method enables an action on the slider, for example, to move the cursor to a new location. Here, action is referenced by a string and is passed to the method as the first argument.
Note: Options which can be used with slider() method are as follows
destroy, disable, enable, option, option(optionName), option(optionName, valyue), option(options), value, value(value), values, values(index), values(index, value), values(values), widget.
Examples of jQuery Slider
Given below are the examples mentioned:
Example #1
Following example is a simple illustration of slider functionality where no parameter is passed to the slider() method.
Code:
<!DOCTYPE html>
<html lang="en">
<head>
<meta charset="utf-8" />
<title>Demo for jQuery UI Slider functionality</title>
<link
href="https://code.jquery.com/ui/1.10.4/themes/ui-lightness/jquery-ui.css"
rel="stylesheet"
/>
<script src="https://code.jquery.com/jquery-1.12.4.js"></script>
<script src="https://code.jquery.com/ui/1.10.4/jquery-ui.js"></script>
<script>
$(function () {
$("#slider").slider();
});
</script>
<style>
.div1 {
width: 400px;
height: 150px;
padding-top: 20px;
padding-left: 5px;
text-align: center;
background-color: cadetblue;
}
#slider {
border-color: yellow;
width: 300px;
margin-left: 30px;
}
</style>
</head>
<body>
<div class="div1">
<div id="slider"></div>
<br />
<p style="font-size: larger;">Scroll the slider to see the result.</p>
</div>
</body>
</html>
Output
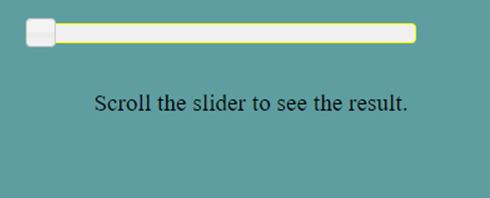
- Below screenshot is taken of the screen which displays when the above code is executed for the very first time.
- A horizontal slider with a single handle can be seen which is moved with the mouse or using the arrows keys.
Example #2
Here is an another example showing the usage of options, value, animate and orientation with the slider() method.
Code:
<!DOCTYPE html>
<html lang="en">
<head>
<meta charset="utf-8" />
<title>jQuery UI Slider functionality</title>
<link
href="https://code.jquery.com/ui/1.10.4/themes/ui-lightness/jquery-ui.css"
rel="stylesheet"
/>
<script src="https://code.jquery.com/jquery-1.12.4.js"></script>
<script src="https://code.jquery.com/ui/1.10.4/jquery-ui.js"></script>
<script>
$(function () {
$("#slider").slider({
value: 50,
animate: "slow",
orientation: "horizontal",
});
});
</script>
<style>
#slider {
border-color: yellow;
width: 400px;
margin-left: 30px;
}
.div1 {
width: 500px;
height: 150px;
padding-top: 20px;
padding-left: 5px;
text-align: center;
background-color: cadetblue;
}
</style>
</head>
<body>
<div class="div1">
<div id="slider"></div>
<br />
<p style="font-size: larger;">
Click anywhere on the axis to see the animation
</p>
</div>
</body>
</html>
Output:
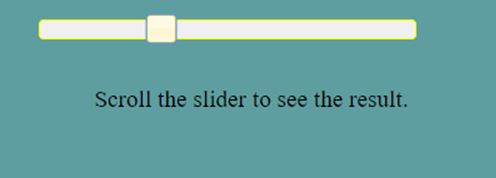
- In this example, the slider value is set as 50 initially, so the handle is a seen at value 50.
- On clicking anywhere on the axis of slider, the handle will move with animation.
Example #3
Here is an another simple example showing the usage of options, range, min, max and values with the slider() method.
Code:
<!DOCTYPE html>
<html lang="en">
<head>
<meta charset="utf-8" />
<title>jQuery UI Slider functionality</title>
<link
href="https://code.jquery.com/ui/1.10.4/themes/ui-lightness/jquery-ui.css"
rel="stylesheet"
/>
<script src="https://code.jquery.com/jquery-1.12.4.js"></script>
<script src="https://code.jquery.com/ui/1.10.4/jquery-ui.js"></script>
<script>
$(function () {
$("#slider").slider({
range: true,
min: 0,
max: 500,
values: [50, 200],
slide: function (event, ui) {
$("#numbers").val(ui.values[0] + "-" + ui.values[1]);
},
});
$("#numbers").val(
$("#slider").slider("values", 0) +
"-" +
$("#slider").slider("values", 1)
);
});
</script>
<style>
.div1 {
width: 500px;
height: 150px;
padding-top: 20px;
padding-left: 5px;
text-align: center;
background-color: cadetblue;
}
#slider {
border-color: yellow;
width: 400px;
margin-left: 30px;
}
</style>
</head>
<body>
<div class="div1">
<p>
<label for="numbers">Number range:</label>
<input type="text" id="numbers" />
</p>
<div id="slider"></div>
</div>
</body>
</html>
Output:
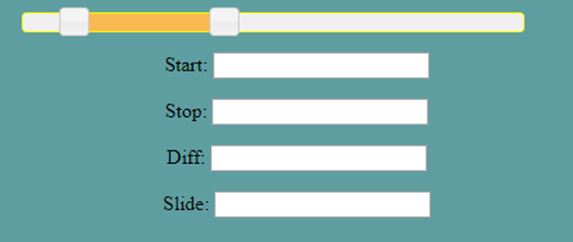
- In the given example, we see a range of numbers getting displayed which is indicated by the space between the handles.
- This space is filled in with a different color to mark the values selected.
- As you move the handle the range getting displayed keeps on changing as well.
Example #4
This example illustrates the usage of event method with slider functionality.
Code:
<!DOCTYPE html>
<html lang="en">
<head>
<meta charset="utf-8" />
<title>jQuery UI Slider functionality</title>
<link
href="https://code.jquery.com/ui/1.10.4/themes/ui-lightness/jquery-ui.css"
rel="stylesheet"
/>
<script src="https://code.jquery.com/jquery-1.12.4.js"></script>
<script src="https://code.jquery.com/ui/1.10.4/jquery-ui.js"></script>
<script>
$(function () {
$("#slider").slider({
range: true,
min: 0,
max: 500,
values: [50, 200],
start: function (event, ui) {
$("#startVal").val(ui.values[0] + " - " + ui.values[1]);
},
stop: function (event, ui) {
$("#stopVal").val(ui.values[0] + " - " + ui.values[1]);
},
change: function (event, ui) {
$("#diffVal").val(ui.values[0] + " - " + ui.values[1]);
},
slide: function (event, ui) {
$("#slideVal").val(ui.values[0] + " - " + ui.values[1]);
},
});
});
</script>
<style>
.div1 {
width: 500px;
height: 200px;
padding-top: 20px;
padding-left: 5px;
text-align: center;
background-color: cadetblue;
}
#slider {
border-color: yellow;
width: 400px;
margin-left: 30px;
}
</style>
</head>
<body>
<div class="div1">
<div id="slider"></div>
<p>
<label for="startVal">Start:</label>
<input type="text" id="startVal" />
</p>
<p>
<label for="stopVal">Stop:</label>
<input type="text" id="stopVal" />
</p>
<p>
<label for="diffVal">Diff:</label>
<input type="text" id="diffVal" />
</p>
<p>
<label for="slideVal">Slide:</label>
<input type="text" id="slideVal" />
</p>
</div>
</body>
</html>
Output:
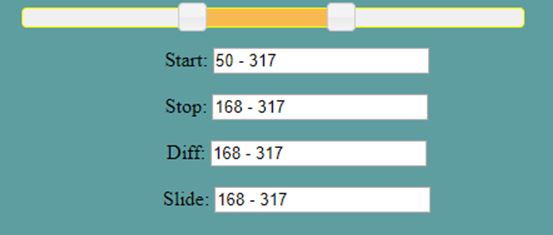
- In the given example, we see the usage of an event method with the slider which gets triggered for a particular event. Here, we have used start, stop , change and slide event methods.
- As we move the handles, we see the changes.
Conclusion
In this article, we saw about the jQuery UI slider functionality which is basically used to pick a numeric value within a given range. The key benefit of using this functionality is that, each and every value you select using the slider is a valid one which is not always the case with the text input.
Recommended Articles
This is a guide to jQuery Slider. Here we discuss the introduction to jQuery Slider, key benefits of using this functionality with programming examples. You may also have a look at the following articles to learn more –


