Updated April 7, 2023
Introduction to jQuery stop
In jQuery, there is an in-built stop() method used to make the current animations for any selected elements to stop running the elements’ animation process. Therefore the effects that are applied to any elements can be halted or are made stopped working with this particular element in jQuery using built-in method stop() for stopping the current animations or effects that were applied to the elements before applying this stop() function. In general, we can define the jQuery stop() method as the in-built method for halting or stopping the current effects of any matched or selected elements before the animations are finished.
Syntax of jQuery stop
Given below is the syntax mentioned:
$(selected_element).stop(stopAll, goToEnd);In jQuery, stop() method syntax is defined as given above, and it is applied on that selected element to which we want the animation to be stopped and such elements, when declared in such syntax, are also known as selectors, and then it takes two parameters such as:
- stopAll: This parameter is an optional parameter that uses the Boolean values to be specified which is used for specifying the queued effects or animations should also be stopped or not. If the value specified is true, we needed to stop the queued animations and falsely if there is no need to stop. By default, the value for this parameter will be false.
- goToEnd: This parameter is also an optional parameter where this also takes the Boolean value as the value for this parameter which is used to specify to the user that it should complete all the effects or animations of the current element immediately or not. If the value specified is true, it will complete all the animations immediately, and if not, then the value is false. By default, the value is false.
How jQuery stop() Function Works with Examples
The stop() method in jQuery is a built-in function for stopping the animations or effects currently running on any element that matches with specified element as a selector in the given stop() function. This stop() function first checks the element which is specified as a selector to this function. Then it will check whether to stop the queued animations of the selected element or not. Also, it will check if it needs to stop all the animations of the selected element immediately or not according to the Boolean value specified; else, by default, it will take it as a false value. It will stop the animations or effects of the currently selected element using this stop() function.
Example #1
In the below example, let us see how to use the stop() function in jQuery for stopping the effects or animations of the selected elements.
Code:
<!DOCTYPE html>
<html>
<head>
<title> jQuery stop() function without parameters </title>
<script src="https://ajax.googleapis.com/ajax/libs/jquery/3.4.1/jquery.min.js"></script>
<script>
$(document).ready(function(){
$(".b1").click(function(){
var div = $("div");
div.animate({height: 150}, "slow");
div.animate({right: "+=200",left: "+=100" }, "slow");
div.queue(function(){
div.dequeue();
});
div.animate({height: 50}, "slow");
div.animate({right: "100", left: "100" }, "slow");
$(".b2").click(function(){
$("div").stop();
});
});
});
</script>
<style>
div {
width:200px;
height:1000px;
position:absolute;
left:10px;
top:100px;
background-color:blue;
}
</style>
</head>
<body>
<button class="b1"> Begin </button>
<button class="b2"> Stop </button>
<div> </div>
</body>
</html>
Output:
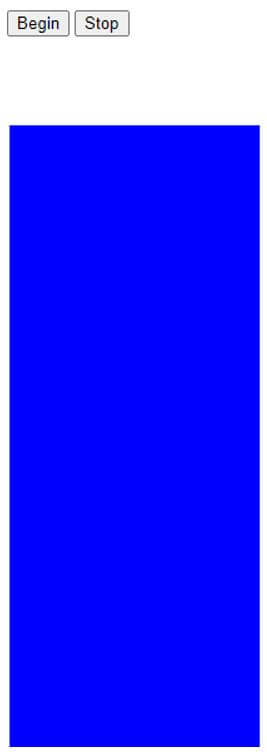
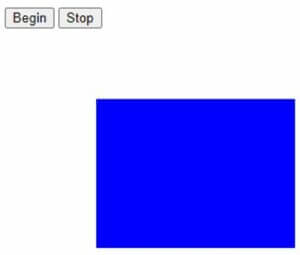
In the above example, we can see; first, we will design any shape or anything so that we can apply animations or effects to it. And such animations are added using the jQuery in-built function animate to a particular element. In this example, we have seen that we have made the document ready to include elements and their events and animations. Then we are including the click function on the button element where there are two buttons in this example on for start button and other for stop where these are used for controlling the animations created for the element “div” because using this element only we have created a square shape using the properties we have designed.
In this example, we have applied the animate() function on the “div” element where first it will make the square go right and then left in slow motion where the changing its size each time the animate() function applied to this “div” function then later using stop() function for the element “div” whenever the stop button is clicked. In this, we have not passed any parameter to this stop() function, so by default, the parameter values will be false. Therefore the output of the above example can be seen in the above screenshots.
Example #2
Now let us see another example where we can specify the parameters to the stop() function.
Code:
<!DOCTYPE html>
<html>
<head>
<title> jQuery stop() function using parameters </title>
<script src=
"https://ajax.googleapis.com/ajax/libs/jquery/3.3.1/jquery.min.js">
</script>
<script>
$(document).ready(function() {
var div = $("div");
$("#start").click(function() {
div.animate({
height: 150
}, "slow");
div.animate({
width: 100
}, "slow");
div.animate({
height: 250
}, "slow");
div.animate({
width: 150
}, "slow");
});
$("#stop").click(function() {
div.stop(true, true);
});
});
</script>
<style>
div {
width: 100px;
height: 100px;
background: red;
border-radius: 50%
}
button {
margin-bottom:30px;
}
</style>
</head>
<body>
<button id="start">Start </button>
<button id="stop">Stop </button>
<div> </div>
</body>
</html>
Output:
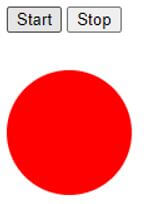
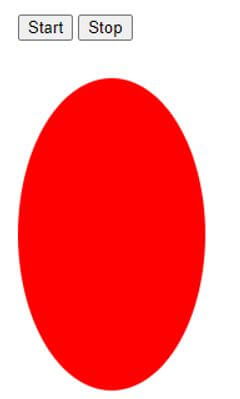
In the above example, we can see it is similar to the above example. Still, here we are creating a circle instead of a square within the “div” tag or element ad we are applying animations also to the same element where this element will not go left or right but instead only its height and width are changing for animations, and this is done using the animate() function on the “div” element. The animation is in slow motion as specified in the animate() function.
So here then we are applying the stop() function for the same element “div,” which already has some queued animations, and we are specifying two parameters with value as “true” for both in the stop() function where it indicates which will stop the animations which are queued according to the first parameter and it will stop the animations immediately according to the second parameter. The output is as shown in the above screenshots.
Conclusion
In this article, we conclude that jQuery provides an in-built function to stop running the applications of any selected elements or tag to stop the running animations applied to that selected element. In jQuery, the finish() function also stops the current running animations of ay matched elements, which will completely remove all the queued animations also unlike in the stop() function.
Recommended Articles
This is a guide to jQuery stop. Here we discuss the introduction and how the jQuery stop() function works with examples, respectively. You may also have a look at the following articles to learn more –
