Updated April 7, 2023
Introduction to jQuery UI Resizable Method
jQuery UI resizable widget enables the users to alter the size of any DOM element by making the selected DOM elements resizable (adding the drag handlers to the elements). This feature is implemented by the jQuery UI resizable() method which displays an icon in the bottom right border of the element, indicating resizing. Using the mouse, one can grab the bottom right border of the element and drag to a certain height or width as desired. One or more drag handlers can be also be specified in addition to specifying the constraints such as max and min-height and width.
Syntax:
There are two approaches of using resizable() method.
$(selector, context).resizable(options)where, options parameter refers to an object which specifies the behavior of elements to be resized.
More than one options can be used each separated with a comma.
$(selector, context).resizable({option1: value1, option2: value2……….})Some of the options that can be used with this method are animate, aspectRatio, autoHide, delay, containment, cancel, disabled, distance, handles, grid, maxHeight, minHeight, maxWidth,minWidth.
$(selector, context).resizable("action", params)where, action refers to a string that specifies the action to be performed on resizable elements.
Some of the actions that can be use with the resizable() method are destroy, disable, enable, widget, etc.
How jQuery UI Resizable Method Work?
There are two ways of using this method as discussed below.
1. $(selector, context).resizable(options)
This approach declares that the resizable() method can be used to resize a DOM element. The parameter optionsrefers to an object which specifies the behavior of elements to be resized.
Let us look at few examples to understand this approach in a better way.
Example #1
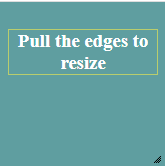
Let us consider a simple example to understand the functionality of resizable() method where no parameter is passed to the method.
Code:
<!DOCTYPE html>
<head>
<title>jQuery UI Resizable Example</title>
<link
href="https://code.jquery.com/ui/1.10.4/themes/ui-lightness/jquery-ui.css" rel="stylesheet"/>
<script src="https://code.jquery.com/jquery-1.10.2.js"></script>
<script src="https://code.jquery.com/ui/1.10.4/jquery-ui.js"></script>
<script>
$(function () {
$("#resizable").resizable();
});
</script>
<style>
.ui-widget-header {
background: cadetblue;
border: 1px solid #b9cd6d;
color: #ffffff;
font-weight: bold;
}
.ui-widget-content {
background: cadetblue;
border: 1px solid #dddddd;
color: #333333;
}
#resizable {
width: 150px;
height: 150px;
padding: 0.5em;
text-align: center;
margin: 0;
}
</style>
</head>
<body>
<div id="resizable" class="ui-widget-content">
<h3 class="ui-widget-header">Pull the edges to resize</h3>
</div>
</body>
</html>
Output:
- Below screen displays when the above code gets executed.
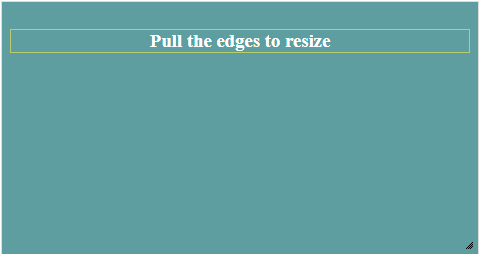
- Now, using the mouse, you can drag the bottom right corner of the border to the size you desire as shown below.
Example #2
Here is another example illustrating the implementation of the resizable() method, passing the parameters containment, minHeight, maxHeight, minWidth and maxWidth.
Code:
<!DOCTYPE html>
<head>
<title>jQuery UI Resizable Example</title>
<link
href="https://code.jquery.com/ui/1.10.4/themes/ui-lightness/jquery-ui.css"
rel="stylesheet"
/>
<script src="https://code.jquery.com/jquery-1.12.4.js"></script>
<script src="https://code.jquery.com/ui/1.10.4/jquery-ui.js"></script>
<script>
$(function () {
$("#resizable").resizable({
containment: "#container",
minHeight: 60,
minWidth: 60,
maxWidth:280,
maxHeight:280,
});
});
</script>
<style>
.ui-widget-header {
background: grey;
border: 1px solid #b9cd6d;
color: yellow;
font-weight: bold;
}
.ui-widget-content {
background: cadetblue;
border: 1px solid #dddddd;
color: #333333;
}
#container {
width: 300px;
height: 300px;
}
#resizable {
background-position: top left;
width: 250px;
height: 100px;
}
#resizable,
#container {
padding: 0.5em;
}
</style>
</head>
<body>
<div id="container" class="ui-widget-content">
<div id="resizable" class="ui-state-active">
<h3 class="ui-widget-header">
Resizing limited to this container
</h3>
</div>
</div>
</body>
</html>
Output:
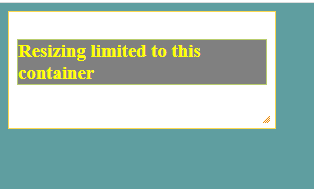
- Below screen displays when the above gets executed.
- Now, hold the cursor and drag the bottom right corner to resize the element but the size can not go beyond the main conatiner as shown below.
- Containment ensures that content do not move all over the page while resizing of any element is done.
- You can set constraints of min and max height and width for the resizable element as per your requirements.
Example #3
Here is another example illustrating the implementation of a resizable() method with options delay, distance and autoHide.
Code:
<html>
<body>
<div id="resizable_delay" class="square ui-widget-content">
<h3 class="ui-widget-header">
Resize will start only after a delay of 0.5 secs
</h3>
</div>
<br />
<div id="resizable_distance" class="square ui-widget-content">
<h3 class="ui-widget-header">
Resize will start only at a distance of 50px
</h3>
</div>
<br />
<div id="resizable_autoHide" class="square ui-widget-content">
<h3 class="ui-widget-header">
Hover here to see the resize icon
</h3>
</div>
</body>
</html>
Output:
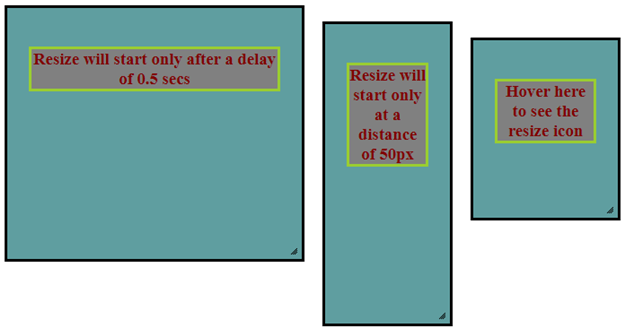
- Below screen displays when the above code gets executed.
- Once you start dragging the bottom right corner of the square boxes, you will find that
-
- Resizing of the first square box starts only after a delay of 0.5 secs, that is, 500 ms.
- The resizing of the second square box starts only after the mouse moves to 50 px.
- For the third square box, resize icon appears once you hover the mouse over it.autoHide set to true hides all the drag handles till the time mouse pointer hovers over the element.
2. $(selector, context).resizable(“action”, params)
This approach declares that certain actions can be performed on resizable elements.
Let us look at an example to understand this approach in detail.
Example
Here is an example illustrating the implementation of a resizable() method with actions disable, destroy and enable.
Code:
<!DOCTYPE html>
<head>
<title>jQuery UI Resizable Example</title>
<link
href="https://code.jquery.com/ui/1.10.4/themes/ui-lightness/jquery-ui.css"
rel="stylesheet"
/>
<script src="https://code.jquery.com/jquery-1.10.2.js"></script>
<script src="https://code.jquery.com/ui/1.10.4/jquery-ui.js"></script>
<script>
$(function () {
$("#resizable1").resizable();
$("#resizable1").resizable("disable");
$("#resizable2").resizable();
$("#resizable2").resizable("destroy");
$("#resizable3").resizable();
$("#resizable3").resizable("enable");
});
</script>
<style>
.ui-widget-header {
background: cadetblue;
border: 1px solid black;
color: maroon;
font-weight: bold;
width:600px;
}
.ui-widget-content {
background: cadetblue;
border: 1px solid black;
color: #333333;
width:600px;
}
#resizable1,
#resizable2,
#resizable3 {
width: 600px;
height: 150px;
padding: 0.5em;
text-align: center;
margin: 0;
}
</style>
</head>
<body>
<div id="resizable1" class="ui-widget-content">
<h3 class="ui-widget-header">Disabled!</h3>
</div>
<br />
<div id="resizable2" class="ui-widget-content">
<h3 class="ui-widget-header">Destroyed!</h3>
</div><br>
<div id="resizable3" class="ui-widget-content">
<h3 class="ui-widget-header">Can be resized.</h3>
</div>
</body>
</html>
Output
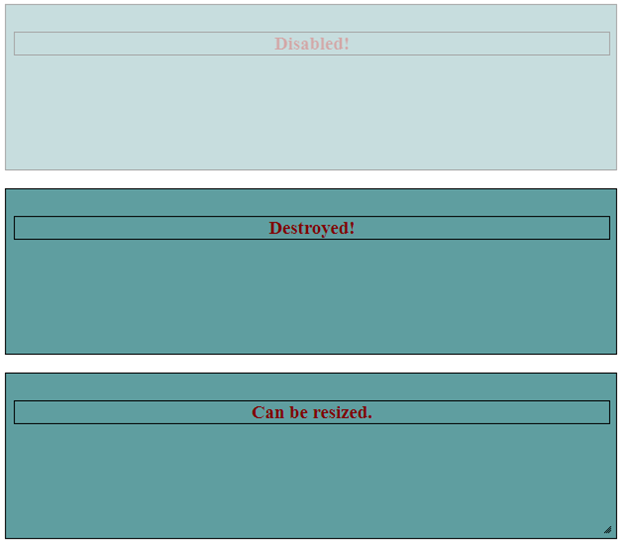
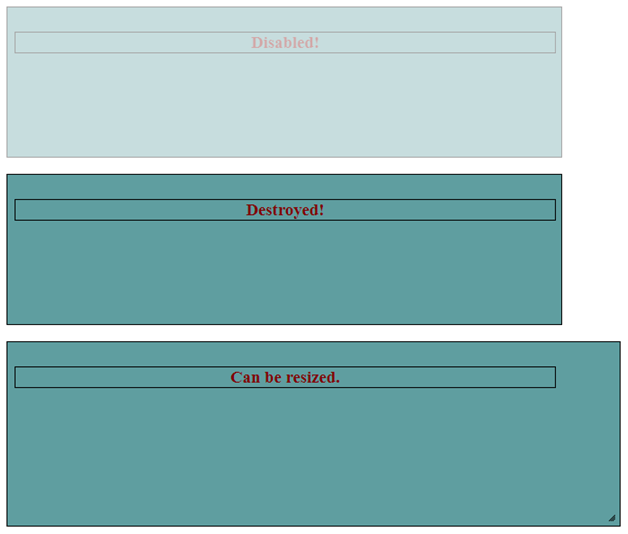
- Below screen displays when the above code gets executed.
- The first two boxes can not be resized since one is disabled and the other one is destroyed.
- The only resizable box is the third one as it is enabled to be resized as shown below.
Conclusion
- In this article, we discussed about the jQuery UI resizable feature which allows users to change the size of any DOM element with the constraints as desired.
- This feature is implemented using the resizable() method which performs various actions on the resizable element.
Recommended Articles
This is a guide to jQuery UI Resizable. Here we discuss a Brief Overview on jQuery UI Resizable and its Examples along with its Code Implementation. You can also go through our other suggested articles to learn more –

