Updated July 4, 2023

Overview of jQuery wrap()
The jQuery wrap() is a pre-defined function applied when there is a requirement for a HTML structure to be wrapped around one or more matches elements from the web page. The syntax used for defining this function is ‘$( selector ).wrap(wrapElement, function( index ) )’, where wrapElement is a mandatory parameter used to represent the particular element for which the wrap() function is applied on, and function (index) is an optional parameter used to represent the function from which the element property can be fetched.
Syntax:
$(selector).wrap(wrapElement, function(index))Parameters
- wrapElement: wrapElement is not an optional parameter, which is used to specify which HTML element is to wrap around each element of the set of matched elements. The wrapElement parameter possible values can be JQuery objects, HTML elements, DOM elements.
- function( index ): function( index ) is an optional parameter, which is used to specify the name of the function to be executed and return wrapped element. Where the index parameter used to specify the element’s index position in a set of matched elements.
Examples of jQuery wrap()
Below are various examples of jQuery wrap():
Example #1 – To wrap <div> HTML Element
Next, we write the html code to understand the jQuery wrap() method more clearly with the following example –
Code:
<!DOCTYPE html>
<html lang= "en">
<html>
<head>
<script src="https://ajax.googleapis.com/ajax/libs/jquery/1.11.3/jquery.min.js" >
</script>
<title> This is an example for jQuery wrap( ) method </title>
<!-- code to show the jQuery wrap( ) working method -->
<script>
$(document).ready( function(){
$("button").click( function(){
$("h2").wrap("<div> </div>");
});
});
</script>
<style>
div{ background-color : red;}
</style>
</head>
<body>
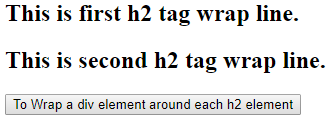
<h2> This is first h2 tag wrap line. </h2>
<h2> This is second h2 tag wrap line. </h2>
<button> To Wrap a div element around each h2 element </button>
</body>
</html>
Output:
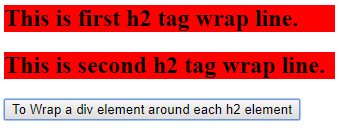
Once they click the button, the output is
So in the above example the <div> Html element is wrap around the <h2> Html elements.
Example #2 – With div tag properties
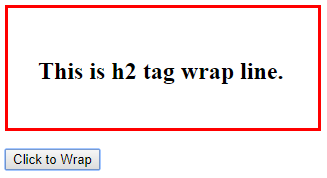
jQuery wrap( ) method sets the properties of div tag as padding, height, width and border to some values.
Code:
<!DOCTYPE html>
<html lang= "en">
<html>
<head>
<title> This is an example for jQuery wrap( ) method </title>
<script src="https://ajax.googleapis.com/ajax/libs/jquery/3.3.1/jquery.min.js" >
</script>
<!-- code to show the jQuery wrap( ) working method -->
<script>
$(document).ready(function() {
$("button").click(function() {
$("h2").wrap("<div> </div>");
});
});
</script>
<style>
div {
padding: 30px;
height: 60px;
width: 250px;
border: 3px solid red;
}
</style>
</head>
<body>
<h2> This is h2 tag wrap line. </h2> <br>
<button> Click to Wrap </button>
</body>
</html>
Output:
Once they click the button, the output is –
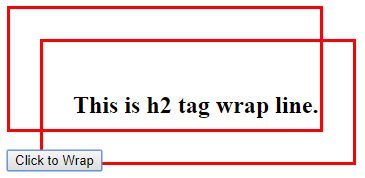
Once again if click the button, the output is –
So the wrapping to the h2 tag keeps on apply if we click the button.
Example #3 – With content as parameter
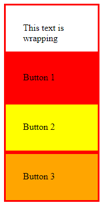
Where the jQuery wrap( ) method accept cont as parameter where the cont is ‘<div class= “div” > </div>’, which means which ever html elements having the same class that is “div” for all those tags the wrapping is done.
Code:
<!DOCTYPE html>
<html lang= "en">
<html>
<head>
<title> This is an example for jQuery wrap( ) method </title>
<script src="https://ajax.googleapis.com/ajax/libs/jquery/3.3.1/jquery.min.js" >
</script>
<!-- code to show the jQuery wrap( ) working method -->
<script>
$(document).ready( function() {
$("div").click( function () {
var cont = '<div class= "div" > </div>';
$("#divid").wrap( cont );
});
});
</script>
<style>
div {
padding: 30px;
height: 20px;
width: 100px;
border: 3px solid red;
}
</style>
</head>
<body>
<div class= "div" id= "divid"> This is text is wrapping </div>
<div class= "div" style= "background-color : red;" > Button 1 </div>
<div class= "div" style= "background-color : yellow;" > Button 2 </div>
<div class= "div" style= "background-color : orange;" > Button 3 </div>
</body>
</html>
Output:
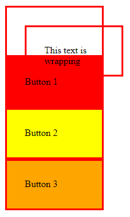
Once we click any of the buttons either button 1, button 2 and button 3, the output is –
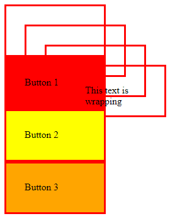
Once again if click any of the button either button 1, button 2 and button 3, the output is –
So the wrapping to the div tag keeps on apply if we click any of the buttons.
Example #4 – jQuery wrap( ) method to wrap all inner contents
Code:
<!DOCTYPE html>
<html lang="en">
<head>
<title>Wrapping HTML Around the Elements in jQuery</title>
<script src="https://code.jquery.com/jquery-1.12.4.min.js" > </script>
<script>
$(document).ready( function(){
$(".cont").wrap( '<div class= "wrap"> </div>');
$("button").click(function(){
$("p").contents().wrap("<em> <b></b></em>");
});
});
</script>
<style>
.cont{
padding : 10px;
background : yellow;
font-size: 20px;
}
.wrap{
padding : 30px;
background : red;
margin: 15px 0;
}
</style>
</head>
<body>
<button type= "button"> click here for wrapping </button>
<div class="cont">
<p> This is text is wrapping. </p>
</div>
</body>
</html>
Output:
Once we click any of the buttons, the output is –
Conclusion
The jQuery wrap() method uses to wrap an HTML structure around each element of the set of matched elements. This method is a built-in method of jQuery. This method accepts any object or string that through the $( ) factory function.
The syntax of a jQuery wrap( ) is $( selector ).wrap( wrapElement, function( index ) ). The parameter are –
- wrapElement – wrapElement is not an optional parameter, which is used to specify which html element is to wrap around each element of the set of matched elements and the possible values can be JQuery objects, html elements, DOM elements.
- function( index ) – function( index ) is an optional parameter, which is used to specify name of the function to be execute and return wrapped element. Where the index parameter used to specify the element’s index position in a set of matched elements.
Recommended Articles
This has been a guide to jQuery wrap(). Here we discuss the introduction, syntax, parameters, and examples of jQuery(). You may also have a look at the following articles to learn more –
