Updated March 29, 2023

Definition of JUnit 5 Gradle
Junit 5 gradle plugin is developed by the junit platform, from the version of 4.6 gradle will support the native support for the executing tests on the platform of junit. To enable the plugin we need to specify the useJunitPlatform function in the declaration of the task name as build. gradle. We can check the gradle version by using “gradle –v” command. The standard gradle test will not provide dedicated DSL to set the configuration.
What is JUnit 5 Gradle?
- We can provide the parameter of configuration which is in the build script with a system properties or by using file of junit-platform.properties.
- In order to run the test, the test engine will be classpath for the implementation. For configuring support of test of Jupiter is configuring the dependency of test implementation.
- Junit will use the APIs of java logging as java.util.logging package for emitting the debug information and warning.
- At the time of using junit 5 gradle, we should include the junit-jupiter-api, junit-jupiter-engine, junit-platform-suite, and junit-Jupiter-params dependency in our project.
Creating JUnit 5 Gradle
- We are creating the project name as JunitGradle.
- We have provided project group name as com.example, artifact name as JunitGradle, project name as JunitGradle, and selected java version as 11. We are defining the version of spring boot as 2.6.7.
Group – com.example
Artifact name – JunitGradle
Name – JunitGradle
Spring boot – 2.6.7
Project – Maven
Java – 11
Package name – com.example.JunitGradle
Project Description – Project for JunitGradle
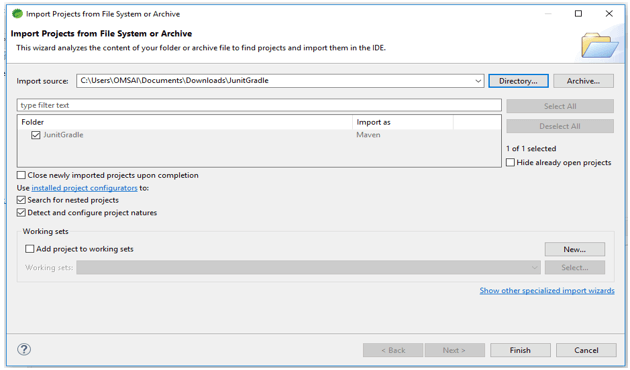
- In this step, we are extracting the downloaded project and opening the same by using the spring tool suite.
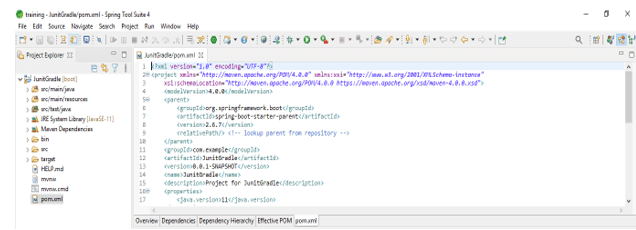
- In this step, we are checking all project structures and their files are as follows. Also, we are checking whether the pom.xml file is created or not. Suppose this file is not created then we need to create the same manually. In the below example this file is created, so we have no need to create it manually.
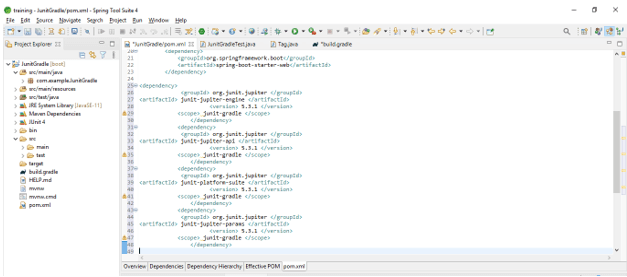
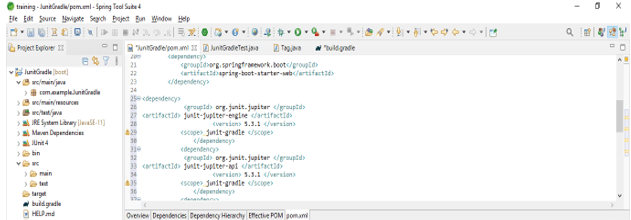
- Add the junit dependency in the project. We are adding junit dependency as follows.
Code –
<dependency>
      <groupId> org.junit.jupiter </groupId>
      <artifactId> junit-jupiter-engine </artifactId>
      <version> 5.3.1 </version>
      <scope> junit-gradle </scope>
</dependency>
<dependency>
      <groupId> org.junit.jupiter </groupId>
      <artifactId> junit-jupiter-api </artifactId>
      <version> 5.3.1 </version>
      <scope> junit-gradle </scope>
</dependency>
<dependency>
       <groupId> org.junit.jupiter </groupId>
       <artifactId> junit-platform-suite </artifactId>
       <version> 5.3.1 </version>
       <scope> junit-gradle </scope>
</dependency>
<dependency>
      <groupId> org.junit.jupiter </groupId>
      <artifactId> junit-jupiter-params </artifactId>
      <version> 5.3.1 </version>
      <scope> junit-gradle </scope>
</dependency>- After adding the dependency in this step we are exploring integration with junit 5 and gradle are as follows. In the below example, we are using two types of tests in our project i.e. short-running and long-running. We are using the junit 5 @Tag annotation as follows. In the below example, we are using two tags i.e. slow_tag and fast_tag. Both the tags we are using with @Tag annotation. We are @Test annotation to create a test suite for the application. We are using the assertEquals method to run the test cases of the project as follows.
Code –
public class JunitGradleTest {
@Tag ("slow")
@Test
public void testAddMaxInteger () {
assertEquals (2147, Integer.sum (2147, 3000));
}

@Tag("fast")
@Test
public void testDivide ()
{
assertThrows (ArithmeticException.class, () -> {
Integer.divideUnsigned (42, 0);
       } );
}
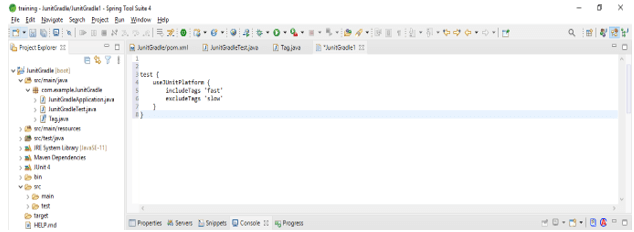
}- After exploring the integration now in this step we are telling the build tool which tests we are executing. In the below example, we are using includeTags to execute the slow and fast values of the junit platform.
Code –
test {
         useJUnitPlatform {
         includeTags 'fast'
         excludeTags 'slow'
         }
}
Junit 5 Gradle Setup
- To set up junit 5 we need to install gradle first in our system. Suppose we have installed gradle in our system already then we check the version of gradle by using “gradle –v” command.
- The below example shows to check the gradle version are as follows.
gradle –v- We need a gradle 4+ higher version to use the same with junit 5. Also, we can use build.gradle file to configure the gradle. We can put the below code into the build.gradle file to use a specified version of gradle which was suitable for the junit5.
Code –
test {
        useJUnitPlatform()
}- After using the above code in our project, junit 5 will take the specified version of gradle which was needed for our project.
- After checking the version of gradle we are adding the dependency in our project as follows.
Code –
<dependency>
  <groupId> org.junit.jupiter </groupId>
  <artifactId> junit-jupiter-engine </artifactId>
  <version> 5.3.1 </version>
  <scope> junit-gradle </scope>
</dependency>
<dependency>
  <groupId> org.junit.jupiter </groupId>
  <artifactId> junit-jupiter-api </artifactId>
  <version> 5.3.1 </version>
  <scope> junit-gradle </scope>
</dependency>- After adding the dependency we are creating a test suite for the project as follows.
Code –
@Test
public void testAdd ()
{
       assertEquals(35, Integer.sum(13, 25));
}
Junit 5 gradle Project structure
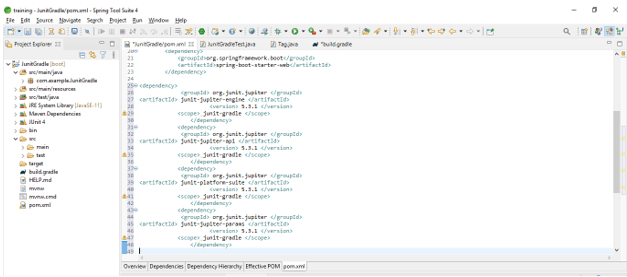
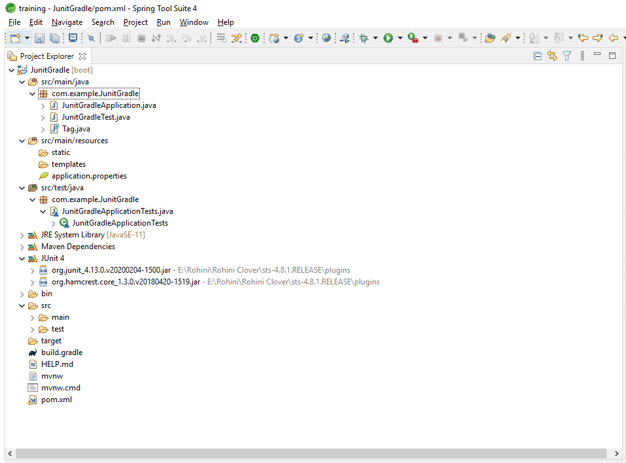
- Below is the project structure. The project structure will start from the main module.
- In the above example, we can see that the project structure is started with the source, in the source module main package is contained.
- At the time of creating new java file, it will come under src/main/java folder. In the above example, we have created a spring boot project with junit5.
- xml and build.gradle file is very important in any project to add the dependency and use the dependency throughout our project.
- For running the dependency we need to add the junit platform suite engine dependency in pom.xml file.
- The project structure is very useful to understand the flow of the project, it will flow from one module to another module
Conclusion
Junit will use the APIs of java logging as java.util.logging package for emitting the debug information and warning. Junit 5 gradle plugin is developed by the junit platform, from the version of 4.6 gradle will support the native support for the executing tests on the platform of junit.
Recommended Articles
This is a guide to JUnit 5 Gradle. Here we discuss the Definition, What is JUnit 5 Gradle, how to create it, and examples with code implementation. You may also have a look at the following articles to learn more –

