Updated February 17, 2023
Introduction to JUnit Framework
The JUnit framework is a regression testing framework that developers use to implement unit testing in java. It is used to accelerate the speed of programming and increase code quality. We can easily integrate it with maven, ant, and eclipse. It provides different features of the junit test frame; we can test our application most efficiently using the same.
What is JUnit Framework?
- It is an open-source framework that java programmers use for testing purposes. Java programmers create test cases based on the code they have developed.
- Junit is one of the frameworks used for testing purposes. The current version of junit is 5. For testing purposes, we need to create the test cases.
- A unit test case is the program code used to ensure that our program logic works as expected. It is essential and valuable in unit testing.
JUnit Framework Project
We can implement the junit framework project using IDE like eclipse or spring tool suite. In the below example, we are implementing the project by using the spring tool suite as follows:
The below steps show the project as follows. We are creating a project name as JunitFramework.
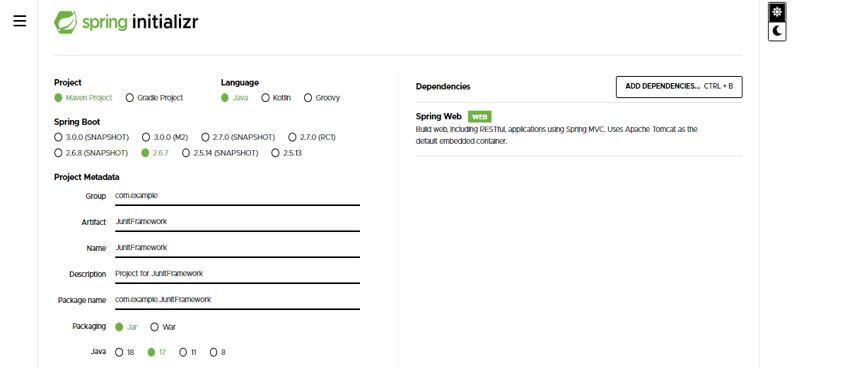
In this step, we are creating the project template of the junit framework in spring boot. We provide project group names as com. Examples are artifact names as JunitFramework, project names as JunitFramework, and selected java version as 11. We are defining the version of spring boot as 2.6.7.
Group – com.example Artifact name – JunitFramework
Name – JunitFramework Spring boot – 2.6.7
Project – Maven Java – 11
Package name – com.example. JunitFramework
Project Description – Project for JunitFramework
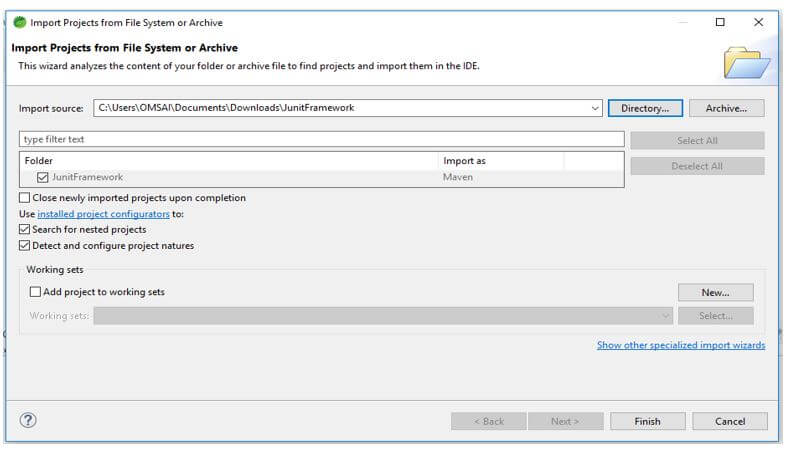
In this step, we extract the downloaded project and open the same by using the spring tool suite.
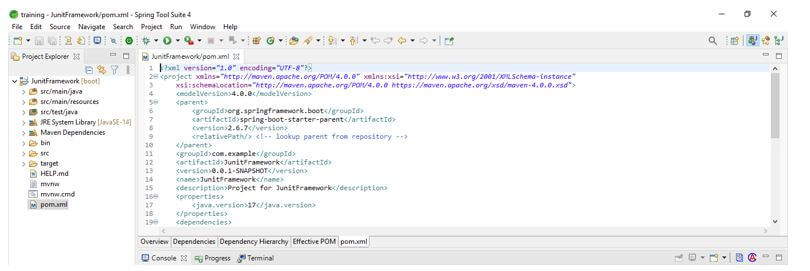
In this step, we check all the project structure and its files. Also, we are checking whether that pom.xml file is created or not. If this file is not created, we need to create the same manually. However, this file is created in the below example, so we do not need to create it manually.
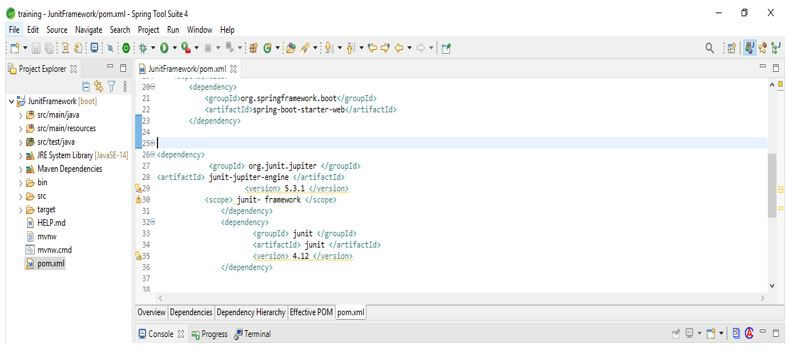
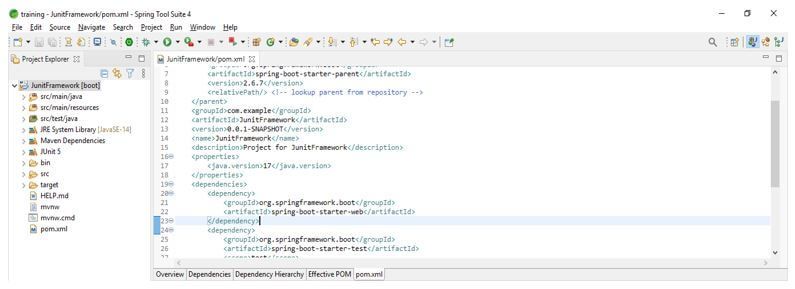
In this step, we are adding the junit dependency to the project. We are adding junit dependency as follows.
Code:
<dependencies>
<dependency>
   <groupId> org.junit.jupiter </groupId>
   <artifactId> junit-jupiter-engine </artifactId>
   <version> 5.3.1 </version>
   <scope> junit- framework </scope>
</dependency>
<dependency>
   <groupId> junit </groupId>
   <artifactId> junit </artifactId>
   <version> 4.12 </version>
</dependency>
</dependencies>
<properties>
    <maven.compiler.source> 1.8 </maven.compiler.source>
    <maven.compiler.target> 1.8 </maven.compiler.target>
</properties>
<reporting>
<plugins>
<plugin>
   <groupId> org.apache.maven.plugins </groupId>
   <artifactId> maven-surefire-report-plugin </artifactId>
   <version> 2.19.1 </version>
</plugin>
</plugins>
</reporting>
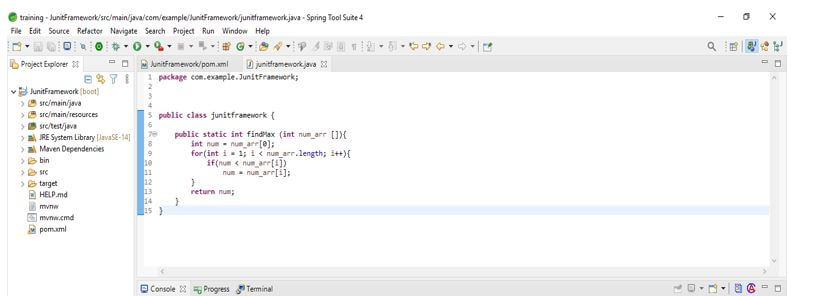
After creating the project structure and adding the dependency in this step, we write a code containing the program logic. Finally, we are creating a class name as junitframework.
Code:
public class junitframework {
public static int findMax (int num_arr []){
int num = num_arr [0];
{
}
return num;
}
}
After writing the project’s logic in this step, we are writing the test case. In the below example, we are using the junit 5 version.
Code:
public class Junit_Framework_Test {
@Test
public void testFindMax () {
assertEquals (4,junitframework.findMax (new int [] {11, 31, 41, 21}));
assertEquals (-1,junitframework.findMax (new int [] {-121, -11, -31, -41, -21}));
}
}
After creating the test case in the below example, we are running the same by using the junit test.
JUnit Framework Selenium Scripts
Below is the selenium script annotation, which we use with the junit framework.
- The @BeforeAll annotation is used to initialize the object we have used when running any test. When initializing a thing, the beforeclass method will invoke only once.
- The @Before annotation is used when we want to initialize any method in our program.
- The @Test annotation is used to tell the method we are executing test cases on specified code on which method we are using @Test annotation.
- The @AfterAll method is initialized when we call this method in our program. We have used all the annotations in a single code in the below code. We have used static class to define the example of selenium scripts.
- Below is the example of @BeforeAll, @Before, @AfterAll, and @After annotation in the selenium junit framework.
Selenium Script Code:
public class JunitFramework_Selenium {
@BeforeAll
public static void Class ()
{
   System.out.println ("@BeforeAll annotation");
}
@Before
public static void Class1 ()
{
   System.out.println ("@Before annotation");
}
@AfterAll
public static void Class2 ()
{
   System.out.println ("@AfterAll annotation");
}
@After
public static void Class3 ()
{
   System.out.println ("@After annotation");
}
@Test
public static void Class4 ()
{
   System.out.println ("@Test annotation");
   }
}
Junit Framework Test Steps
To test the junit framework project, we need IDE to run the test using junit.
In the below example, we use the spring tool suite to run the test.
1. Create a project using the spring tool suite or any IDE used to develop the project using java.
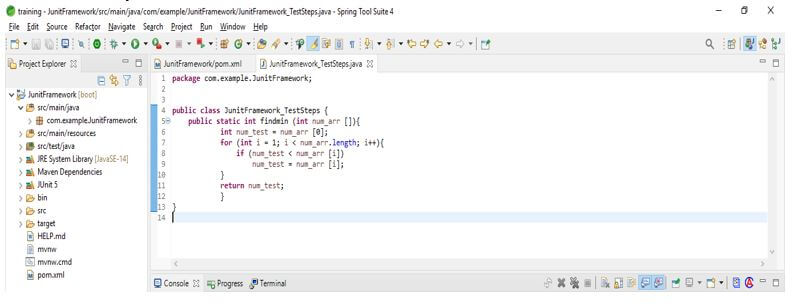
2. After creating the project, we are writing the code of the junit framework test as follows.
Code:
public class JunitFramework_TestSteps {
public static int findmin (int num_arr []){
int num_test = num_arr [0];
{
}
return num_test;
   }
}
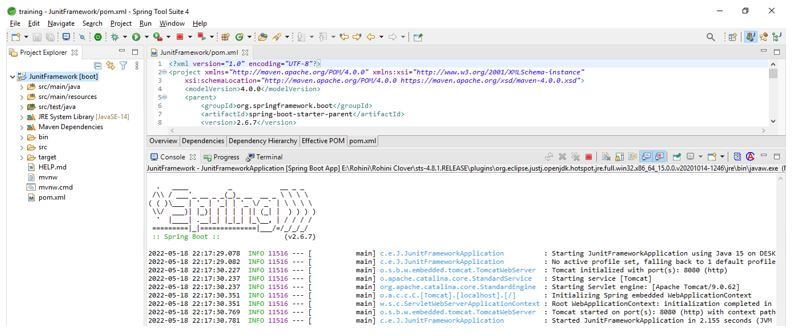
3. After creating the program code in this step, we run the project using the junit test as follows.
Conclusion
JUnit is one of the frameworks used for testing purposes. The current version of junit is 5. For testing purposes, we need to create the test cases. It is a regression testing framework developers use to implement unit testing in java.
Recommended Articles
This is a guide to JUnit Framework. Here we discuss the introduction, JUnit framework project, selenium scripts, and test steps. You may also have a look at the following articles to learn more –

