Updated April 4, 2023
Introduction to JUnit Maven Dependency
JUnit is the testing framework that is extensively used for java projects built in the maven project format for unit testing purposes. Here we will see how we can mention the JUnit dependency in pom.xml file in a maven project and see various annotations and assert methods that can be used in java projects. Two types of JUnit versions were written from scratch and have huge differences in their usage. We will see about both of them and how we can perform unit testing in eclipse IDE for java projects.
We require org.junit package while performing unit testing with JUnit 4 and org.junit.jupiter.api package while doing testing with JUnit 5.
Tags for JUnit Maven Dependency
The latest release dependency tags for JUnit4 and JUnit5 are as follows:
Tag for JUnit4
Following is the latest release dependency tag for JUnit 4.
Code:
<!-- https://mvnrepository.com/artifact/junit/junit -->
<dependency>
<groupId>junit</groupId>
<artifactId>junit</artifactId>
<version>4.13</version>
<scope>test</scope>
</dependency>
Tag for JUnit5
JUnit 5 has the following dependency tag to be added in maven’s pom.xml file for performing unit testing in java projects using maven.
Code:
<!-- https://mvnrepository.com/artifact/org.junit/junit5-engine -->
<dependency>
<groupId>org.junit</groupId>
<artifactId>junit5-engine</artifactId>
<version>5.0.0-ALPHA</version>
</dependency>
Examples of JUnit Maven Dependency
Given below are the examples mentioned:
Example #1: JUnit 4
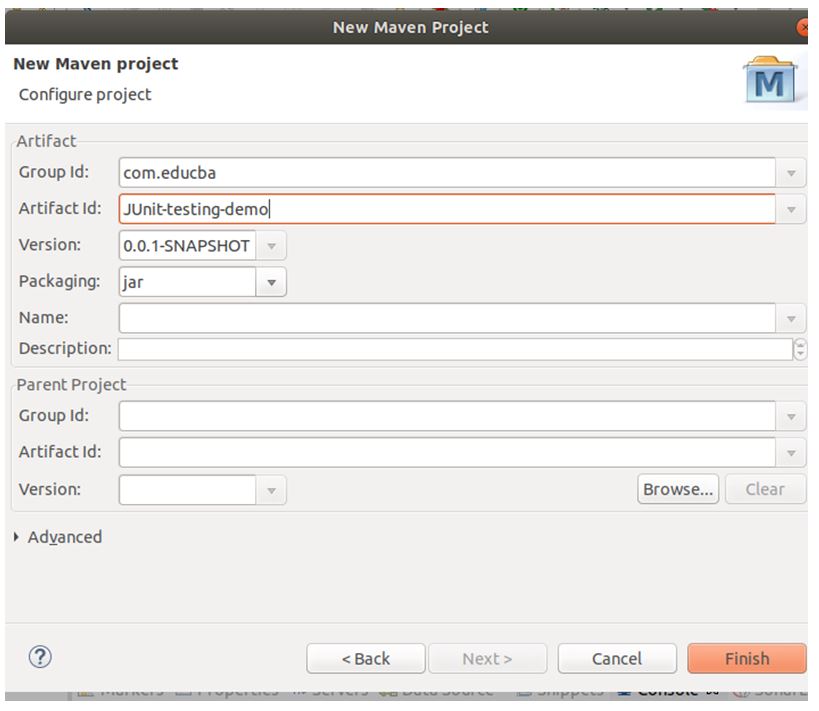
Begin by creating a new maven project.
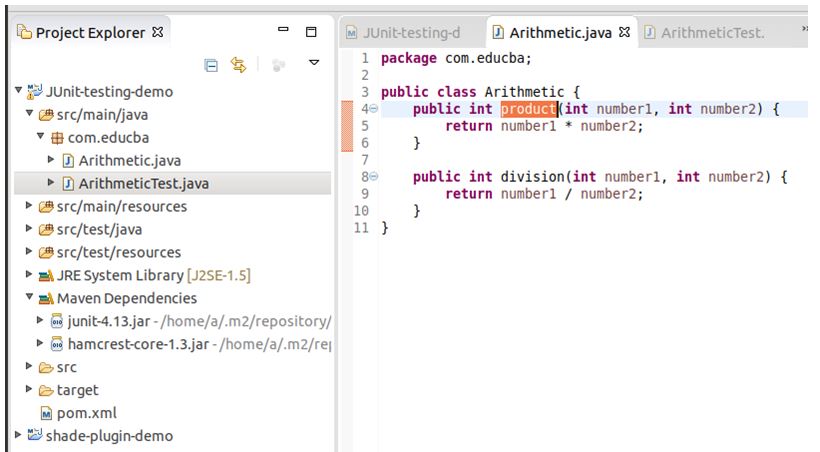
Consider the following example where we have two methods, one for calculating product and other for division in class named Arithmetic. Create a new java class file named Arithmetic.
Code:
public class Arithmetic {
public int product(int number1, int number2) {
return number1 * number2;
}
public int division(int number1, int number2) {
return number1 / number2;
}
}
This class file should be structured and located in the following way:
Now, we will create a test class named ArithmeticTest according to coding conventions the name of the testing class should be the name of the class which is being tested followed by the Test keyword. This will contain test methods whose naming convention is the name of the method being test prepended with test word. Hence, here are two testing methods named testProduct and testDivision.
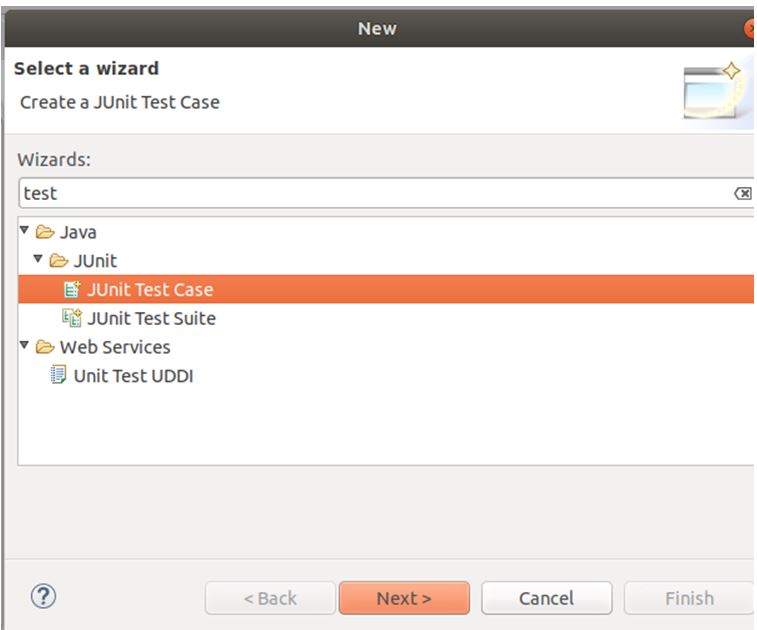
The test class can be created by clicking on new -> other and then the test case option inside JUnit as shown below:
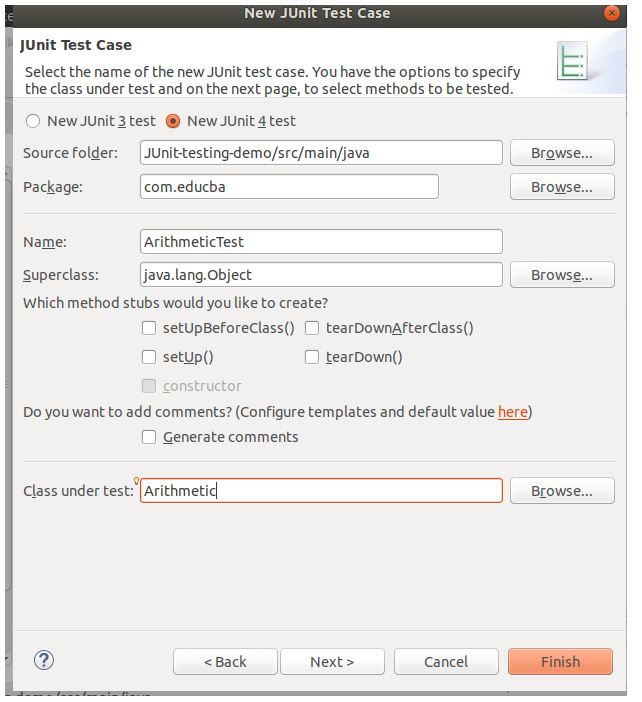
Then select the methods you want to add in the test class file and mention the name of the test class file and the file being tested in the following window to create a test class file.
Code:
import org.junit.*;
public class ArithmeticTest {
@BeforeClass
public static void setUpClass() {
// This block is executed before all the methods of test
}
@Before
public void setUp() {
// This block is executed before each method of test
}
@Test
public void testProduct() {
// This block is executed for testing product method of Arithmetic class
Arithmetic arithmetic = new Arithmetic();
int number1 = 100;
int number2 = 5;
int actualvalue = arithmetic.product(number1, number2);
int expectedvalue = 500;
assertEquals(expectedvalue, actualvalue);
}
@Test
public void testDivision() {
// This block is executed for testing division method of Arithmetic class
}
@After
public void tearDown() {
// This block is executed after each method of test
}
@AfterClass
public static void tearDownClass() {
// This block is executed after all the methods of test
}
}- BeforeClass: The code that you want to execute only once before any other method is executed such as setting up an environment for testing, opening database connection, etc can be included over here.
- Before: This is the method that will be executed before each of the test methods is executed.
- Test: The code where you want to check the execution and performance of your method can be included in the test method. Many assertion methods are available that will be useful to decide the correctness of working. They will result in java.lang.AssertionError is condition fails.
- After: This is the method that will be executed after each of the test methods is executed.
- AfterClass: The code that you want to execute only once after all other test methods are executed such as clearing up the environment of testing, closing database connection, etc can be included over here.
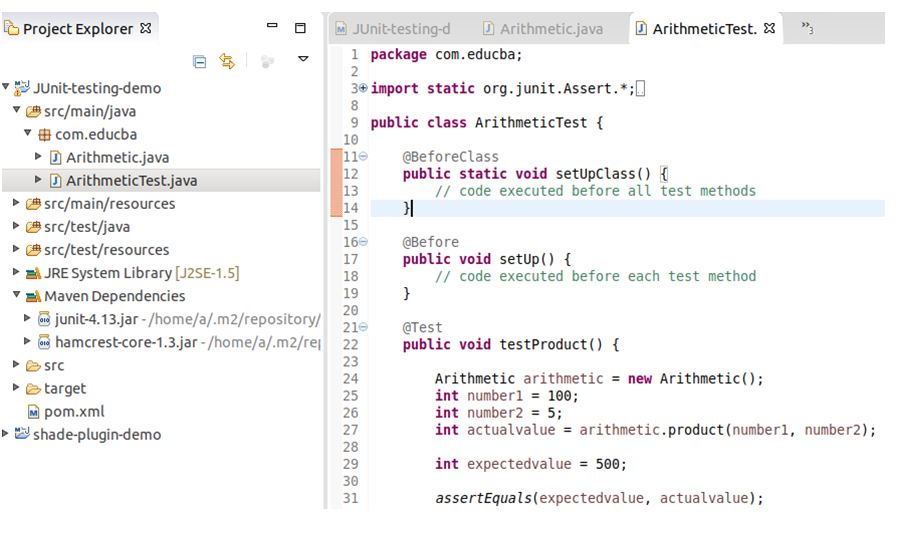
This ArithmeticTest class file should be structured and located in the following way:
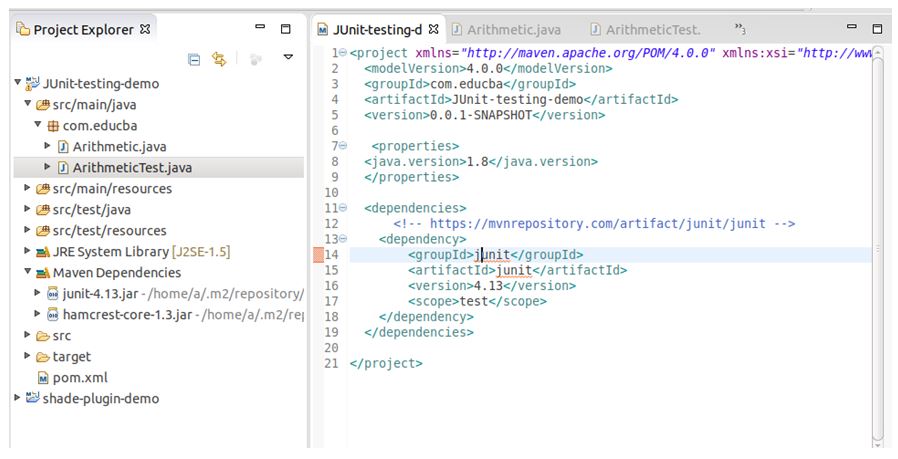
Maven’s pom.xml will contain:
Code:
<project xmlns="http://maven.apache.org/POM/4.0.0"xmlns:xsi="http://www.w3.org/2001/XMLSchema-instance"xsi:schemaLocation="http://maven.apache.org/POM/4.0.0 http://maven.apache.org/xsd/maven-4.0.0.xsd">
<modelVersion>4.0.0</modelVersion>
<groupId>com.educba</groupId>
<artifactId>JUnit-testing-demo</artifactId>
<version>0.0.1-SNAPSHOT</version>
<properties>
<java.version>1.8</java.version>
</properties>
<dependencies>
<!-- https://mvnrepository.com/artifact/junit/junit -->
<dependency>
<groupId>junit</groupId>
<artifactId>junit</artifactId>
<version>4.13</version>
<scope>test</scope>
</dependency>
</dependencies>
</project>
This file should be structured and present in the following way:
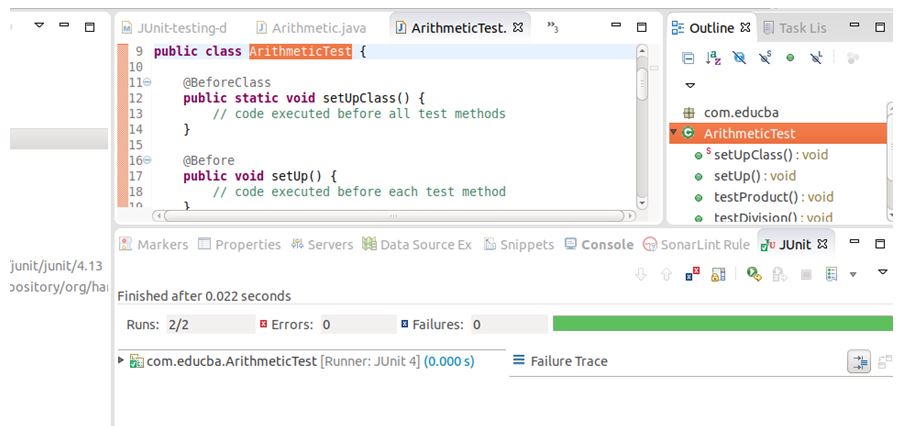
To check the test cases and execute the test, open the outline window from the window -> preferences -> outline and then right-click on any method of test class file you want to execute and run as the JUnit test option. After running the above testProduct method of ArithmeticTest class you will get the following output on Junit console.
The green bar shows that the test case is successfully executed and there are no errors. For running whole class file of test cases you can right-click the ArithmeticClass file and run a Junit test that gives following output.
Example #2: JUnit 5
Considering the same above example for Junit 5 dependency, our Arithmetic class file will remain same. Our pom.xml will be somewhat like the following.
Code:
<project xmlns="http://maven.apache.org/POM/4.0.0"xmlns:xsi="http://www.w3.org/2001/XMLSchema-instance"xsi:schemaLocation="http://maven.apache.org/POM/4.0.0 http://maven.apache.org/xsd/maven-4.0.0.xsd">
<modelVersion>4.0.0</modelVersion>
<groupId>com.educba</groupId>
<artifactId>JUnit-testing-demo</artifactId>
<version>0.0.1-SNAPSHOT</version>
<properties>
<java.version>1.8</java.version>
</properties>
<dependencies>
<!-- https://mvnrepository.com/artifact/org.junit/junit5-engine -->
<dependency>
<groupId>org.junit</groupId>
<artifactId>junit5-engine</artifactId>
<version>5.0.0-ALPHA</version>
</dependency>
</dependencies>
</project>
ArithmeticTest will will be as follows:
Code:
package com.educba;
import org.junit.gen5.api.AfterAll;
import org.junit.gen5.api.AfterEach;
import org.junit.gen5.api.BeforeAll;
import org.junit.gen5.api.BeforeEach;
import org.junit.gen5.api.Test;
import staticorg.junit.gen5.api.Assertions.assertEquals;
public class ArithmeticTest {
@BeforeAll
public static void setUpClass() {
// code executed before all test methods
}
@BeforeEach
public void setUp() {
// code executed before each test method
}
@Test
public void testProduct() {
Arithmetic arithmetic = new Arithmetic();
int number1 = 100;
int number2 = 5;
int actualvalue = arithmetic.product(number1, number2);
int expectedvalue = 400;
assertEquals(expectedvalue, actualvalue);
}
@Test
public void test Division() {
// test method
}
@AfterEach
public void tearDown() {
// code executed after each test method
}
@AfterAll
public static void tearDownClass() {
// code executed after all test methods
}
}
Running the testProduct test gives the following output in the above test file of Junit 5 I had changed the expected value to 400 that is not equal to 100 * 5 that is 500 hence a red bar with error is thrown. Note that the names of annotations are changed in Junit 5 testing however their functionality remains the same and unaffected.
If we change the testProduct method’s expected value back to 500 it will give the green bar and successfully execute the test case.
Just make sure that while creating a test file for JUnit 5, you choose the option correctly on the window where the name and other details are asked while creating it.
Recommended Articles
This is a guide to JUnit Maven Dependency. Here we discuss the introduction of JUnit Maven Dependency along with examples. We can add JUnit 4 or JUnit 5 maven dependency in our pom.xml to perform unit testing in java projects that are structured and use maven in it. You may also have a look at the following articles to learn more –
