Updated March 15, 2023

Introduction to Kafka JDBC Connector
The Kafka JDBC connector is defined as, with the help of JDBC this connector can manage the large diversity of the databases with no connector for everyone in which the connector can poll the data which came from the Kafka to interpret it to the database by subscribing the topics, and this connector can be utilized to join the JDBC source connector for bringing the data from various RDBMS by using JDBC driver on to the topics of Apache Kafka, and we can able to use the JDBC sink connector for exporting the data from different RDBMS with no use of custom codes for everyone.
What is Kafka JDBC connector?
The Kafka JDBC connector can authorize us to connect with an outer database system to the Kafka servers for flowing the data within two systems, in which we can say that this connector has been utilized if our data is simple and it also contains the primitive data type such as int, and ClickHouse which can clarify the particular types like a map which cannot be managed, on the other hand, we can say that the Kafka connector can allow us to send the data from any RDBMS to Kafka.
It can have two types of connectors as JDBC source connector in which can be utilized to send data from database to the Kafka and JDBC sink connector can send the data from Kafka to an outer database and can be used when we try to connect the various database applications and the ClickHouse is the open-source database which can be known as ‘Table Engine’ that authorizes us to describe at where and how the data is reserved in the table and it has been implemented to sieve and combined more data fastly.
Kafka JDBC connector install
There are some steps that can be used for installing the JDBC connector in Kafka, so let us see how to install it and we have to follow the steps which are given below,
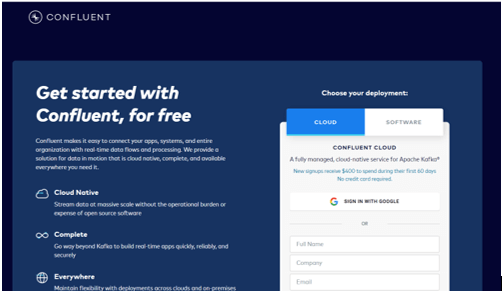
- Step 1: At first, we have to install the Kafka connect and Connector and for that, we have to make sure, we have already downloaded and installed the confluent package after that, we have to install the JDBC connector by following the below steps.
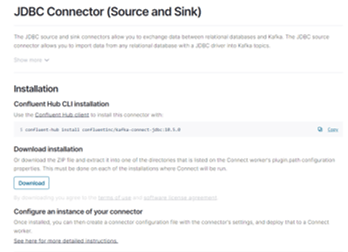
- Step 2: Then we have to do the installation with the help of confluent Hub so we have to traverse to our confluent platform directory and then we have to run the command which is mentioned below for the latest version, we also have to make sure that the connector should be installed on all devices where connect is being run.
“confluent-hub install confluentinc/kafka-connect-jdbc:latest”.
- Step 3: If we want to update the particular version then it can be done by restoring the latest version with a version number, such as, “confluent-hub install confluentinc/kafka-connect-jdbc:10.0.0”.
- Step 4: For installing the connector manually we have to download and extract the zip file for our connector.
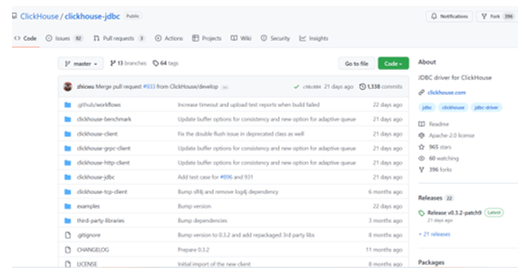
- Step 5: For downloading and installing the JDBC driver we have JDBC drivers such as ClickHouse that can be downloaded and installed from ‘https://github.com/ClickHouse/clickhouse-jdbc’ and it can be installed on the Kafka connect by following the steps.
Kafka JDBC connector configuration
Let us see the configuration of the JDBC connector in Kafka by following the below steps while installing it which can have the limitations for utilizing the JDBC connector along with ClickHouse,
- “_connection.url_”: This parameter can be used to get data from the “jdbc:clickhouse:// <clickhouse host>:<clickhouse http port>/<target database>”.
- user: This parameter indicates that is a user who has the access interpretation to the target database.
- name.format: When we want to add data from the ClickHouse table.
- size: It can dispatch the number of rows in a single batch which also makes sure that this can be put in the large numbers, for each ClickHouse the value of 1000 can be scrutinized as minimum.
- max: The JDBC connector can manage the streaming of one or more tasks which can help to improve the production and with the help of the batch size it constitutes as our first goal is to increase the production.
- converter.schemas.enable: If we are utilizing the schema registry when it is false and when we try to plant our schema in our system as true then this parameter has been set.
- converter: This parameter has been put on as per the datatype.
- converter: When we try to utilize string keys then this parameter has been utilized by setting it as “org.apache.kafka.connect.storage.StringConverter”.
- mode: This parameter is not applicable to ClickHouse hence it can be set as none.
- create: This is also not managed by the ClickHouse hence it can be set as false.
- evolve: For such type of setting, we can set it as false so it can be managed in the future.
- mode: It can be put as ‘insert’ and other modes are not presently managed.
- converter: It can be configured according to the type of your keys.
- converter: This parameter can be set as per the data type of topic in which it can be managed by schema.
If we are utilizing the sample dataset then the below setting needs to do,
- converter.schemas.enable: It can be set as false when we are using the schema registry and can be set as true when we utilizing the schema registry for every message.
- converter: It can be set as ‘org.apache.kafka.connect.storage.StringConverter’ when we try to use the string keys.
- converter: It can be set as ‘io.confluent.connect.json.JsonSchemaConverter’.
- converter.schema.registry.url: It can be set on the schema server URL by using credentials for the schema with the help of parameter ‘value.converter.schema.registry.basic.auth.user.info’.
Conclusion
In this article we conclude that the Kafka JDBC connector has been used to connect the outer systems such as databases to the server of Kafka for flowing the data between two organizations, we have also discussed how to install the connector and also the configuration of the Kafka JDBC connector.
Recommended Articles
This is a guide to Kafka JDBC Connector. Here we discuss the Introduction, What is Kafka JDBC connector, Kafka JDBC connector install respectively. You may also have a look at the following articles to learn more –


