Updated April 3, 2023
Introduction to Kali Linux VMware
Kali Linux VMware is defined as a cloud computing software that enables users with virtualization. Kali Linux is a Debian-based Linux distribution that intends to help users with penetration testing. Now, in the world of virtualization, dedicating entire hardware to running Kali Linux through Live DVD or boot the installed OS from the internal hard disk might be unwanted. There is where VMWare’s virtualization technology comes in handy and to the rescue. With the concept of virtualization, one would be able to run another machine within another physical machine and perform all tasks and work as any system with Kali Linux installed. In this article let us explore on working of Kali Linux VMWare and the process of installing it!
Working of Kali Linux VMware
As we by now know Kali Linux is a Debian based operating system and a rebuild of BackTrack Linux, specifically built for security auditing and penetration testing. More than 600 penetration testing tools are present in Kali Linux. In today’s world of sharing hardware has been a common practice. And for taking care of this kind of problem, comes to the rescue is VMware. There is a hypervisor that is installed in the physical server for allowing many virtual machines to run on the same server. The hypervisor is a virtual machine monitor (abbreviated as VMM) which creates and runs virtual machines. The task of a hypervisor is to allow one host to connect to multiple guest VMs by sharing the resources like memory and processing. Hence, the entire hardware like the physical presence of a PC is just “one”, rest is about sharing the resources from this PC. With this, IT mobility is improvised by a huge margin which also makes sure that VMs can be mobile and have benefits of space energy and requirements for maintenance.
Before understanding the working of VMware, we need to know how hypervisor work, as this working plays a major role in making VMware work. Hypervisor abstracts the software from PC’s hardware and thus creates and manages the virtual machines. At the level of motherboard basic input/output system (BIOS), the hypervisors are embedded and thus enable the operating system for access and usage of virtualization software.
This hypervisor allows multiple VMs for running the same physical server. Now, each VM can run its own operating system (OS) and the networking and RAM are some resources that are shared among the different OS running on the VMware. In the next section, we have the entire steps explaining the way of installing VMware.
How to install VMware for Kali Linux?
In this section, we will talk about installing the VMware software in Kali Linux. The entire installation of VMware includes 3 steps: Preparation, Installation, and Verification. Without much further ado, let’s get started.
Preparation
Before we install VMware, we need to make sure that Kali Linux is up to date with all required updates so that the installation and continuation of VMware on Kali are seamless and is without disturbance. If not, we would need to run a few commands to make sure the update of the machine takes place and the system is restarted. The reason we go for a reboot is, some updates take effect only after the PC is restarted. The commands are as follows:
- sudo apt update
- sudo apt full-upgrade -y
- [ -f /var/run/reboot-required ] && sudo reboot -f
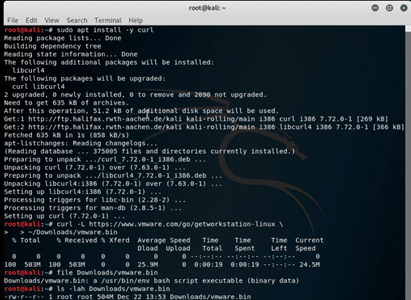
Once the system is updated, the next step of preparation is downloading the VMware, either by command line or by downloading the same from the VMware’s download page. For the command line, the commands are as follows:
- sudo apt install -y curl
- curl -L https://www.vmware.com/go/getworkstation-linux \
~/Downloads/vmware.bin
- file Downloads/vmware.bin
- ls -lah Downloads/vmware.bin
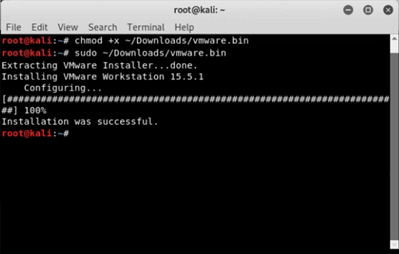
Once downloaded, we need to make sure that the file (vmware.bin) is executable, if not, we use chmod to make it executable by executing the following command and post that execute the bin file.
- chmod +x ~/Downloads/vmware.bin
- sudo ~/Downloads/vmware.bin
Setup
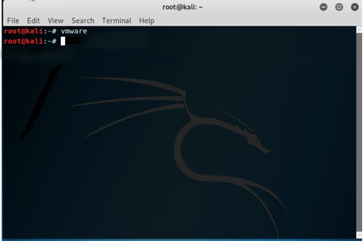
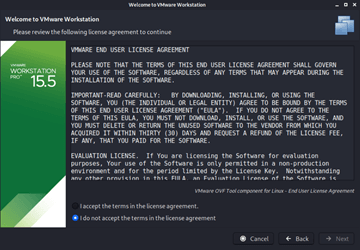
After the installation is complete, we need to use the keyword “vmware” to continue the setup. Just to confirm, the OS could ask for confirming updating module which needs to give permission to do so. Once the permission is granted, one would need to accept the legal agreement from VMware.
VMware
Legal Agreement
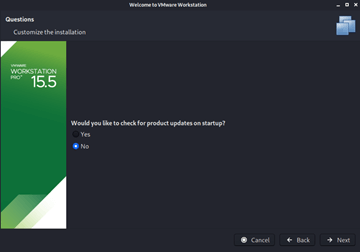
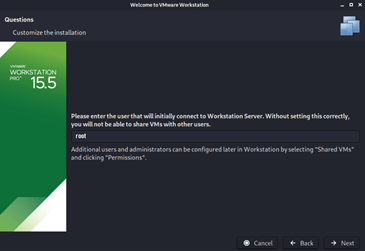
Next, the setup would ask the user, if it requires VMware to check for any updates when it starts. One would need to put it as Yes or No depending on the requirement. Post that, the setup would ask for the current username to be provided.
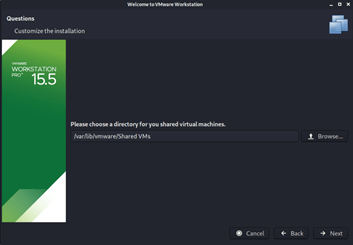
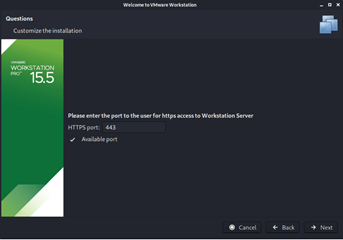
Once done, we would need to put the location for the shared VMs, and proceeding from there, one would need to enter the port for https access to the workstation server.
Port Avalaibility Check
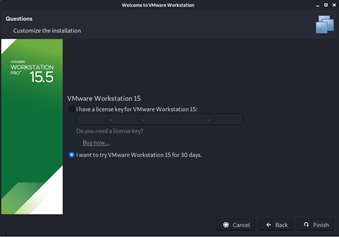
Now at this point, one would need to enter the product key available in case one has bought the product. If not, one can obviously try the VMware workstation for 30 days for free (This is the option which will be shown here.
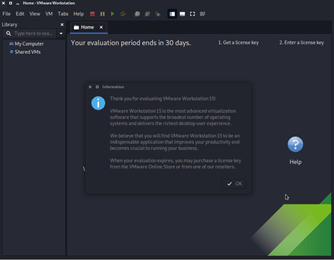
Once the respective option is selected the final screen would look like this:
Conclusion
In this article, we have tried to take you through a step by step process of installing VMware in Kali Linux. There might be some challenges as well while installing VMware Kali Linux like libaio missing. For these, one can refer to the FAQ section in Kali Linux documentation which will point out the correct procedure to be undertaken to take care of the error. Other than that, we can now start having different VMs for different users in Kali Linux through the steps mentioned above.
Recommended Articles
This is a guide to Kali Linux VMware. Here we discuss the working of Kali Linux VMware and also gone through a step by step process of installing VMware. You may also have a look at the following articles to learn more –
