Introduction to Kotlin graphQL
Kotlin graphql is a client which was generating java models and kotlin queries of graphql. Kotlin graphql will execute the queries of graphql server and return the result as a type of kotlin specific. This means we have no need to deal with JSON passing around the maps, and it will be making the value of the cast manually. Using it, we have no need to write the model type.
Key Takeaways
- graphql is the query language for runtime and the API which was used to fulfill the queries in our existing data.
- graphql provides an understandable and complete description of the data in our API, giving clients the power to ask what exactly they will need.
What is Kotlin graphQL?
graphql is the API query language that was used to get our data. Also, it is a REST API alternative; graphql is not specific for the platform, which was single. Also graphql works with all types of clients including IOS, web, and android. graphql will stand between client and server, which helps us query the data in an optimized way. Every graphql service in kotlin will define a set of types that describe the data. By using this data, we can query that particular service. It is very important.
Kotlin graphQL Installation
The below steps show how we can install graphql as follows. For installing graphql plugin first, we need to open the Intellij idea in our system.
We are installing the graphql plugin in Intellij idea software as follows:
1. For installing graphql, first, we are opening the Intellij idea in our system. We are not opening any project at the time of opening Intellij idea framework.
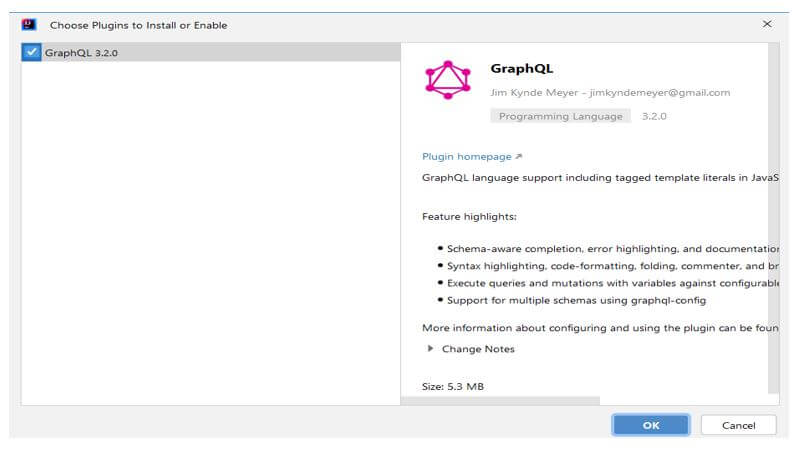
2. After opening this framework, we are installing the plugin of graphql with version 3.2.0. At the time of installing graphql plugin it will be showing all the feature insight that it contains.
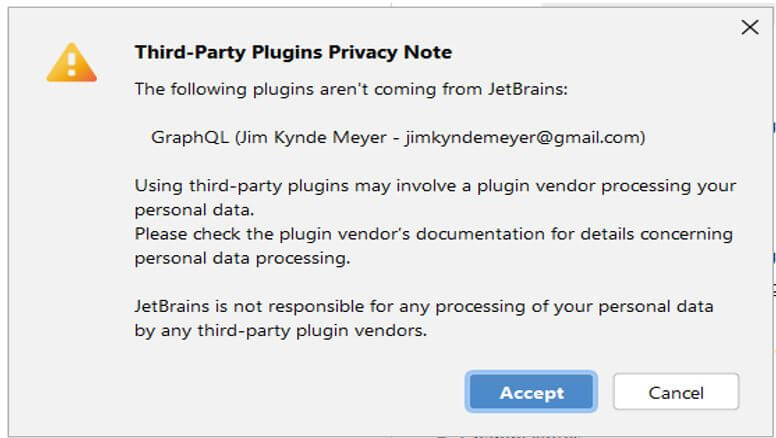
3. After clicking on the install ok button, it will show the tab of the privacy notice. We need to accept this privacy notice of graphql plugin. Without accepting the privacy notice, we cannot install the graphql plugin.
4. After installing the plugin to take effect in the project, we need to restart the Intellij idea. In the below example,, we restart the Intellij idea after installing the graphql plugin.
5. After taking the restart of Intellij idea, the plugin of graphql is added so that we can use the same in our project.
Kotlin graphQL Client
Basically, graphql will support the three types of files as follows. In kotlin graphql we are using graphql files.
- Graphqls schema files – This file will describe the type in our backend using the syntax of graphql.
- Json schema files – This file will describe the types of our backend using the syntax of graphql.
- Graphql executable files – This file will describe our operations and queries into the syntax of graphql.
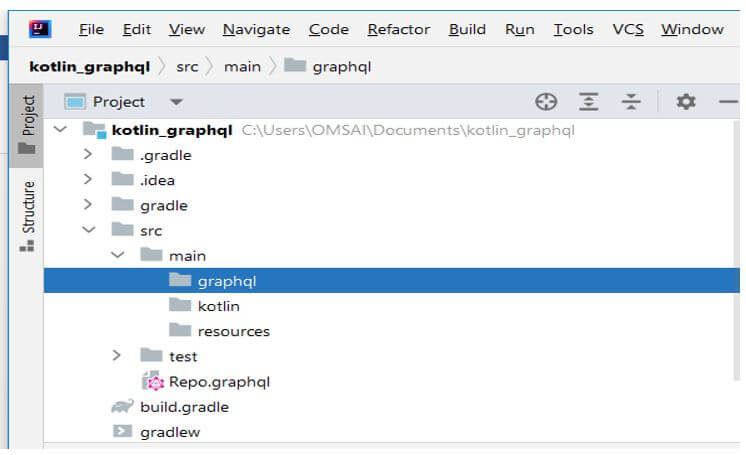
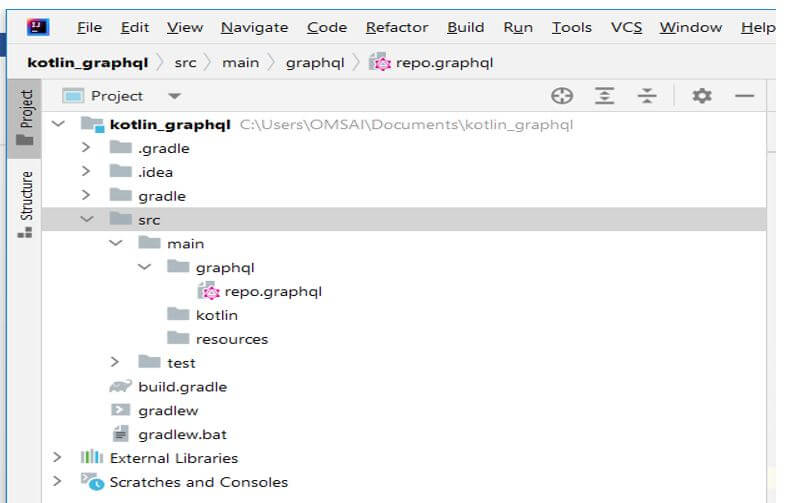
By default, the kotlin requires the schema in our module. We can create the schema in src/main directory. In the below example, we are creating a new director name as graphql in /src/main directory.
After creating a directory, we download the schema by using introspection. Sometimes the introspection is disabled, and we need to get it from the backend. We need to copy the schema in our module. After downloading the schema, we are writing the below query into the graphql file as follows.
Code:
query Student ($stud_id: String!) {
 stud(stud_id: $stud_id) {
  stud_id
  stud_name
 }
}
Output:
After writing a query, we are creating a client as follows. We are writing the below code to create a client.
Code:
val client = client.Builder ()
.url("https://test.com/")
.build()
val res = client.query (Student(id = "1")).execute()
println("stud.stud_name=${res.data?.stud?.stud_name}")
Output:
Kotlin graphQL Project Configuration
For configuring the graphql project, we need to create the project in kotlin.
Below we are creating the kotlin project name as kotlin_graphql as follows:
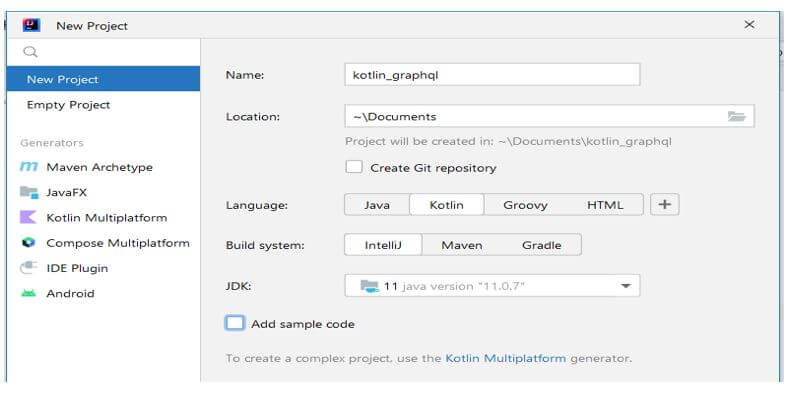
1. For configuring the graphql in kotlin, in the first step, we are creating the kotlin project name as kotlin_graphql by using Intellij idea. We are providing the below parameter while creating the kotlin project as follows.
Name – kotlin_graphql location – \Documents
Language – Kotlin Build system – Intellij
Jdk – Java version 11 Project – New project
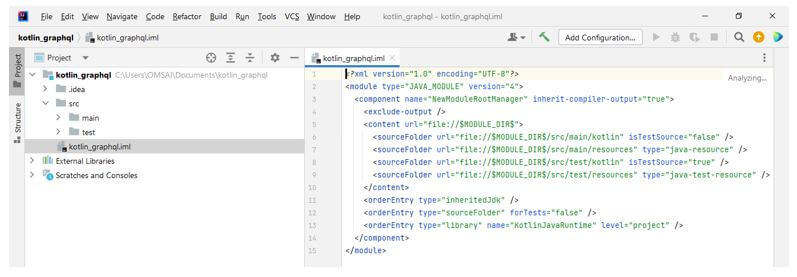
2. After creating the project template name as kotlin_graphql, now we are checking the structure of the specified project.
3. Now, in this step, we are adding the plugin into build.gradle file. We are adding the following plugin into build.gradle file.
Code:
plugins {
  id ("com.apollographql.apollo3").version("3.4.0")
}
Output:
4. After adding the dependencies, now we need to set the runtime dependency for kotlin graphql as follows.
Code:
dependencies {
  implementation("com.apollographql.apollo3:apollo-runtime:3.4.0")
}
Output:
5. After adding the dependency, we are creating the package name for using the generated models as follows. In package name, we are defining the name of the package.
Code:
apollo {
  packageName.set ("com.example")
}
Output:
6. After setting the project name, we create the graphql directory and the client of graphql. After creating the client, our configuration looks as below.
FAQ
Given below is the FAQ mentioned:
Q1. How many types of file is supported by kotlin graphQL?
Answer:
It supports three types of files. i.e graphqls, json and graphql. In that, mainly we are using graphql file.
Q2. What types of dependencies are used while using graphQL?
Answer:
We need to use ktor, koin, squash, and graphql dependencies at the time of working with graphql in kotlin.
Q3. What is API endpoint in graphQL?
Answer:
To specify the endpoint, we need to pass the string by annotation. Then we need to create the data class for representing the get or post request.
Conclusion
It will stand between client and server, which helps us our query data in an optimized way. It will execute queries of graphql server and return the result as a type of kotlin specific. It is a client which was generating java models and kotlin queries of graphql.
Recommended Articles
This is a guide to Kotlin graphQL. Here we discuss the introduction, kotlin graphQL installation, client, project configuration, and FAQ. You may also have a look at the following articles to learn more –

