Updated April 13, 2023

Introduction to Kubernetes Kubectl
Kubernetes kubectl provides us a command-line interface to interact with Kubernetes clusters. It can be installed on any machine or workstation so that we can manage our Kubernetes cluster remotely. We can manage multiple clusters using ‘use-context’ command from the same machine or workstation. It is also known as ‘Kube Control’. We can manage nodes in the cluster such as draining node for maintenance, update taint on a node, etc. Whenever we run kubectl command it looks for the kubeconfig file in $HOME/.kube folder.
Syntax and Parameters of Kubernetes Kubectl
Syntax:
kubectl [command] [TYPE] [NAME] [flags]Parameters:
let’s understand each component of the syntax:
- command: it defines what action or operation we want to perform on any object or resource of the cluster like get, describe, delete, etc.
- type: it defines on what type of resource we want to perform the action like pods, deployments, services, etc. We can use singular, plural or abbreviated forms, for example, to list a pod we can use type as pod, pods or pod. It is also case-insensitive.
- Name: it defines on which resource we want to perform the operation and it is case-sensitive which means POD1 and pod1 is two different resources in Kubernetes cluster.
Examples of kubernetes Kubectl
Below are the examples given:
kubectl get pods
kubectl get pods nginx-6db489d4b7-hzvwx
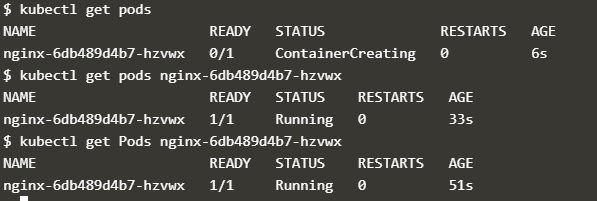
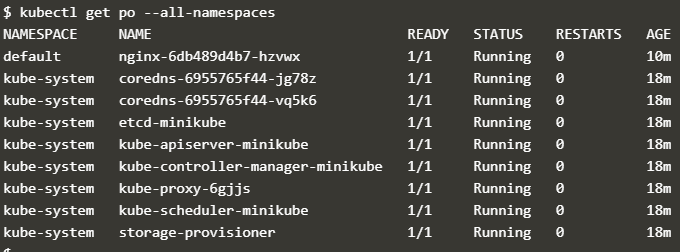
Explanation: In the above example, the first command listed all pods running under default namespace. To get specific pod we need to give the name of the resource, here pod name is “nginx-6db489d4b7-hzvwx”. If we want to list all pods in all namespaces, we use “–all-namespaces” flag as below: –
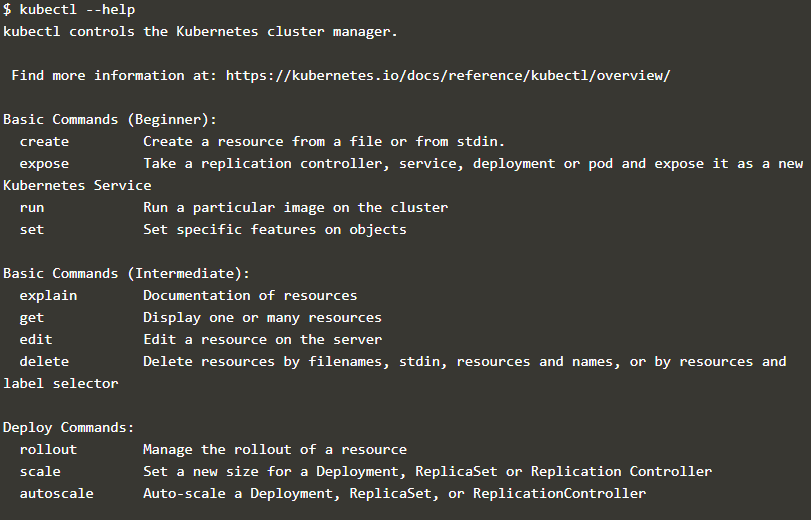
kubectl get po --all-namespacesKubectl has a good documentation and we can know all commands it has, using ‘–help’ flag as below: –
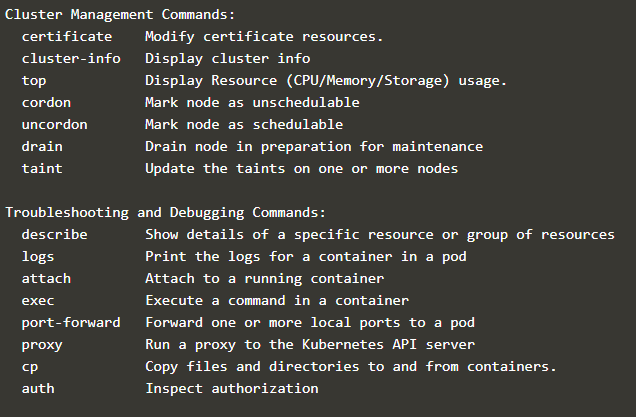
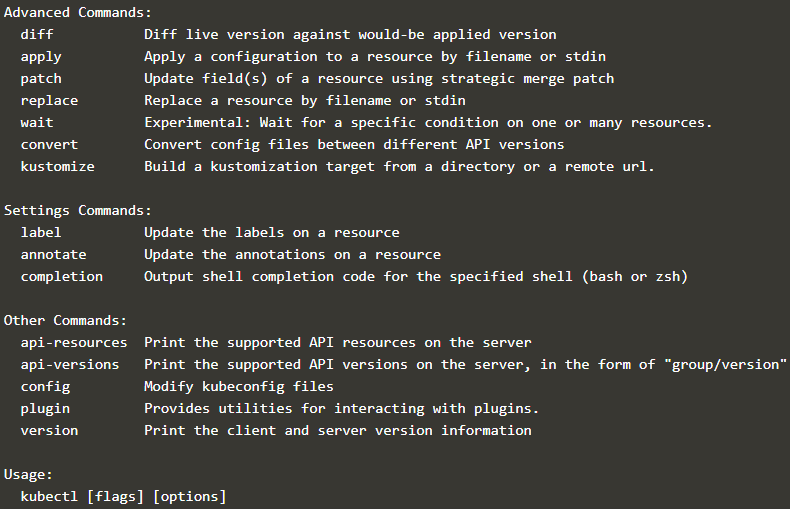
kubectl --helpIf we see the above snapshot, what we understand is that commands are divided into groups like basic commands, deploy commands, cluster management commands, troubleshooting commands etc. and most of the commands are self-explanatory.
Basic Commands of Kubernetes Kubectl with Examples
Let’s explore some of the basic but essential commands:
1. create
This command can be used to create a new resource from a file mostly it is a yaml file or from a stdin mostly from the terminal.
Syntax:
kubectl create -f <file_name>Example:
kubectl create -f my-nginx.ymlHere is the code of my-nginx.yml file:
apiVersion: v1
kind: Pod
metadata:
name: my-nginx
labels:
app: nginx
spec:
containers:
- name: my-nginx
image: nginx
port:
- containerPort: 80
Explanation: In the above example, it created a pod with name my-nginx.
2. get
We use ‘get’ command to know the status of any resources like Pods, Deployments, Services, etc. We have just created a pod and we want to know the status of the pod, we can use get command as below: –
Syntax:
$kubectl get <resource_type>
$kubectl get <resource_type><name_of_the resource>
Example:
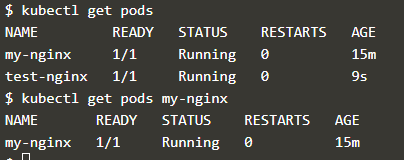
$kubectl get pods
$kubectl get pods my-nginx
Explanation: In the above snapshot, the first command is used to list all pods running under default namespace. If the pods are running under a different namespace, we need to specify the namespace as well. The second command displays the status of specific pods.
3. expose
It is used to expose our deployment, pods, replicaset, service, and replication controller as a Kubernetes service to access it from the host. For example, we have created an nginx pod and now want to access it from our host, we need to create a service using expose command as below: –
Syntax:
$kubectl expose <resource_type><resource_name> --port=<source-port> --target-port <destination-port><service_name>Example:
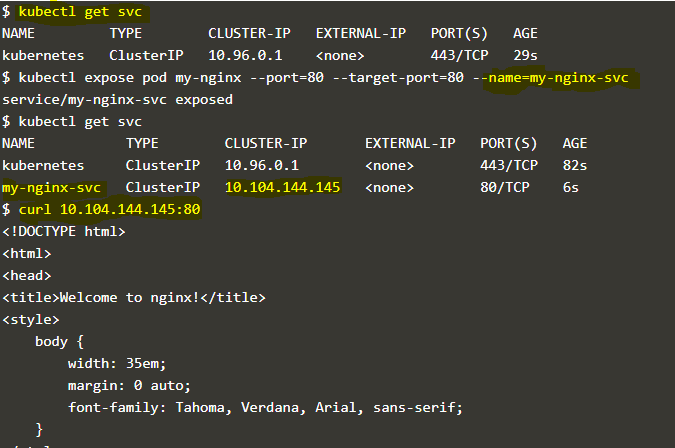
kubectl get svc
kubectl expose pod my-nginx --port=80 --target-port=80 --name=my-nginx-svc
Explanation: In the above snapshot, the first command is used to list available services and we can see only one service is there. Second command is used to expose the newly created ‘my-nginx’ pod and source and destination port is the same and given a name of the service called ‘my-nginx-svc’ however service name is optional here, if we don’t provide service name it will pick pod name as service name by default. Also you can expose the same pod multiple times by changing the service name. When we run the first command second time, we can see there is a new service called ‘my-nginx-svc’ is visible now and if we curl the IP of that service we can access our nginx pod from the host itself.
4. run
It is used to run any image in the cluster. When we use ‘run’ command it creates a deployment by default and runs a pod under this deployment and by default it sets replicas equal to 1. If we delete the pod running with that deployment, deployment is going to create a new pod and it will continue. We need to delete the deployment if we have to delete the pod running under this deployment.
Syntax:
$kubectl run <deployment_name> --image=<image_name>Example:
kubectl run test-nginx --image=nginx
kubectl run --generator=run-pod/v1 test-nginx2 --image=nginx
Explanation: In the above snapshot, we run annginx image and by default, Kubernetes creates a deployment with run command however it is deprecated. This command might not work in future versions. If we have to create only a pod using ‘run’ command, we need to use ‘–generator=run-pod/v1’ option or else use ‘create’ command to create pods or any resources from a file or stdin.
5. edit
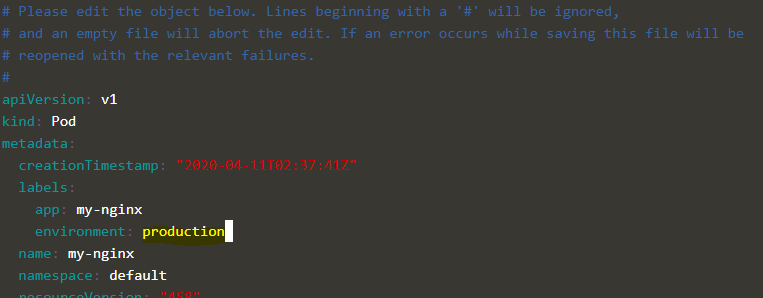
it is used to edit any existing resource in the cluster. It opens a yaml file of that resource. We need to just make the changes to the file and save it. It will be applied to the resource. For example, if we want to make changes in our running ‘my-nginx’ pod, we can use the ‘edit’ command as below.
Syntax:
kubectl edit <resource_type><resource_name>Example:
kubectl edit pod my-nginxkubectl get pod my-nginx --show-labelsExplanation: In the above snapshot, we edited the ‘my-nginx’ pod and changed the environment label from ‘production’ to ‘test’.
6. describe
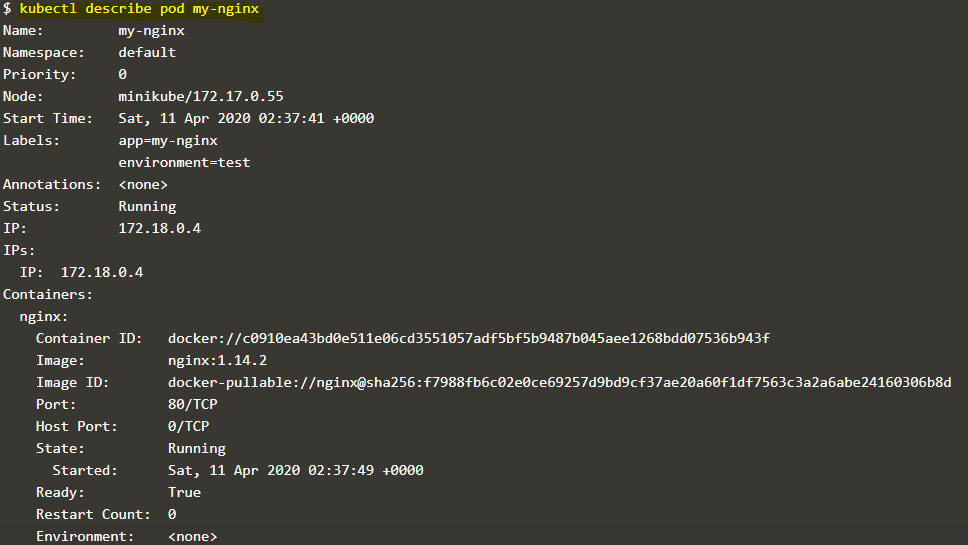
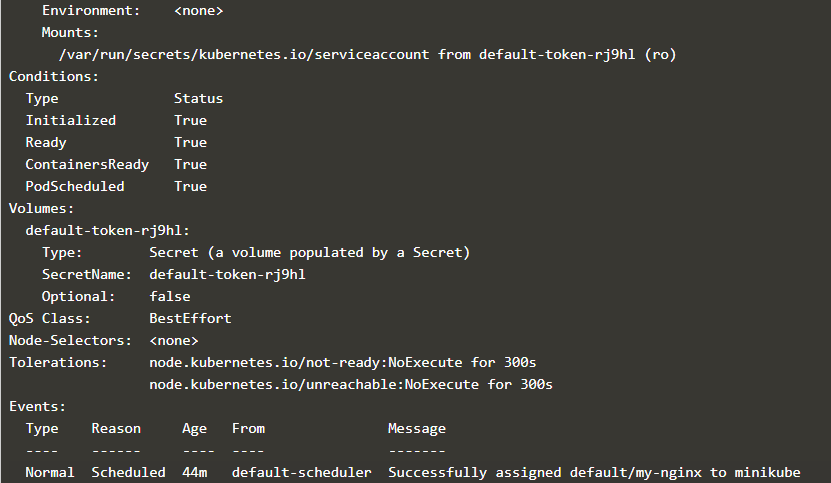
It is used to know all about any resources like pod, deployment, services etc. It is very useful for troubleshooting. For example, if we want to know more about our ‘my-nginx’ pod as we get very less information using ‘get’ command. We can use ‘describe’ command as below: –
Syntax:
$kubectl describe <resource_type><resource_name>Example:
$kubectl describe pod my-nginxExplanation: In the above snapshot, we get all details of our ‘my-nginx’ pod starting from name to containers, mounts, networks, events, etc. Events are very useful to troubleshoot any issue in the pod.
7. scale
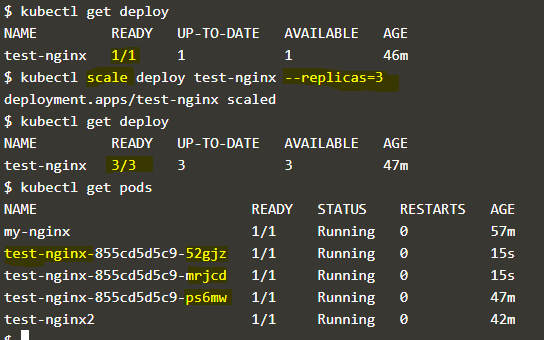
This command is used to scale our deployment, replica set or replica controller as per our requirement. For example, we have a deployment called ‘test-nginx’ running with 1 replica and want to scale the deployment to run 3 replicas of that pod, we can use scale command as below: –
Syntax:
$kubectl scale <resource_type><resource_name> --replicas=<replicas_count>Example:
kubectl get deploy
kubectl scale deployment test-nginx --replicas=3
kubectl get pods
Explanation: In the above snapshot, we have only one replica of the deployment and after increasing the replicas count from 1 to 3, we can see 3 pods are running now.
8. drain
It is used to drain the node for maintenance activity as if there is any hardware failure on that node and we don’t want to schedule a pod on that until maintenance has been performed on it.
Syntax:
$kubectl drain <node_name>Example:
kubectl get nodes
kubectl drain node01 --ignore-daemonsets
Explanation: In the above snapshot, we have 2 nodes cluster with 1 master and 1 worker node. We can see after draining the node status has been changed from ‘Ready’ to ‘Ready,SchedulingDisabled’ that means Kubernetes controller is going to schedule any pod on it. Existing pods will be migrated to other available nodes in the cluster. Here we have only one worker node so we need to use ‘–ignore-daemonsets’ option to drain the node.
9. taint
It is used to taint a node. Node affinity is used to attract a pod to schedule on the specific node whereas taint is used to repel a set of pods to not schedule on the node. It is used for dedicated nodes like nodes that are dedicated to a specific group of users or if nodes have special hardware like nodes with GPUs or to evict the node as per taint. It uses key and value with taint effect NoSchedule. In this case, no pods will be scheduled on those nodes other than pods having tolerations.
Syntax:
$kubectl taint nodes <node_name> key=value:NoScheduleExample:
kubectl taint nodes node01 key=value:NoSchedule10. version
It is used to check the client and server version of the Kubernetes cluster.
Example:
kubectl versionConclusion
Kubectl has multiple commands and some of them are self-explanatory and some of them are not used in day to day management of the Kubernetes cluster. Here, we have discussed the most important and daily used commands to manage and troubleshoot our Kubernetes cluster.
Recommended Articles
We hope that this EDUCBA information on “Kubernetes Kubectl” was beneficial to you. You can view EDUCBA’s recommended articles for more information.
