Updated April 11, 2023
Introduction to Laravel Deploy
When you have got your application ready and completed for hosting or production, you have to make use of the option of Laravel deployment to go ahead with the next step. Also, it is important to make sure that the application is running smoothly and as expected. There should not be any error or glitch in the application when it is finally ready for production or hosting. There are several steps in deployment depending upon the need for the application. The most popularly used system for production is ‘Git’ but there are other options available too for deploying a Laravel project.
What is Laravel Deploy?
Preparing a Laravel project takes a lot of time to get all the processes completed and also organize and format the internal functioning of the application that you may make with the help of Laravel. One your development process is finally complete after cross-checking for errors and rectifying them, it is time to either host it in a live environment or complete the production so that it is made available for its use.
Moving from development to production, several steps are involved which assist in the process.
- Cloning of the production code which is ready.
- Installing the Composer dependencies.
- Laravel uses dotenv (PHP Library) for its configuration and therefore .env file needs to be formatted and also adjusted to the settings of the server.
- Application of caching of the configuration and route cache with the help of Artisan.
These processes ensure that the deployment of the application developed with the help of Laravel is deployed appropriately. Many web hosting servers are available online for the sake of the users who wish to produce and host their applications.
Laravel in itself has all the settings to prepare an application from scratch. When you prepare the application with the help of the different available settings inside Laravel, you already prepare yourself according to the need of the application as to whether you are going to host it live online or you are going to produce it so that it can be completely made available for the users and their works.
How does Laravel deploy work?
Laravel deploy assists in the final step of the application. It helps to produce or host. Many websites give you the option of hosting your content on their website and the prices are reasonable. If you wish to use ‘Git’ for production, you can do that too. Production is also done in various other spheres. Laravel deployment is different depending on different websites. ‘Godaddy’ offers shared hosting which is economical and also reasonable. There are others like HostGator, cloudways, etc. which offer the same services. They are made specifically for hosting and are well organized and accept all kinds of files to host.
Additionally, there are command-line interfaces that are available too. Third-party deployment services need to be used and Laravel deployment services help with it so that the outcome of the application is made available. This also helps to make changes if necessary in Laravel itself. The setting up of a ‘Github’ repository is required in most of the applications. So it is better to have good to know about it. To get the Laravel application is necessary to make sure that the application functions well. You can either host the Laravel application on a shared hosting or a dedicated server depending upon the need.
A few optimization processes need to be conducted in the end when the development of the application is done. Configuration, route, and view need to be optimized to make sure that they are loading properly. Optimization will help in looking for loopholes and making the necessary alterations that may be required so that the errors don’t recur and create a problem.
Example of Laravel deploy
Deploying Laravel Projects to Live Server
Make sure that you already have a purchased or ordered a server with you from any space on the internet. Also, consider installing either LEMP or LAMP stack which is just a one-click installation and will make the process easier. Following this, SSH access needs to be configured according to the need of the project.
Run commands like PHP artisan, git pull, etc. Run the Composer Install on the server. Configure the git repository code which you can download and configure. Also additionally, configure the MySQL so that you have a database that is specifically meant for your project. Configuration of the Web-server needs to be done so that you have a specific folder for your website. The domain later needs to be pointed to the server. You will have to change the DNS records to point it to the new IP address of your own.
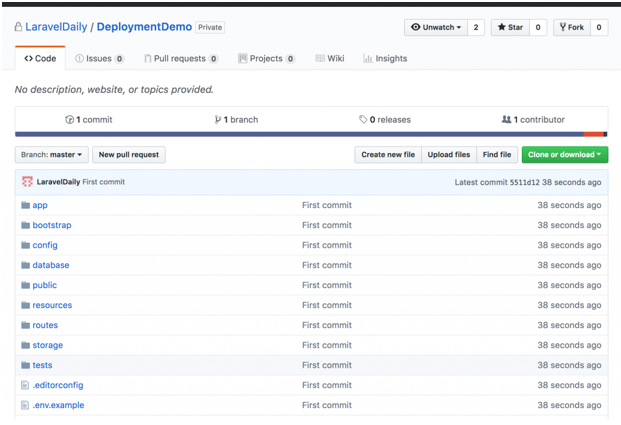
Put the code to the repository (preferably GitHub) to start with launching the project.
git init
git add README.md
git commit -m "first commit"
git remote add origin https://github.com/LaravelDaily/DeploymentDemo.git
git push -u origin master
An example follows:
Launch git clone command after doing SSH into our server and navigating to the folder of the project. After cloning the files will be visible. The outcome will be as follows:
Laravel has a file named as .env.example with configuration values already in it.
Use this command – cp .env.example .env and make this the main .env file. Edit it to make it vi .env. The main variables which cannot be changed are as follows
APP_URL=http://localhost
DB_CONNECTION=mysql
DB_HOST=127.0.0.1
DB_PORT=3306
DB_DATABASE=homestead
DB_USERNAME=homestead
DB_PASSWORD=secret
Set up the app URL and also the database credentials. Install the composer. Generate the application key by generating the PHP artisan key: generate.
If you wish to migrate any data then launch PHP artisan migrate
Run the database that’s ready with you: PHP artisan DB: seed
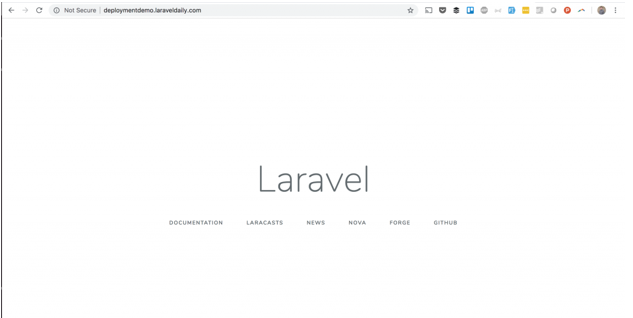
Finally, try it out on a browser:
This will be the outcome on the server.
Conclusion
Laravel Deploy is therefore very important as it plays a very important role in Laravel when the application is ready and needs to be either posted online on the server or needs to be produced to be made available to other users. If we follow all the options correctly, the result will be appropriate. Any small error can change the routing or the settings and we may have to rework all from scratch. So, be careful when stepping on this final step.
Recommended Articles
We hope that this EDUCBA information on “Laravel Deploy” was beneficial to you. You can view EDUCBA’s recommended articles for more information.


