Updated April 11, 2023

Introduction to Laravel Permissions
Laravel is one of the most sought after frameworks for E-commerce development. The reason for this popularity being the ease of usage. Laravel allows the developer of the scope of creating complex structures and functionalities using simple and expressive syntax. Laravel is scalable and that is the reason why E-commerce site owners prefer to use it. This gives them a wide range of options to choose from for catering to demanding customers. Laravel is known for its vast library of queries which provide all that is needed for quick development. The framework is also capable of integrating with third-party queries to form standalone systems.
One such query that makes development easy is Laravel Permissions.
What is Laravel Permission?
Laravel Permissions allows developers to provide access control to users, through the Roles and Permission-based Access Control (ACL). Hence, one can edit and provide access to users, from the back end of the site.
How does Laravel Permission work?
Through Roles and Permissions, one can create several types of users with different roles and permissions, some users will only have view access, some users can also edit items, some can go ahead and delete. Access is usually provided by the Super Admin.
Example #1
Installing the tool: The migration needs to be run: PHP artisan migrate
1. The HasRole needs to be added to the User Model:
class User extends Authenticatable
{
use HasRoles;
...
}
2. It now has to be loaded into the Tool for the Roles to be displayed:
// app/Providers/NovaServiceProvider.php
public function tools() /* defining the function tools */
{
return [
new NovaToolPermissions(),
];
}
3. Adding an additional relationship if roles are to be assigned from the User resource:
// app/Nova/User.php
public function fields(Request $request)
{
return [
...
BelongsToMany::make('Role', 'role', Role::class),
];
}
4. Since we are using the Nova Tool for permission, the viewNova Gate default can be replaced with Gate():
protected function gate()
{
//
}
5. This program comes with default permissions:
"viewNova":
"viewRoles":
"manageRoles":
"assignRoles":
"viewUsers":
"manageUsers":
6. It is pertinent to know that, routine permission is required for certain sections. This is to ascertain that only the correct authority has access to the sections of the blog or the whole blog.
For example, the policy related to the blog: PHP artisan make: policy BlogPolicy Now the policy needs to be assigned:
class AuthServiceProvider extends ServiceProvider
{
use ValidatesPermissions;
protected $policies = [
\App\Blog::class => \App\Policies\BlogPolicy::class,
];
public function boot()
{
collect([
'viewBlog',
'manageBlog',
])->each(function ($permission) {
Gate::define($permission, function ($user) use ($permission) {
if ($this->nobodyHasAccess($permission)) {
return true;
}
return $user->hasRoleWithPermission($permission);
});
});
$this->registerPolicies();
}
}
7. Final step. Access control has to be specified in the policy:
// app/Policies/BlogPolicy.php
use Illuminate\Support\Facades\Gate;
public function viewAny($user)
{
return Gate::any(['viewBlog', 'manageBlog'], $user);
}
public function view($user, $post)
{
return Gate::any(['viewBlog', 'manageBlog'], $user, $post);
}
public function create($user)
{
return $user->can('manageBlog');
}
public function update($user, $post)
{
return $user->can('manageBlog', $post);
}
public function delete($user, $post)
{
return $user->can('manageBlog', $post);
}
public function restore($user, $post)
{
return $user->can('manageBlog', $post);
}
public function forceDelete($user, $post)
{
return $user->can('manageBlog', $post);
}8. Now add labels:
{
"viewBlog": "View Blog",
"manageBlog": "Manage Blog"
}
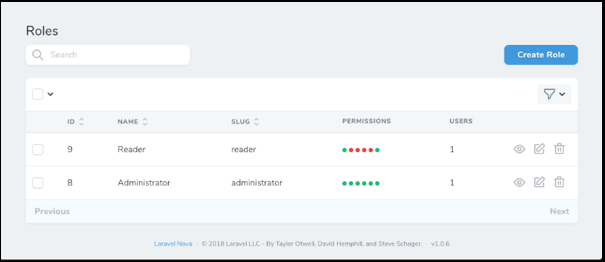
Output:
This one is for the Edit Role:
This one is to add users
The Role would now need to be assigned.
Example #2
Another quick example:
Install: Install it into the Laravel application which uses Nova through composer. Register the provider in case you have the package discovery disabled. It will be registered in the config/app PHP file as shown below:
'providers' => [
NovaPermissionServiceProvider::class,
]
1. Now tool needs to be registered as shown below:
//NovaServiceProvider.php
/*defining tools method */
public function tools()
{
return [
/*…*/
LaravelNovaPermission::make(),
];
}
2. Now, the addition of Morph To Many to the resource as follows:
use Laravel\Nova\Field\MorphToMany;
/*defining method*/
public function field(Request $request)
{
return [
/* ...*/
MorphToMany::make('Role', 'role', Role::class),
MorphToMany::make('Permission', 'permission', Permission::class),
];
}
3. Now, adding class ForgetCachedPermissions to the config/nova.php as follows:
/* config/nova.php */
/*Registering middleware*/
‘middleware’ =>[
‘web’,
/*adding different classes*/
DispatchServingNovaEvent::class,
Authenticate::class,
Authorize::class,
BootTools::class,
ForgetCachedPermissions::class,
],
4. Artisan command line can be used for localization files publishing: vendor: publish. Usage of Custom Role:
/*app/Providers/NovaServiceProvider.php*/
/*defining tools method */
public function tools()
{
return [
/* ...*/
LaravelNovaPermission::make()
->permissionsResource(CustomPermissions::class)
->rolesResource(CustomRoles::class),
];
}
5. Changing the default Authorization (Policy-based) to Permissions based Authorisation:
/* app/Nova/MyNovaResource.php*/
class MyNovaResource extends Resource
{
use PermissionsBasedAuthTrait;
/* defining array*/
public static $permissionsForAbilities = [
'all' =>'managing products',
];
}
6. Separate permissions can be defined as follows:
public static $permissionsForAbilities = [
'view' =>'viewing products',
'viewAny' =>'viewing any products',
'update' =>'updating products',
'create' =>'creating products',
'restore' =>'restoring products',
'delete' =>'deleting products',
'attachAttribute' =>'attaching product attributes',
'addAttribute' =>'adding product attributes',
'forceDelete' =>'forceDelete products',
'detachAttribute' =>'detach product attributes',
];
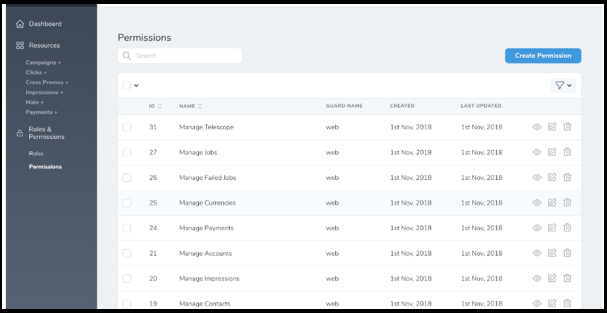
Output:
Here one can create Roles and give access to users as well as to others who would have defined Roles. It is imperative to remember that at the top of the Access control Hierarchy, sits the Super Admin. The Role of the Super Admin is to provide definite access control authorizations for specific responsibilities. Developers need to be careful while creating ACL or Access Control Lists, since a wrong move here may lead to jeopardizing the entire project.
Steps to Provide Laravel Permissions
Another way to provide permissions is:
Step #1
PHP artisan make: seeder PermissionSeeder
Step #2
<?PHP
use Illuminate\Database\Seeder;
use Spatie\Permission\Models\Role;
use Spatie\Permission\Models\Permission;
class PermissionSeeder extends Seeder
{
/**
* Run the database seeds.
* @return void
*/
public function run()
{
$roles=[
'admin',
'accountant',
'user'
];
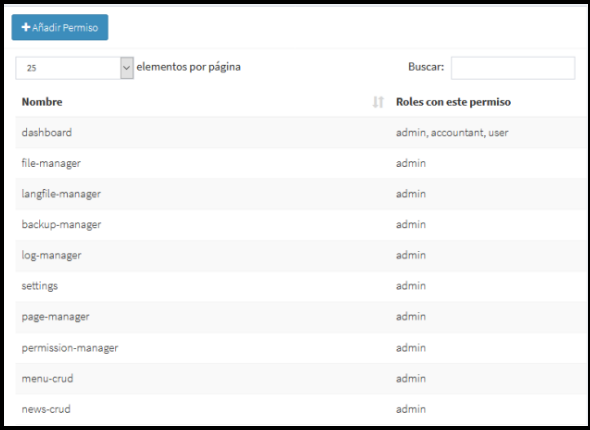
$permissions=[
'dashboard'=>['admin','accountant','user'],
'file-manager'=>['admin'],
'langfile-manager'=>['admin'],
'backup-manager'=>['admin'],
'log-manager'=>['admin'],
'settings'=>['admin'],
'page-manager'=>['admin'],
'permission-manager'=>['admin'],
'menu-crud'=>['admin'],
'news-crud '=>['admin'],
];
//create roles
foreach ($roles as $role) {
$rolesArray[$role]=Role::create(['name' => $role]);
}
//create permissions
foreach ($permissions as $permission=>$authorized_roles) {
//create permission
Permission::create(['name' => $permission]);
//authorize roles to those permissions
foreach ($authorized_roles as $role) {
$rolesArray[$role]->givePermissionTo($permission);
}
}
}
}
Add role to the Users
$user1=User::create(['name'=>'eduardo','email'=>'example@gmail.com','password'=>bcrypt('1234);$user1->assignRole('admin');Go ahead and refresh the database:
- php artisan migrate: fresh –seed
Conclusion
Laravel Permission is important from the perspective of access control. An access control list is a concise set of information authorising users for a certain level of access. Laravel Permissions work on the basis of hierarchy. Developers will be given a higher level of access than front end users.
The administrator of the site will be provided with greater access. The final access rests with the Super Admin. He/she will be the one providing everyone with the Roles and their access limits.
Recommended Articles
We hope that this EDUCBA information on “Laravel Permissions” was beneficial to you. You can view EDUCBA’s recommended articles for more information.


