Updated March 11, 2023

Introduction to Lightroom New Presets
Lightroom New Presets can understand the new collection of presets of this software through which we can do several types of manipulation in our photos in just a few simple steps. With these presets we can create a configuration of different settings through which we can achieve a certain types of looks and styles for our photos. In this software we can create new presets with our own settings or can have external presets that we can download from external sources. We can find a number of free tools for Lightroom through which we can create good and effective presets for our work. So let us start our discussion about New Presets of Lightroom.
Free Tools of Lightroom New Presets
There are number of free tools those we can have for having good control on the several parameters of presets of this software. So today I am going to tell you about some of them one by one.
-
The Fader:
With this free tool or plugin we can have full control over the intensity of any type of lightroom preset. You can have variation from 0% to 150% without making any modification. Although it is free to use for full capacity it costs US$10. So you can go use it according to your requirement.
-
LR/Instagram:
We all have Instagram account which is most pouplar these days and with LR/Instagram you can upload your photos directly to any number of Instagram account from Lightroom and best part is this you can crop it according to ideal ratio of Instagram. It is also free to use but you have to register through the Lightroom plugin manager and the fee for this is only US $10.
-
Focus Mask:
You may find it very powerful tool because with this plugin you can create a mask that shows you focused area of your image as well as how much fouces is there. Its free version is available in beta testing but works very smoothly.
-
LR/Enfuse:
With this tool, you have control for blending multiple images because Lightroom has limited capacity to work with multiple exposure. LR/Enfuse offers more natural look for our images with powerful dynamic range which is very effective incomparison with single exposure.
So these are some important free tools which with which you can go for enhancig working ability of Lightroom and can get best result in your working.
Many time it happens that during surffering on internet you like the preset of different images and want to have them for your photos manipulation. So let me tell you how you can install those presets in your Lightroom software for using them.
How to install Lightroom presets?
You can find a number of presets on the external sources and can use them in your photos during doing manipulation as well as organizing them and for that, you have to install lightroom presets.
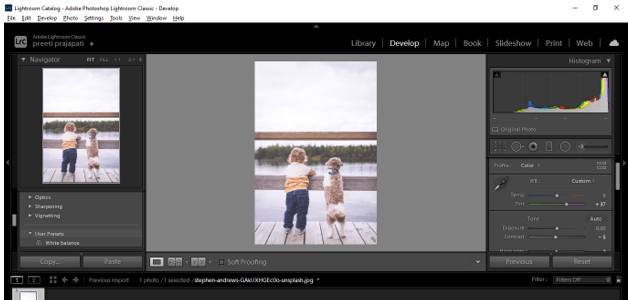
Before start discussing installation process let us has an image on which I want to use installed preset. I will choose this image for this purpose.
And I will go to Develop mode of this by clicking on Develop button of top bar of this software.
I will change parameters of this image such as slight change in temperature and tint. I also adjust is exposure.
Now with these parametrical settings, we can create our own new presets which you can understand as internal preset of lightroom. So for that, I will go to Presets panel of this software which you can find at the left side of working screen and click on the plus icon then choose to Create Preset option from open drop-down list and you can name your presets in opened dialog box after that then go with all settings that you made.
Now let us discuss how we can install presets in lightroom so for this purpose go to Edit menu of menu bar and click on it. Here in the scroll-down list of it you will find Preferences option so click on it or you can use Ctrl +, button of keyboard as shortcut key of Preference option.
Once you click on it, you will have a Preferences dialog box. In this box click on Presets tab for having parameters of it.
Here in the Presets tab, we have two options for installing preset. First one is ‘Show lightroom develop preset’. By going through this option you can install XMP file formats of preset.
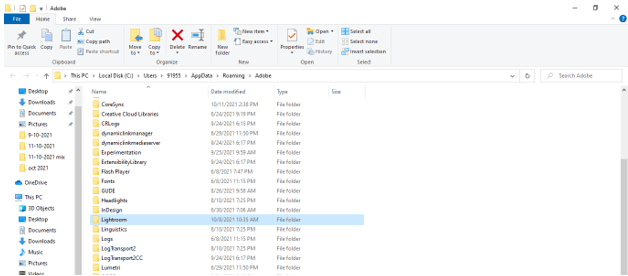
And once you click on it, it will take you to Settings folder of Lightroom. So open this folder by clicking on it.
And you can paste XMP file format of preset here which you have been downloaded from any external source. You can paste bunch of presets file at a time. Just copy all then paste all.
Now next option if ‘Show all other Lightroom Presets’ which is for LR template. So click on it.
And once you click on it, it will take you to the Lightroom folder of Lightroom software. Open this Lightroom folder.
Then go to Develop Presets folder and open it and User Presets Folder of it you can paste your LR template file.
After installation of preset through any of above-discussed method, you have to restart Lightroom and after that, you can find your installed preset in the Presets panel of this software which is at the left side of working screen. You make find it in the User preset folder which is in the list of Presets panel.
These are some aspect about which you must have knowledge so that you can understand New Presets of Lightroom clearly.
Conclusion
Now after going through this article, you have handful of knowledge about presets of this software and you also know how you can create new presets with your own settings as well as how you can install external presets for having effective result in your photo manipulation work. So just start practice on how you can use new preset very smoothly.
Recommended Articles
This is a guide to Lightroom New Presets. Here we discuss the Introduction, Free Tools Lightroom New Presets, How to install Lightroom presets? You may also have a look at the following articles to learn more –


