Introduction to Lightroom XMP
Lightroom XMP can be understood as a text file that holds metadata or any changes made in raw photo files by us to manipulate them differently. Lightroom itself stores data in the catalogue, but it is only readable for Lightroom and only exists in our catalogue as a whole, but the XMP file offers us the best feature that saves our edited image changes in a separate file that is easy to retrieve and use them. So today, I will tell you all the important aspects of XMP and tell you how you can save them so that you can also use Lightroom files with other editing softwares also.
How to save XMP files?
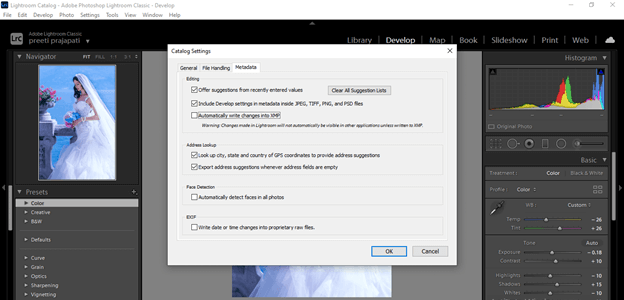
Lightroom doesn’t save the xmp file automatically until you do the following settings. It is only two steps 0settings so let me tell you about this. First, go to the Edit menu of the menu bar, which you can find top of the user screen, and choose the Catalog Settings option from the scroll-down list of it, or you can press Ctrl + Alt +, for quick access to this option.
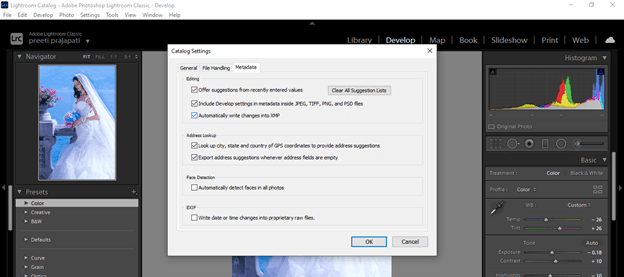
A Catalog settings dialog box will be open. Here go to the Metadata tab. In this tab, you will see the ‘Automatic write changes into XMP’ option is disabled, which means Lightroom will not automatically save the .xmp file, and you will not be able to see changes in other applications.
So enable this option by making a tick mark on the check box and then hitting on the Ok button of this dialog box. This way, we can save the .xmp file in this software.
Now let us have a look at the xmp preset so that you can have an idea about how it works with our photos.
Lightroom xmp preset
While working on image manipulation and organizing processes in this software, we have always used presets to make our work easy. We can get our desired result in just a few steps. Here in this software, we have almost every preset in XMP format, which means the preset file has all the metadata details of parametrical settings used to create that preset.
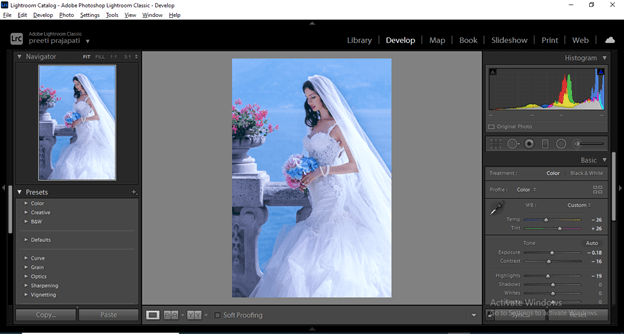
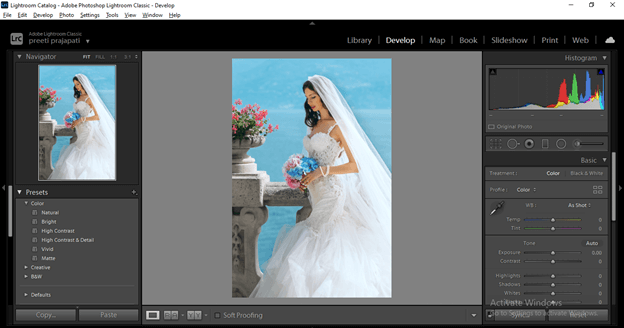
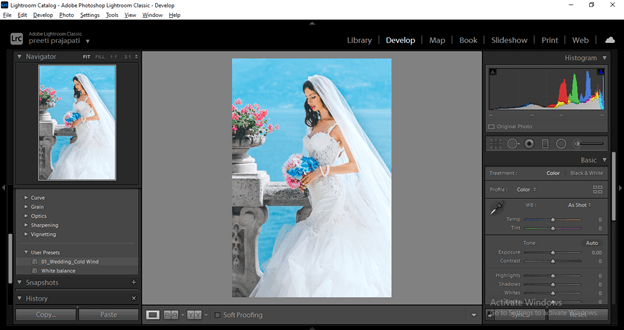
Let us go with this image and change it to Develop mode, and at the left side of this user screen, you will find Presets tab. You can see that there are many presets folders.
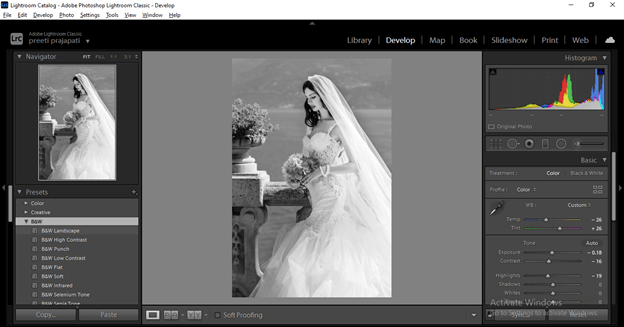
I can open any one of the folders and use any preset to change different parameters of this image.
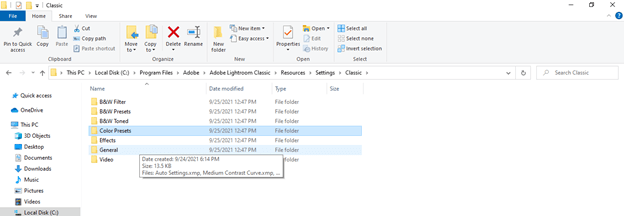
And all these presets are in XMP file format. So let me show you this. Go to Presets folder of Lightroom classic in your computer system.
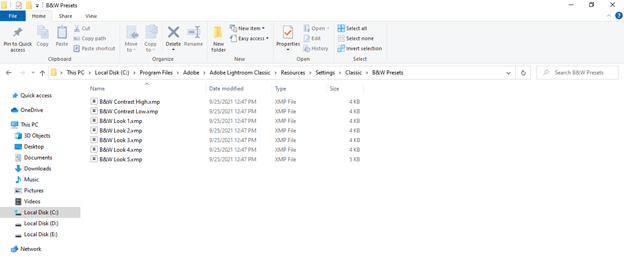
And when you open one of the folders, you can see the file extension is .xmp. This software pre-installed all these xmp presets so that we can understand them as internal xmp preset.
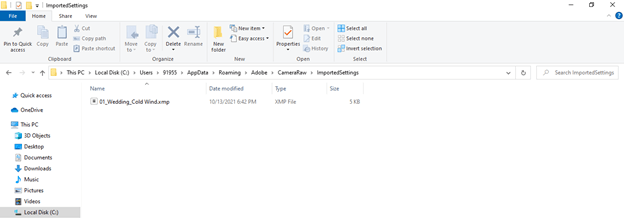
Suppose you have imported any xam presets file in the Lightroom folder. In that case, you can find imported xmp preset in the Imported Settings folder of CamerRaw folder of lightroom, an external xmp file.
Installed xmp preset or created xmp preset, also understood as external xmp preset. These two presets were created by me, and I saved them in the User Presets folder of Lightroom software. But, of course, you can do it for you too.
Now we will discuss how we can import xmp presets in lightroom to use them in our image’s manipulation process.
Importing XMP preset in Lightroom
Importing xmp preset in Lightroom is not a very big deal; we just have to follow these steps. First, select the image on which you want to use the imported xmp preset and switch to Develop mode.
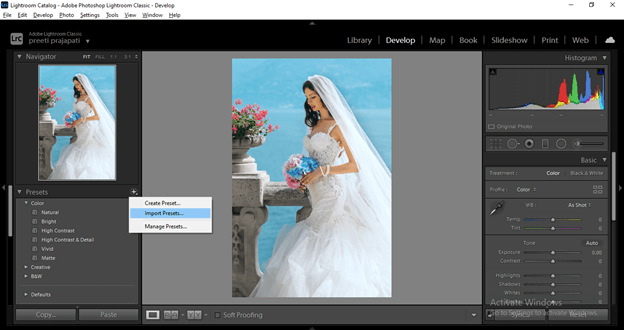
At the left side section of lightroom software, you can find Presets tab, and in this tab, we have a plus icon on the right side, so click on it. Once you click on it, you will have the Import Presets option in the popup list, so click on it.
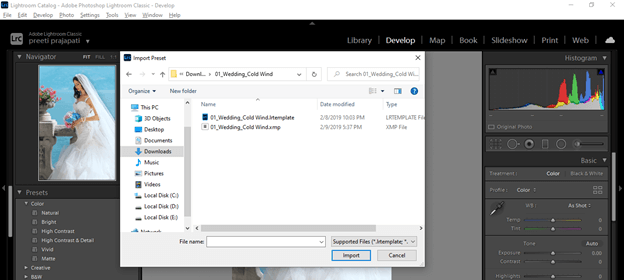
Once we click on it, a dialog box will open for choosing our xmp file of preset, so go to the saved location of xmp preset and select it. You can download these presets from external sources. I have only one here, which i have downloaded from the internet.
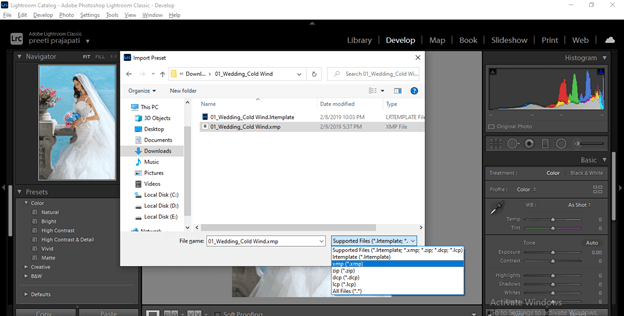
You can see the supported file format in this list, and xmp is one of them.
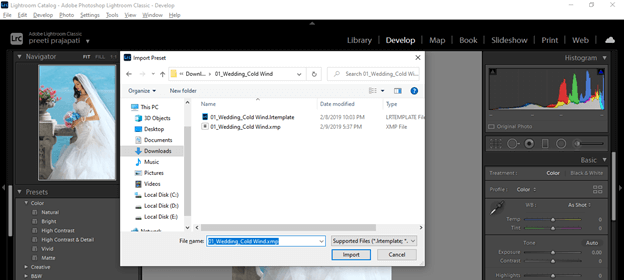
I will select this one; you can select more than one preset file at a time and then click on the Import button of this dialog box.
And it will come into the Presets tab section. You can find it by scrolling down the list of presets. It generally comes in the User Presets folder.
How to install new .xmp presets in Lightroom?
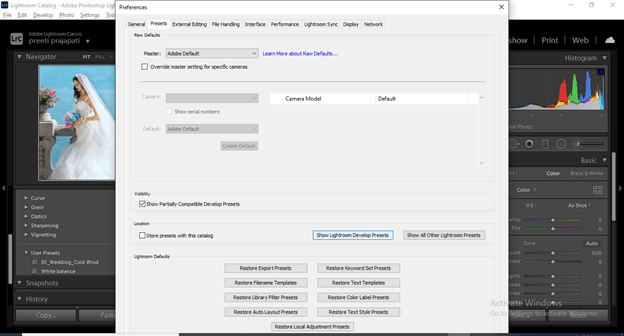
The next thing you want to know is how you can install new .xmp presets in Lightroom. So for that, go to the Edit menu of the menu bar and choose the Preferences option from the scroll-down list, or you can press Ctrl + button as its shortcut key.
Once you click on it, you will have this dialog box. Here click on Presets tab, and in this tab, we have the ‘Show Lightroom Develop Presets’ option. Click on this for installing .xmp presets.
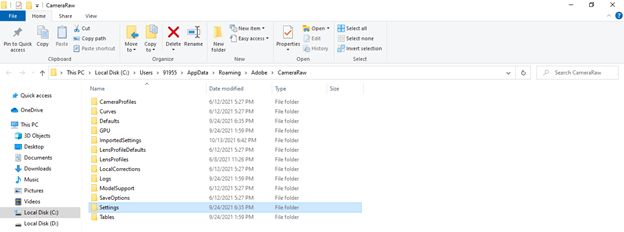
Once you click on this option, it will directly take you to the Settings folder of Lightroom. So open this folder.
And here, you can past copied file of the downloaded xmp presets file. You can create a new folder for new presets or paste them into the User Presets folder by opening it. After completing this process, you have to restart Lightroom to have your installed presets in the Presets tab of Lightroom.

Conclusion
These are some important aspects of the xmp file and its presets that we use in Lightroom for having several manipulations works on our photos. Now you can try different xmp presets for your photos so that you can make different experiments and get the best output from them, and for this purpose, you can create your own xmp preset or go with externally installed presets.
Recommended Articles
This is a guide to Lightroom XMP. Here we discuss How to install new .xmp presets in Lightroom along with the Importing XMP. You may also have a look at the following articles to learn more –

