Updated April 14, 2023

Introduction to Linux Disk Space
The following article provides an outline for Linux Disk Space. Disk Space is defined as a utility which helps the user with the space left in the system’s disk. Within this utility itself, there are numerous sub-utilities which allows the user to perform specific tasks. A few examples of such tasks are managing the disk space, checking the disk space, freeing up the disk space, etc. In this article, we will take a dig at each of the tasks which are performed separately within the big picture of Disk Space. One needs to make sure that the user who is performing such disk space actions on the system needs to have appropriate read access, devoid of which it will be impossible to even test out the commands.
Syntax of Linux Disk Space
In Linux, there are a lot of options available for Linux Disk space utilities, and to respect the restriction of the article size, we would need to shortlist a few of them, but be sure of the fact that the options we would be discussing here would suffice most of the utilities which are used in today’s world.
Here we would look at the syntax first, and in subsequent blocks of the article, look at the working of Disk space’s utilities.
1. Checking the disk space usage.
Syntax:
df2. Human readable format for displaying disk space.
Syntax:
df -hThe above option of -h can be replaced by -m if the user wants to get the disk space in MB, or it can be replaced by -k if a user wants to get the disk space in KB.
3. Displaying information about a particular mount location.
Syntax:
df -hT <mount location>4. Display the inodes of the file system.
Syntax:
df -i5. Display the type of the File System.
Syntax:
df -T6. List only certain file system type.
Syntax:
df -t <type of file system>7. List after exclusion of certain file system.
Syntax:
df -x <type of file system>8. Display the complete disk usage even if the available field is 0.
Syntax:
df -a9. Displaying the help section of the command.
Syntax:
df --helpHow does Linux Disk Space Work?
Before we see about Linux disk space, let us familiarize ourselves with some key notations when it comes to space. It is a known fact that 1024 GB = 1TB. Now when you buy a 1 TB drive and mount it, the system will report it as 977 GB. Ok. Where did the rest of 23 GB go? As a matter of fact, it didn’t go anywhere, and neither you should feel that you are cheated. The discrepancy lies in disk manufacturers using true metric measurements, i.e. 1000 instead of 1024.
So mathematically,
1 TB = (1000 /1024) *1000 GB = 976.5 ~ 977 GB
Now coming to the next pointer on how the file gets stored in the disk. The contents in the files are stored in data blocks in the disk. Now, the question which arises is, if a specific block contains contents in a file, how a command would know on what to retrieve. For this, the usage of the inode is what comes to play. An inode is like file pointers which are presently pointing to a specific location or block in the disk space.
Now the inode carries some information of the block, and using this, or in other words by the usage of the file pointers left; the system finds the group of pointers which are not consumed and then sums up the non-used space to show up the free space! One must also be wary of the fact that Disk has some reserved space which is known as Reserved Block count, space which is reserved by the kernel for privileged users’ processes which are not available for everyone to access hence, might show up disk as 100% full, even though there might be some space in the comparison between size and used.
Examples of Linux Disk Space
Given below shows specific examples of different commands in disk space for specific utilities:
Example #1
Checking the disk space usage.
Syntax:
dfOutput:
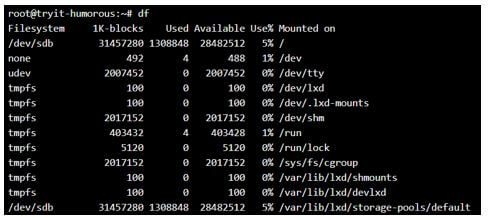
Here we see that all the properties are mentioned in a crude form that is not so human-readable. The different file systems are mounted in different locations, as mentioned in the display. One can also get the use% of the different filesystem and, in accordance to that, make a necessary strategy to optimize the disk space.
Example #2
Human readable format for displaying disk space.
Syntax:
df -hOutput:
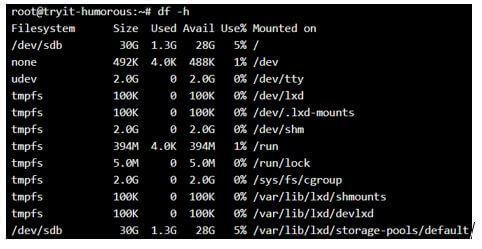
Formatting in GB:
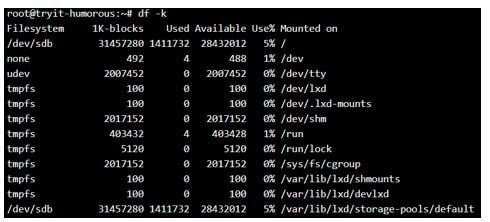
Formatting in KB:
df -kOutput:
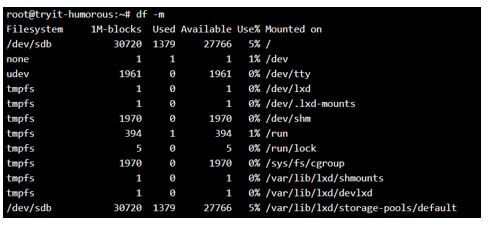
Formatting in MB:
df -mOutput:
Example #3
Displaying information about a particular mount location.
Syntax:
df -hT /dev
df -hT /run
Output:
Example #4
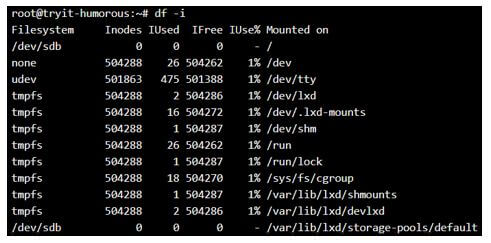
Display the inodes of the file system.
Syntax:
df -iOutput:
Example #5
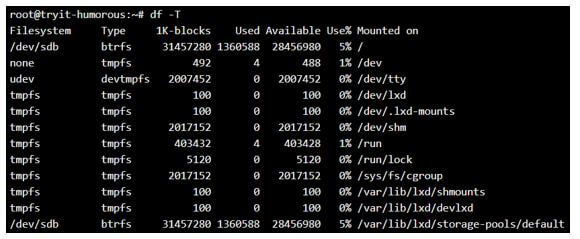
Display the type of the File System.
Syntax:
df -TOutput:
Example #6
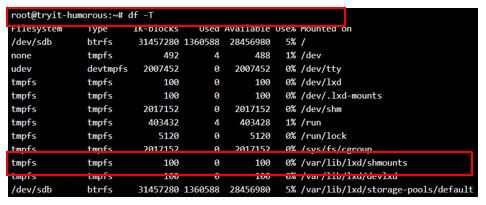
List only certain file system type.
Syntax:
df -T
df -t btrfs
Output:
Display of File system will all file types:
Display of file system for the only btrfs:
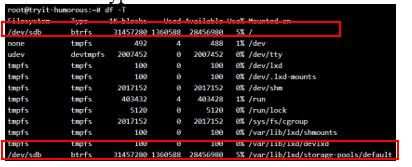
In the first snap, only the highlighted ones get displayed when the second command is executed.
Example #7
List after exclusion of certain file system.
Syntax:
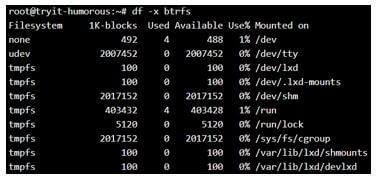
df -x btrfsOutput
Display of File system will all file types:
Display of file system excluding btrfs:
The ones highlighted in the first snapshots are removed.
Example #8
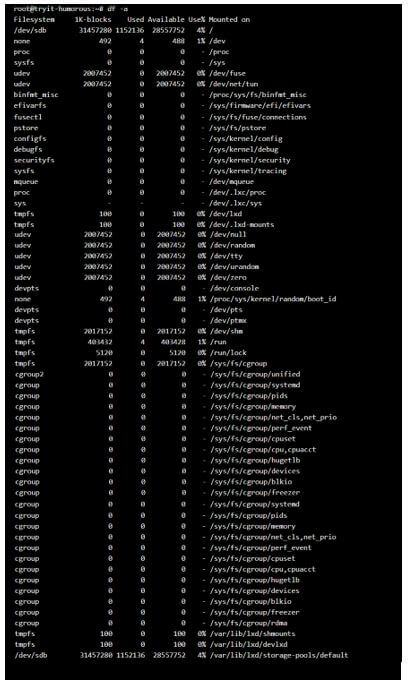
Display the complete disk usage even if the available field is 0.
Syntax:
df -aOutput:
Example #9
Displaying the help section of the command.
Syntax:
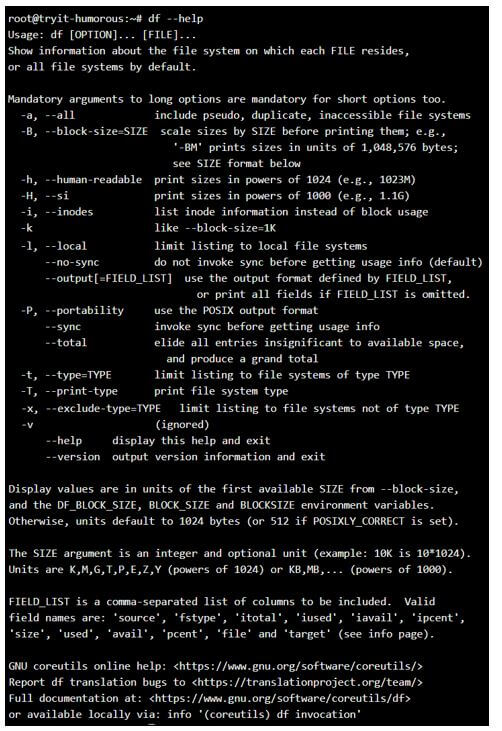
df --helpOutput:
In this example, we see that most of them seldom used all the other options visible when the command is executed.
Conclusion
With the set of examples and explanation of the way of working for disk space, we can get a sense of the df command’s utility. Another thing to mention is that there is the availability of another command du which more or less performs a similar task as df, and is left to the readers to try and experiment it out so that one can easily appreciate the vastness which Linux brings! Last but not the least, we would recommend the readers to try each of the commands by themselves to understand and get eased to the working of the command.
Recommended Articles
We hope that this EDUCBA information on “Linux Disk Space” was beneficial to you. You can view EDUCBA’s recommended articles for more information.
