Updated May 29, 2023

Introduction to Linux tracepath Command
The tracepath command in Linux allows to trace the path to the destination path determining MTU along this path using UDP port or any other ports that will not require any superuser permissions. Tracepath, tracepath6 are the path traces to host a network detecting MTU along with its path. Tracepath6 is the best example of apps running in Linux error queues. There are many options available in tracepath that helps to fetch the data along with their hostname and IP addresses.
Tracepath and traceroute are similar to each other as a Linux Utility service. The main differences between them are:
- root or superuser privileges are not required in tracepath. This is the main reason for using tracepath than traceroute in Linux.
- Tracepath only uses UDP probe along with any other high ports. But traceroute uses UDP along with ranges of destination port between 33434-33534.
Syntax:
The general syntax of Linux tracepath is:
tracepath [destination]When the options are given along with the tracepath command, the syntax is given below:
tracepath [-n] [-b] [-l pktlen] [-m max] [-port] destinationHow Does tracepath Command Work in Linux?
Let us take an example and briefly describe each parameter in it.
tracepath6 4gge:2467:2:374::3
From the above screenshot, the first column gives us the information on TTL(Time to Live) followed by a colon(:). Generally, the TTL value is fetched from the network, and times when the TTL values is not fetched then the value is pursued by ?.
The second column gives information on network hop. Usually, it is the address of the router. In some cases when the probe is not sent to the network then the word (LOCALHOST) is displayed.
The remaining data that is displayed in the output is some varied information regarding the network hop or the paths. The last line briefs about the paths to the destination, MTU path, network hops from the destination, number of network hops in the probe.
Options Available for tracepath in Linux
There are few options that are available in Linux for tracepath to trace the path of the destination determining MTU along this path using UDP port or any other ports.
| Options | Descriptions |
| No option | When tracepath command is given with no option in the parameter, then it will simply display the syntax of tracepath. |
| Option with destination | We can trace a path to the destination using tracepath |
| Option -n | When tracepath is given by option n, it prints the IP addresses in the output. |
| Option -b | The option b, will print hostname and IP Addresses in the output. |
| Option -l | this option for tracepath will allow to set the packet length initially to pktlen. |
| Option -m | Option m will allow to set the number of maximum hops or TTLs to maximum instead of 30. |
| Option -p: | Option p with tracepath command will allow to set destination port to be used. |
Examples to Implement Linux tracepath Command
Below are a few examples shown to use the tracepath command in Linux with its options. Syntax and examples with screenshots are given below for better understanding.
1. With no Option
tracepath when entered without any option will display the syntax of tracepath command with different options that are associated with tracepath. A brief description is explained on each option.
Command:
tracepathOutput:
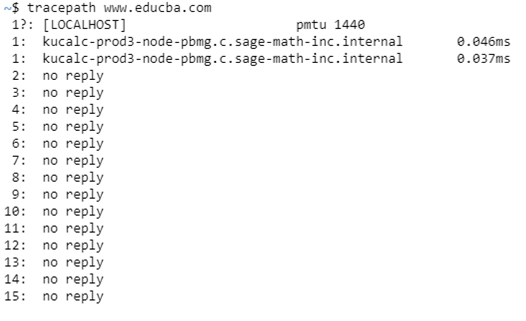
2. Tracepath with Destination
We can trace a path to the destination using tracepath command in Linux by the given syntax below:
Syntax:
tracepath destinationCommand:
tracepathOutput:
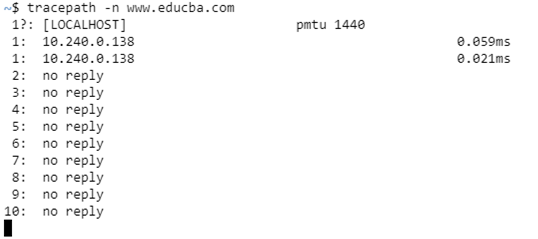
3. Option -n
When tracepath is given by option n, it prints the IP addresses in the output. There will be times when we would need the details about the IP addresses of the destination, then this option would be more needed. The syntax for option n is given below.
Syntax:
tracepath -n destinationCommand:
tracepath -nOutput:
4. Option -b
The option b will print hostname and IP Addresses in the output. The output shown in the below screenshot gives you the complete knowledge on the hostname as well as the IP Addresses. The syntax is given below:
Syntax:
tracepath -n destinationCommand:
tracepath -bOutput:
5. Option -l
this option for tracepath will allow to set the packet length initially to pktlen. The syntax is given below:
Syntax:
tracepath -l <num> destinationCommand:
tracepath -l 42Output:
6. Option -m
Option m will allow to set the number of maximum hops or TTLs to maximum instead of 30. The syntax is given below:
Syntax:
tracepath -m <num> destinationCommand:
tracepath -m 12Output:
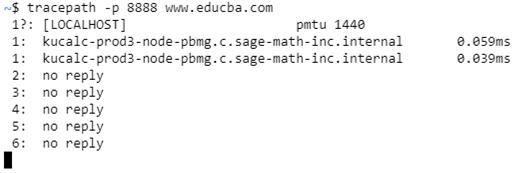
7. Option -p
Option p with tracepath command will allow to set destination port to be used. Whenever we would need to set a fixed port at the destination probe, we can use this option. It generally limits the usage of the port options. The syntax of this option is given below:
Syntax:
tracepath -p 8888 destinationCommand:
tracepath -p 8888Output:
Conclusion
tracepath command in Linux allows to trace the path to the destination path determining MTU along this path using UDP port or any other ports that will not require any superuser permissions. Tracepath,tracepath6 are the path traces to host a network detecting MTU along with its path. Tracepath6 is the best example of apps running in Linux error queues. There are many options available in tracepath that helps to fetch the data along with their hostname and IP addresses.
This article has complete information on how and when to use the tracepath command in Linux. The examples are also briefly described with screenshots for better understanding. Hope this article brings you a clear understanding of tracepath command in Linux.
Recommended Article
We hope that this EDUCBA information on “Linux Tracepath” was beneficial to you. You can view EDUCBA’s recommended articles for more information.


