Updated May 10, 2023
Excel Lock Formula (Table of Contents)
Lock Formula in Excel
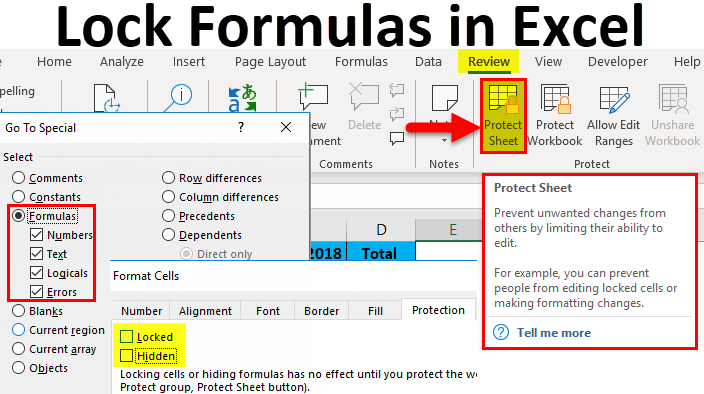
We can lock the sheet or workbook to protect our work or functional formula in Excel. There are different ways to do it. The first way, select the Protect Sheet option from the Review menu tab under the Changes section. Next, please choose the option which we want to lock in a workbook, then give the password to lock it. In another way, we can lock any cell’s formula using the Format cell. Click right on the cell we want to protect, and from the Format Cells option, select LOCKED from the protection tab.
How to Lock and Protect Formulas?
It is a very simple and easy task to lock and protect formulas. Let’s understand how to lock and protect the formulas with an example.
Excel Lock Formula – Example #1
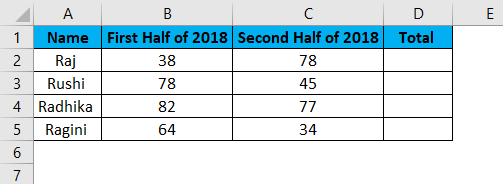
Consider the below example, which shows the data of the sales team members.
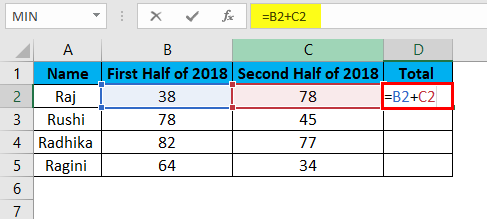
In the below image, the total has been calculated in column D by inserting the formula =B2+C2 in cell D2.
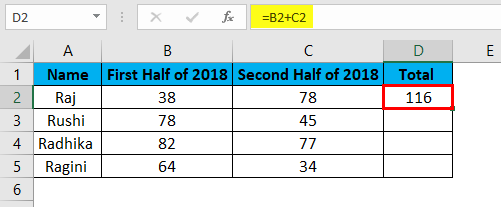
The Result will be as shown below:
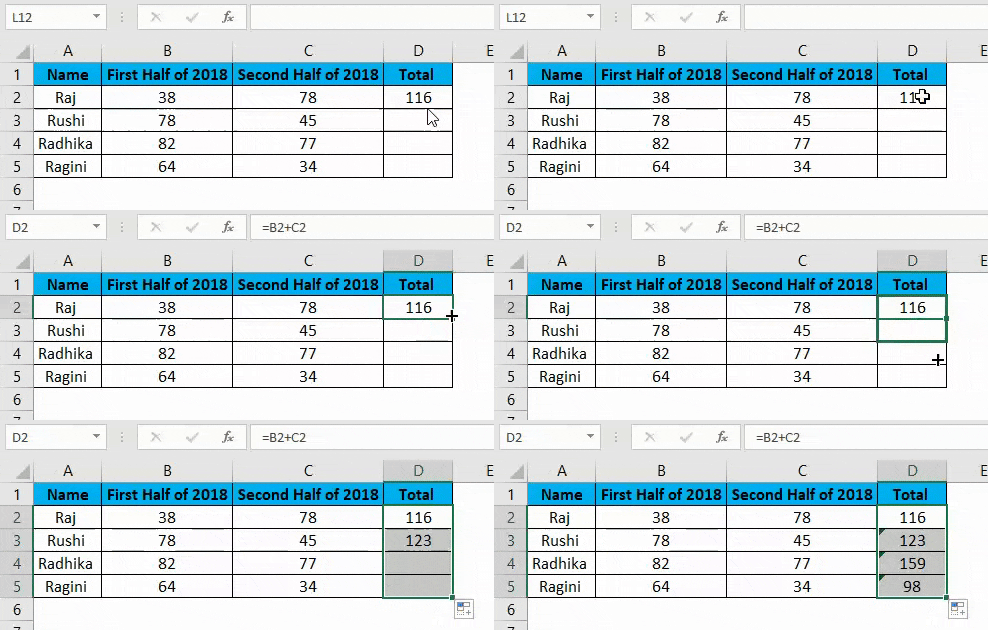
The formula in the total column has been copied from cells D2:D5.
In this example, we will lock the formula entered in column D. So, let us see the steps to lock and protect the formulas.
- Please select all the cells by pressing Ctrl+A and unlock them.
- Select the cells or the entire columns or rows where you must apply the formula.
- Lock the cells which contain the formula.
- Protect the worksheet.
Let us in detail show how are the above steps executed.
Step 1: Unlocking all the cells
The cells in Excel are protected and locked in Excel. We must unlock particular cells in the workbook as we need to lock them. So let us see how to unlock all the cells. The steps to unlock all the cells are as follows:
- Press Ctrl+A to select the entire worksheet.
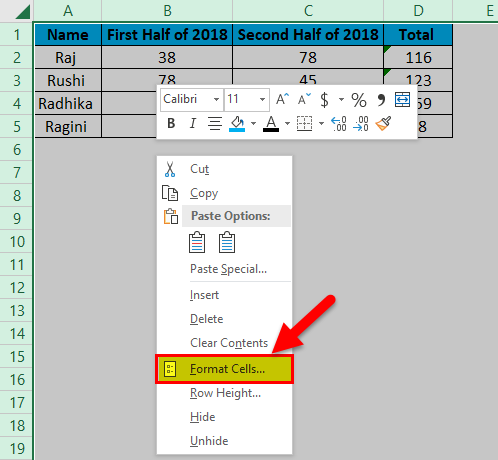
- Right, Click, and select Format Cells from the options in the context menu.
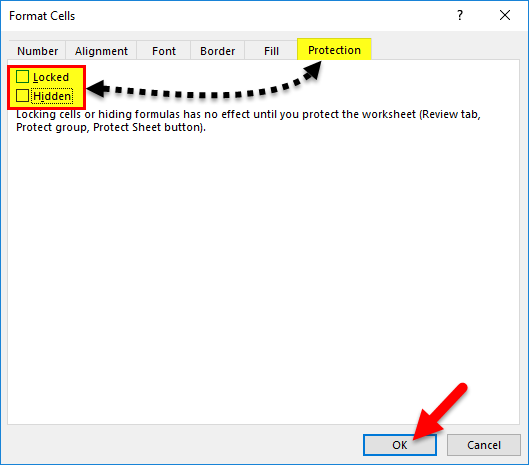
- Select the Protection tab, uncheck the Locked and Hidden options, and then click OK.
Step 2: Select and lock the cells containing the formula
Now, we need to lock the cells where we entered the formula. The steps to lock the cells containing the formula in Excel are as follows:
- Select all the cells in the worksheet by pressing Ctrl +A.
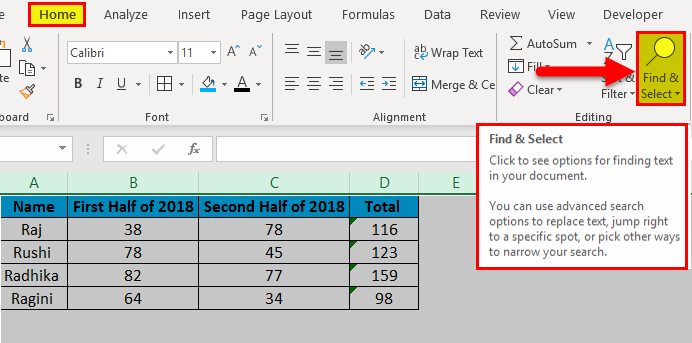
- Go to the Home tab and select Find & Select option from the Editing menu.
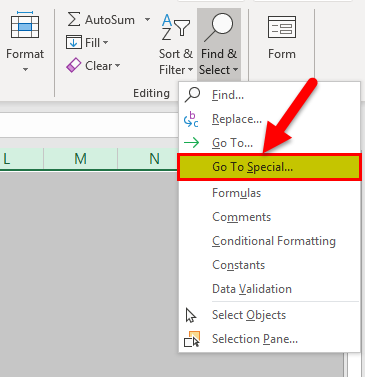
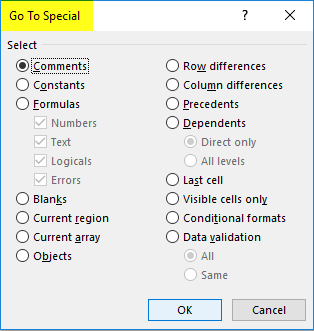
- After selecting the Find & Select option, other options will appear under it, from which select the Go To Special option.
- Go To Special dialog box will appear as shown below.
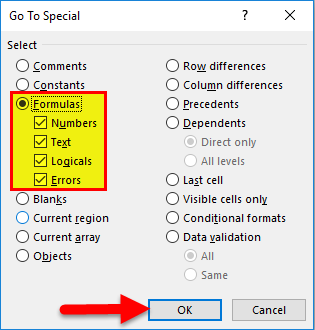
- We have to select the Formulas option and check all the options under the Formulas button are ticked and then click OK.
Step 3: Protection of the Worksheet
This function ensures that the locked property is enabled for cells with formulas and all the cells in the workbook. Let us see the steps followed to implement the protection for the worksheet:
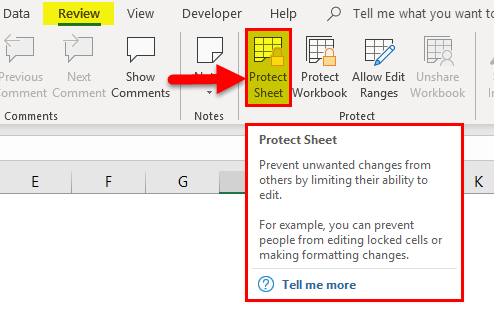
- First, go to the Review tab and select Protect Sheet option.
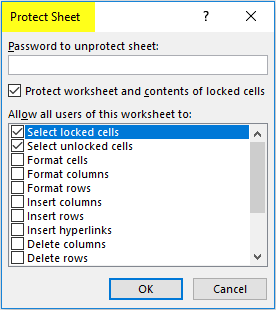
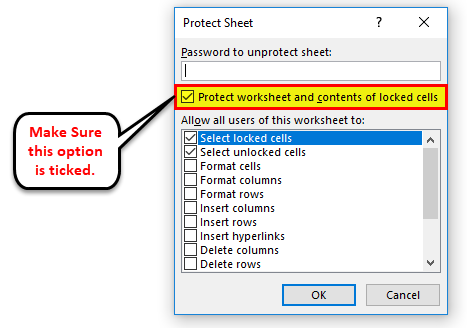
- After this, the Protect Sheet dialog box will appear.
- This ensures that the “Protect Worksheet and contents of locked cells” is selected.
The user can also type a password in the text box under the Password to unprotect the sheet to make the worksheet safer.
Advantages of Lock Formulas in Excel
- It helps the user keep their data secure when sending their files to other recipients.
- It helps users hide their work when sharing the file with other readers and users.
- The user can use a password in the case to protect the entire workbook, which can be written in the text box named ‘Password to unprotect the sheet.’
Disadvantages of Lock Formulas in Excel
- A new user will need help understanding the function in Excel.
- It becomes easier if the user remembers to enter the password to unprotect the file.
- It could be more efficient in terms of time as it consumes the time of a user to protect and unprotect the cells of the worksheet.
Things to Remember
- All the cells are protected by default; remember to unlock the cells to lock formulas in Excel.
- After locking formulas in Excel, make sure to lock the worksheet again.
- The entire workbook can be protected by using the option restricted or unrestricted access from the “Protect Workbook” option.
- In case the user needs to hide their work or formulas from others, they can tick the option “Hidden” by selecting the “Protection” tab from the “Format Cells” dialog box.
- If the user must unprotect the complete file, type the password by selecting the “Unprotect Sheet” option.
- Users can save time by moving the formulas to separate worksheets and hiding them instead of protecting and unprotecting the worksheet.
Recommended Articles
This has been a guide to Lock Formula in Excel. Here we discuss how to Lock and Protect Excel formulas, practical examples, and downloadable Excel templates. You can also go through our other suggested articles –
