Introduction to Logo Reveal After Effects
After Effects is the most important software that Abode Systems offer as their graphics editing software, we animate logos in this software also. Logo Reveal is one of the logo animation technique of this software. We can understand Logo Reveal animation as a method in which we animate the logo by using some different types of effect from the Effects & Presets option of this software. We will understand Logo Reveal through an example and understand how to handle its parameters for getting good knowledge about this feature of After Effects software. Logo Reveal is very simple to other logo effects methods so let us start our learning in this software.
Creating Logo Reveal in After Effects
Here we will learn Logo Reveal in very simple steps of learning, but before starting, you should have to get introduced to the working screen of this software for your better understanding of Logo Reveal of this software.
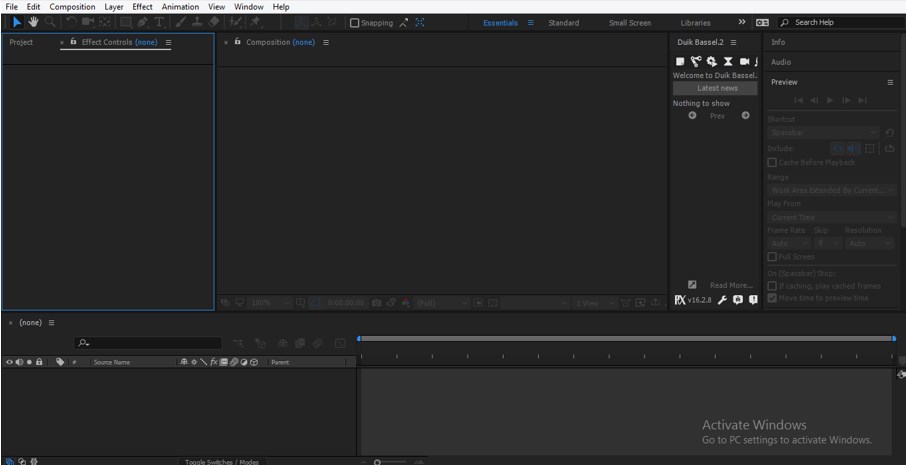
Step 1: At the top of the working screen we have two ribbon one is Menu bar and other is Tool panel along with Properties bar of these tools, below this we have three sections first is Project panel at the left side, Composition Window at center and Parameters tab at the right side, below these sections there are two sections at the bottom on the working screen first is Layer sections at the left side and Timeline sections at the right side. You can also make your workspace according to you. This is the default working screen of this software.
Step 2: Now, let us have a new composition for our learning. For new composition, go to the top ribbon at the ‘Composition menu’ of the Menu bar. A drop-down list will be open; click on the New Composition option of this drop-down list.
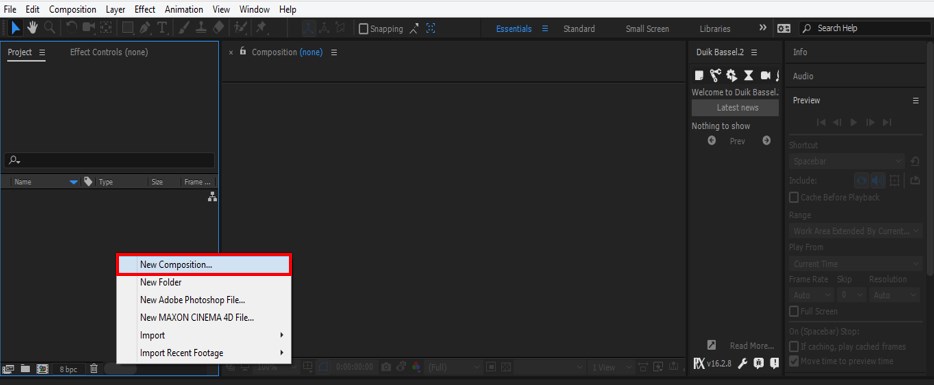
Step 3: Or go to the Project panel of this software and make the right-click from the mouse button anywhere in this area. Go to the New Composition option in the drop-down list.
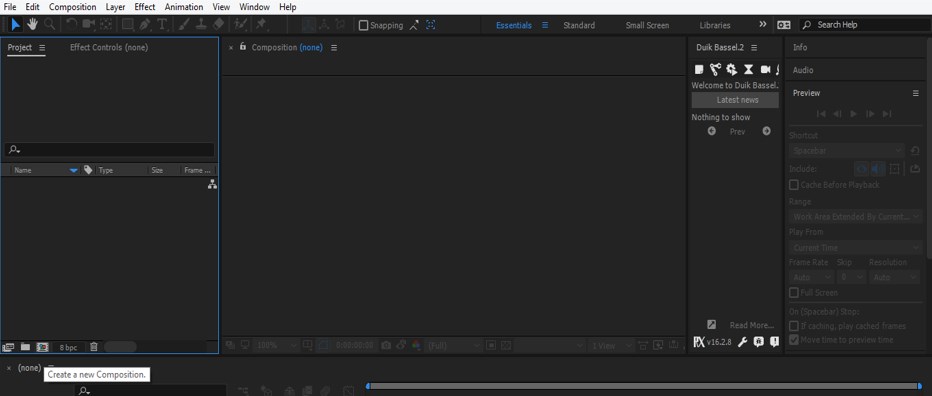
Step 4: Or you can click on the ‘Create a new Composition’ tab at the Project panel of this software.
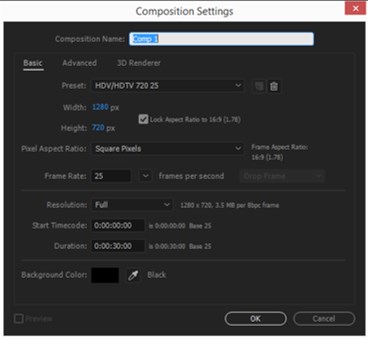
Step 5: A dialog box for the composition setting will be open. Make your settings of new composition here according to your requirement, and then click on the Ok button of this dialog box.
Step 6: Now, let us have a logo. I will take the text tool from the tool panel of this software for writing a letter. I will use this word as a logo for my work. You can use any type of logo from the internet for our learning, or you can use your one.
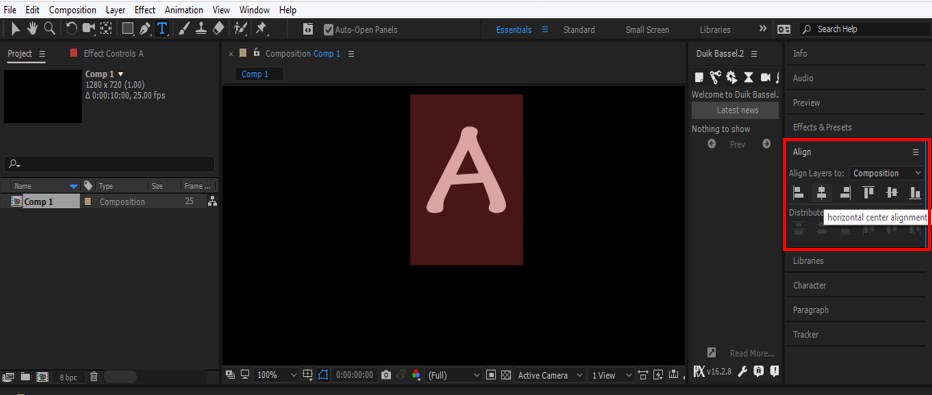
Step 7: After writing a text-align it at the center of the working screen with the help of the Align tab of the parameters section of this software.
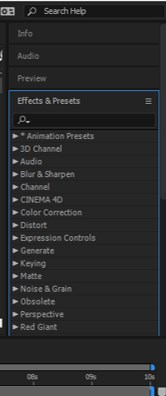
Step 8: Now go to the Effects & Presets tab of this software in the Parameter section.
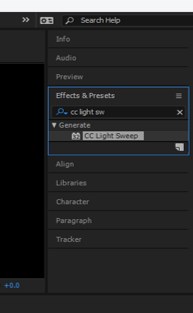
Step 9: Now search for the CC Light Sweep option in the search box of the Effects & Presets tab for giving effect on this logo.
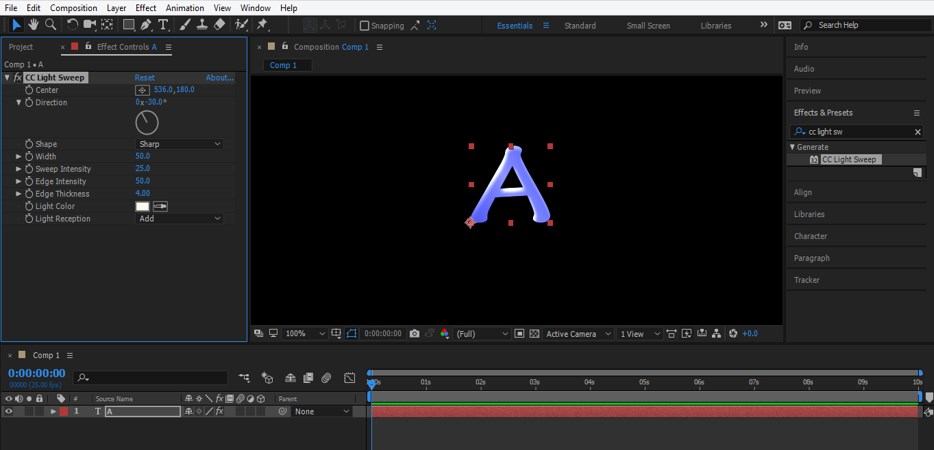
Step 10: Now, pick this effect from the parameters section by the mouse button and drop it on the layer of this logo in the Layer panel of this software.
Step 11: Now click on the plus sing of the Center option of CC Light Sweep effect for getting moving handling of this sweep on the logo screen. The moving handling of sweep is indicated by plus sings in a circle.
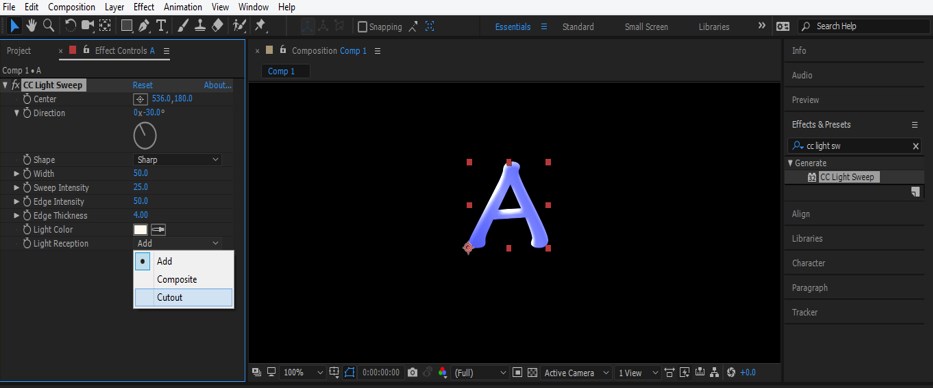
Step 12: Now click on the drop-down arrow of the Light Reception option of CC light Sweep Effect and choose the Cutout option from the drop-down list.
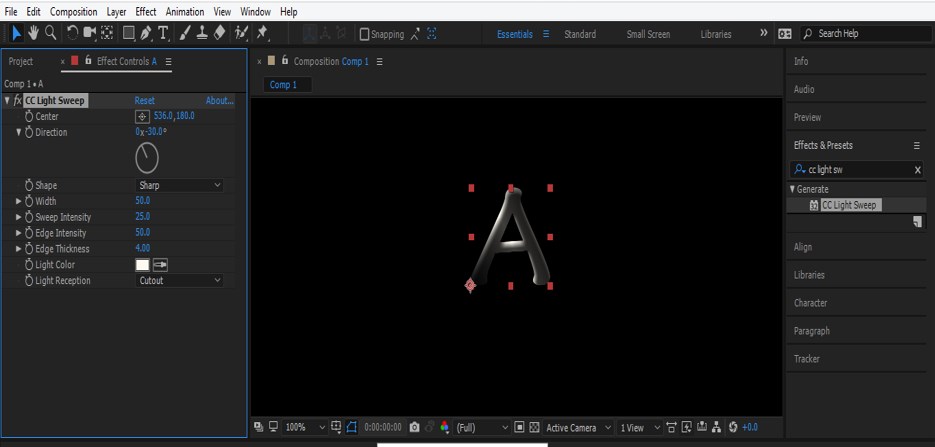
Step 13: Once you choose this option, your logo will look like this.
Step 14: Now, let us make some adjustments in the CC Light Sweep effect parameters for getting the best result of the Logo Reveal effect of this software.
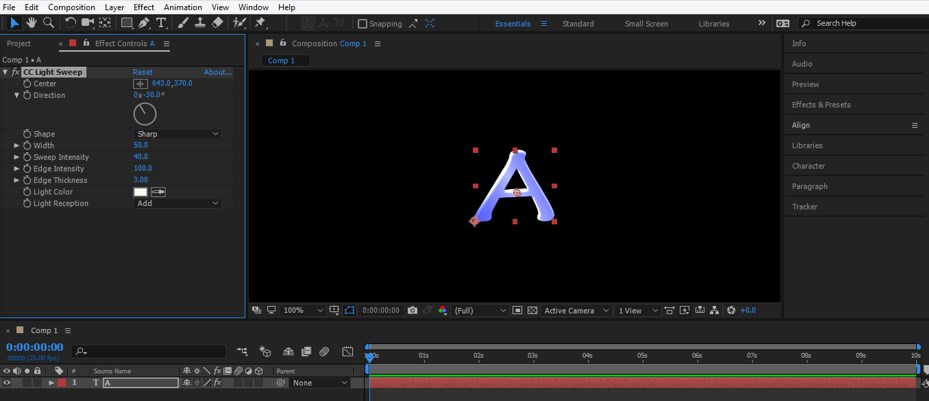
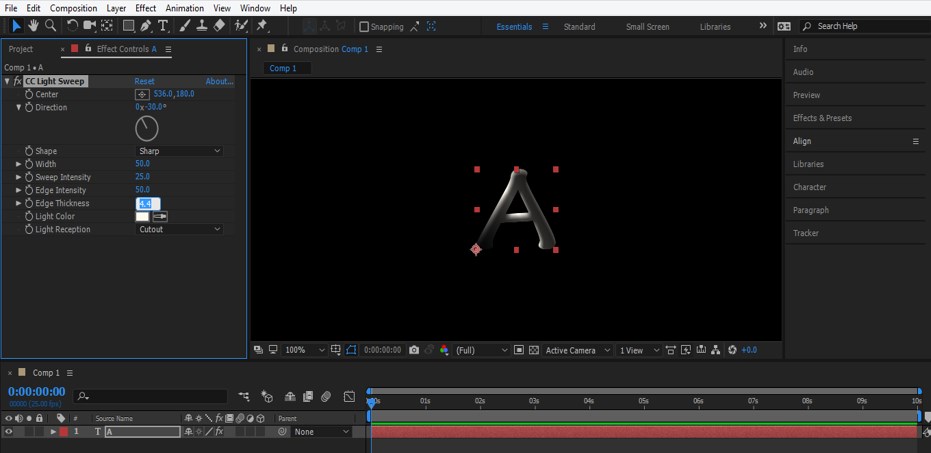
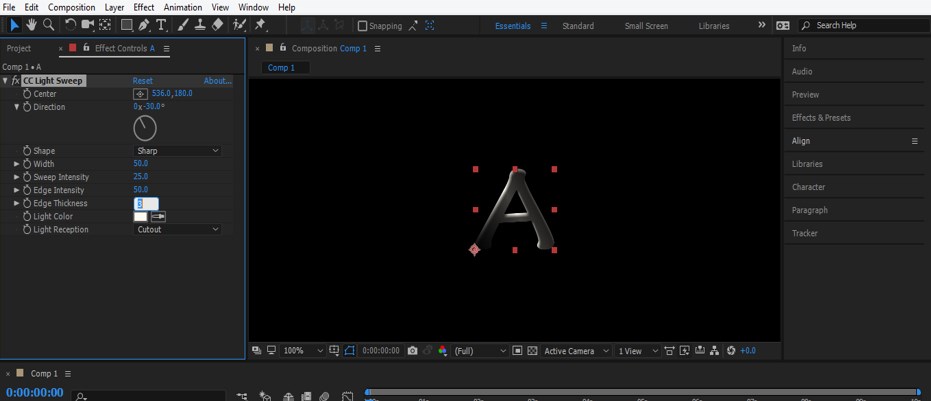
Step 15: Here, increase or decrease the Edge Thickness of the sweep light for getting the best look at the sweep line. You can choose any value of Edge Thickness according to you.
Step 16: I will take 3 as the value of Edge thickness.
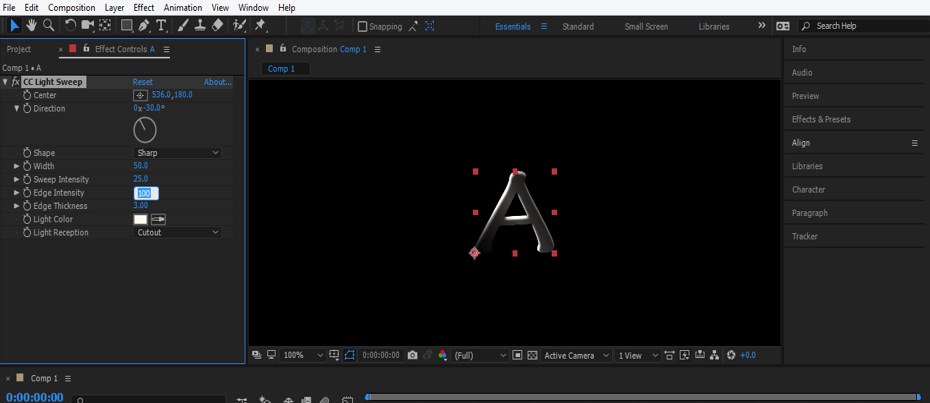
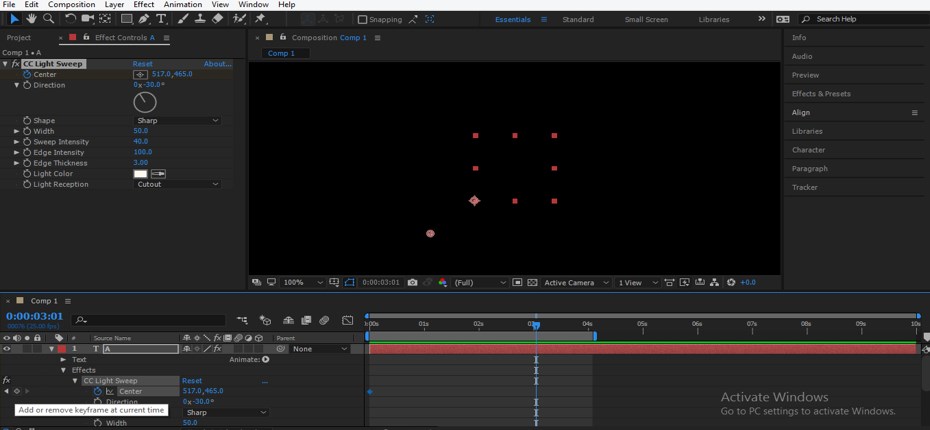
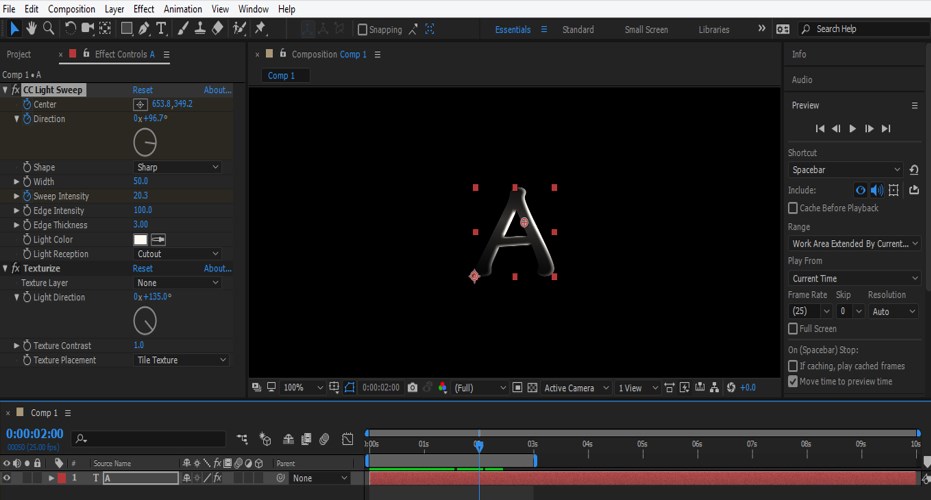
Step 17: Now, set the value of Edge Intensity which suits your logo. I will make it 100 because it suits my logo and gives a good look at my logo.
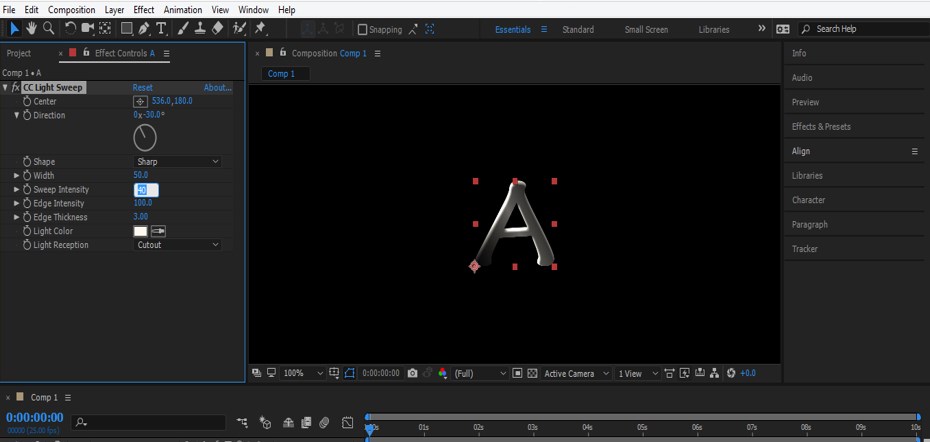
Step 18: Now adjust the value of Sweep Intensity. I will take it as 40. You can check the effect of Sweep Intensity by changing the value of it again and again.
Step 19: You can also change the direction of the sweep by changing the value of the Direction option of the CC Light Sweep effect.
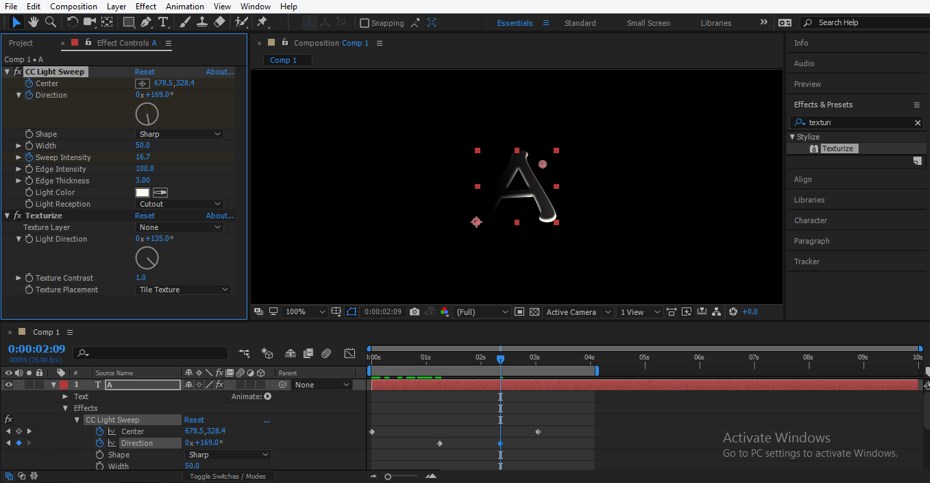
Step 20: Now, let us animate the sweep value for getting reveal effect on our logo. Place the sweep handle out of your logo screen and click on a small clock icon of the Center option of sweep effect for adding a key in the keyframe section.
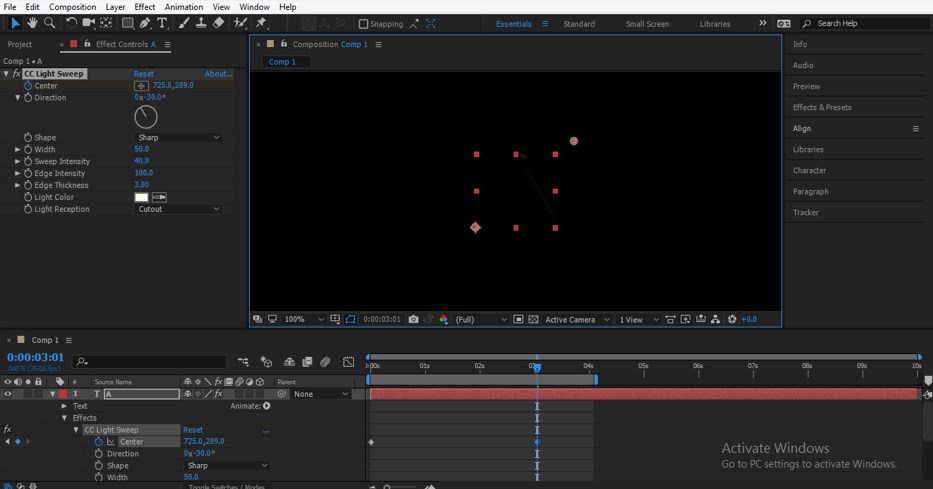
Step 21: Now, place the sweep handle out of the logo screen in the opposite diagonal direction of the logo and place the play head of the keyframe at 3 sec in the keyframe timeline section.
Step 22: Play the animation of the sweep by pressing the space bar of the keyboard. Your animation will look like this.
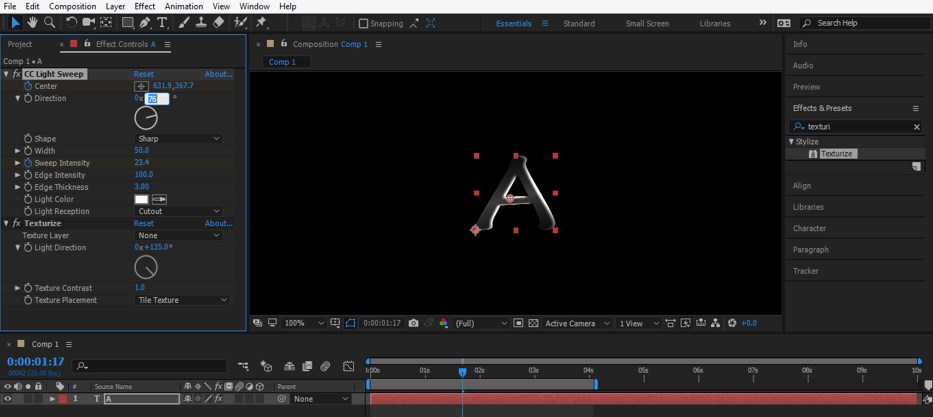
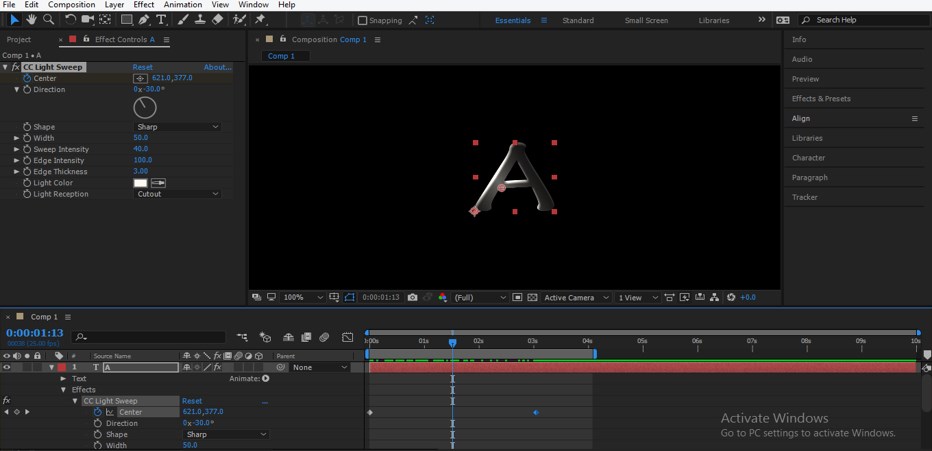
Step 23: Now, let us animate the Direction of sweep also. Place the sweep handle at this place and place the keyframe head at about 2 sec in the keyframe Timeline section, then add a key at the Direction option of CC light Sweep by click on the small clock icon of this option.
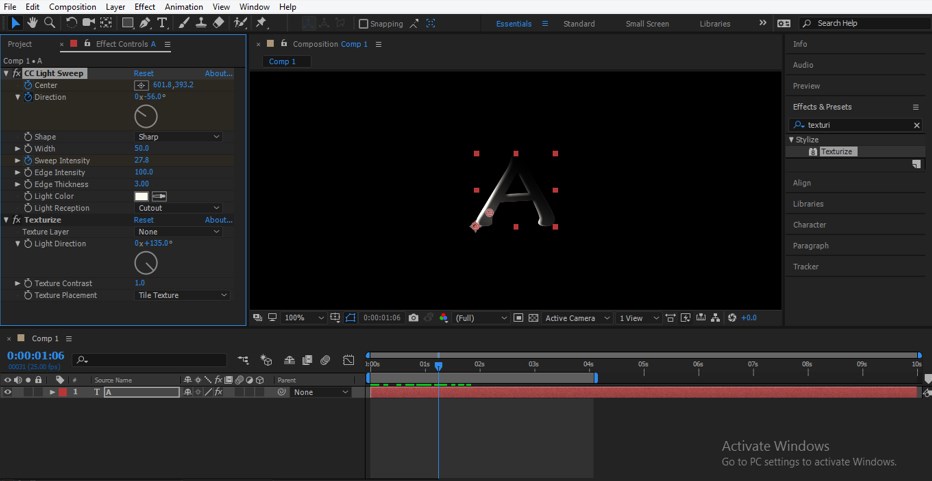
Step 24: Now, place the keyframe play head before 3 sec in the keyframe Timeline section and add another key in the keyframe section. Now change the direction of the sweep by changing the value of the Direction option of this effect.
Step 25: Now, you can see the animation by playing it. You can play it from the Preview tab of the Parameter section also.
In this way, you can make a Logo Reveal effect in After Effects software. You just have to make some adjustments in the parameters of different types of effects of this software.
Conclusion
Now, after this article, you can understand the ‘Logo Reveal’ feature of After Effects and get expertizing in it by practicing on parameters of different types of options. You can make a different type of Logo Reveal effect by using different effects of this software.
Recommended Articles
This is a guide to Logo Reveal After Effects. Here we discuss an Introduction, how to create a logo reveal in after-effects in a step by step manner. You can also go through our other related articles to learn more –
