Updated March 15, 2023

Introduction to Logstash Geoip
logstash geoip is the plugin available as a filter plugin in logstash and has its latest version of 7.2.9 as and when the article is written. It was released in January of 2022. It helps in adding the info about the IP address, which helps in the determination of the geographical location, which gets its help from the database of MaxMild GeoLite2. In this article, we will learn about logstash geoip and its subtopics, including what is logstash geoip, creating map logstash geoip, logstash geoip configure, and conclusion.
What is logstash geoip?
Logstash geoip is the plugin available in logstash that helps in determining the exact ip address, which is the geographical position, by getting additional help from the database of MaxMild GeoLite2. GeoLite2 city database is used while bundling the plugin. MaxMind’s GeoIP database is more accurate compared to the geolite2 database. But the advantage of the geolite2 database is that it is a geolocation database available for ip address locations that are too free of cost.
The plugin also supports various commercial databases provided from the max mind. We can download the database from the website of maxmind in case we need a database other than that of the geolite2 city, which is bundled internally. Other than this, we can specify the database location we will use in the database option. For example, if you wish to use Autonomous System Number information that is ASN, then we can use the Geolite2-ASN database.
Create Map logstash geoip
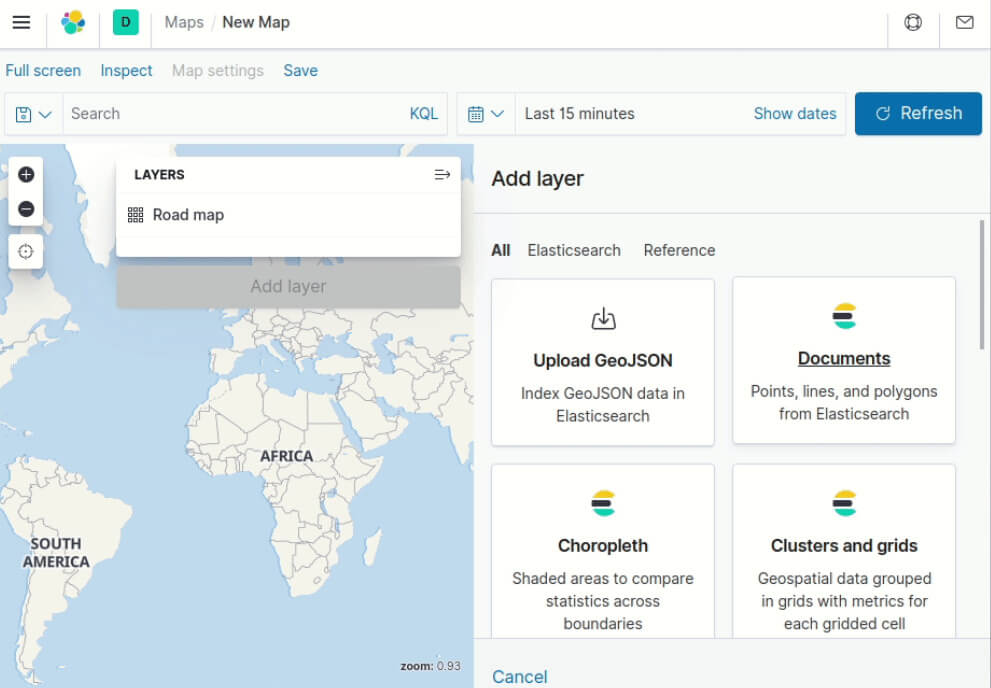
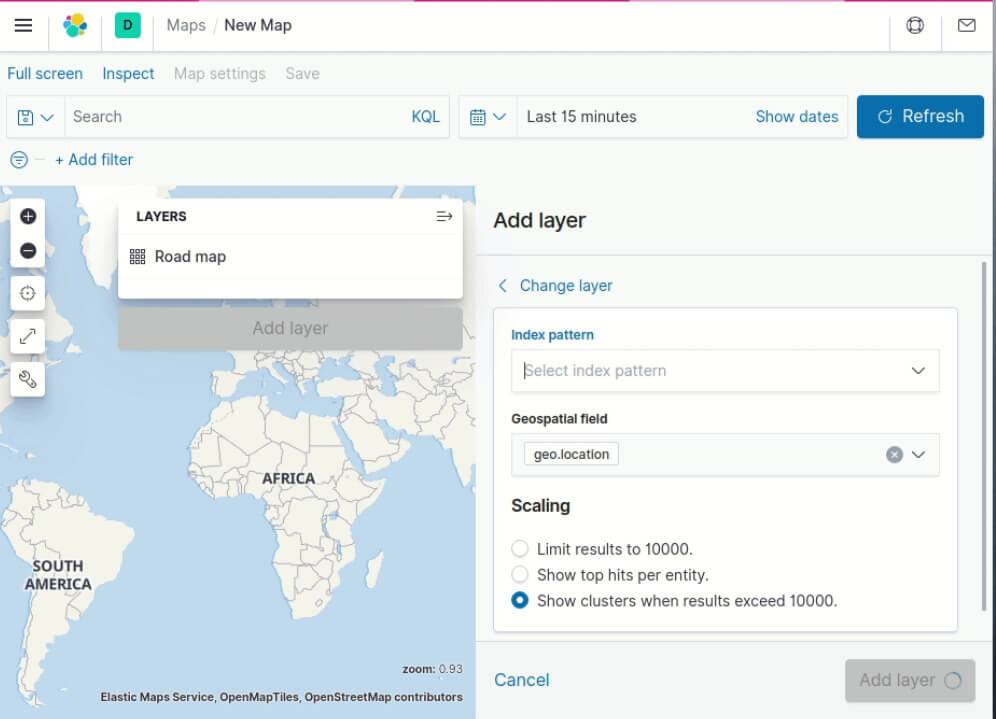
We can create the map logstash geoip by following certain steps that include the installation of kibana, loading the required data to the elastic search with the help of logstash, creating the dashboard in kibana, and going to creating the map by simply clicking on the option of add layer and then select the option of chloropleth layer from all the mentioned options. The window will look as shown below –
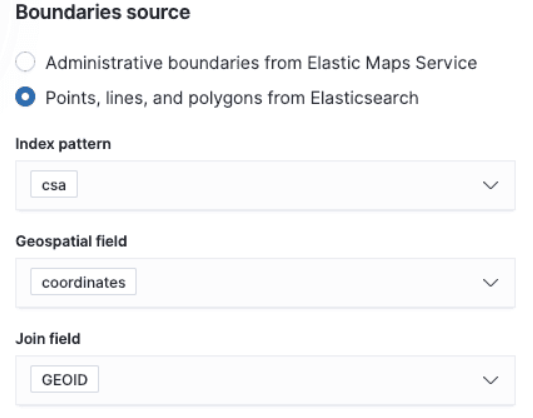
Choose the index pattern as kibana sample data logs and the associated join field value. We will then need to create a CSA layer and assign a unique GEOID identifier by associating both. Further, by using the request index, we will aggregate the information. Pipeline created a join field which was csa.GEOID. After we are done adding certain tooltip fields and the green to red color, we will help us create the map.
To visualize the data on the map of graphical format, we will perform certain steps, which include the starting of logstash with the help of a pipeline that is configured; the transfer of the data will be collected from API and then further forwarded to the elastic search once the designing of index pattern is completed.
Note that the exact coordinates and the accuracy of the same are not accurate by the filter of geoip as it can differ as per the location geographically. It can even be accurate in some countries and regions while not accurate in other cases. The parameters on which this depends are the zoom level set for the map and whether the ip address device is of mobile connection or a stable one.
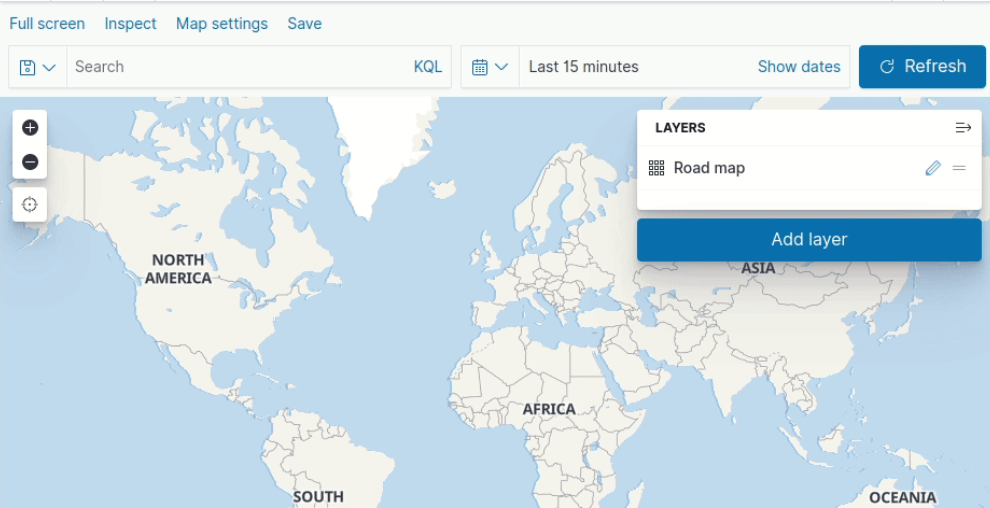
Step 1 – Add a layer.
Step 2 – Choose the chloropleth layer.
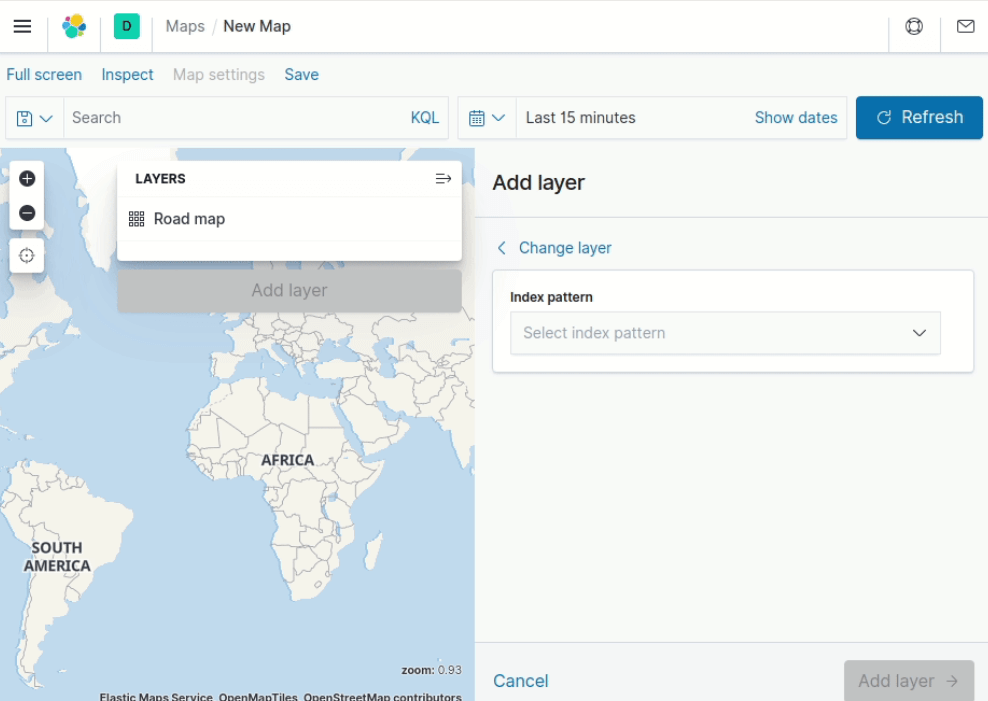
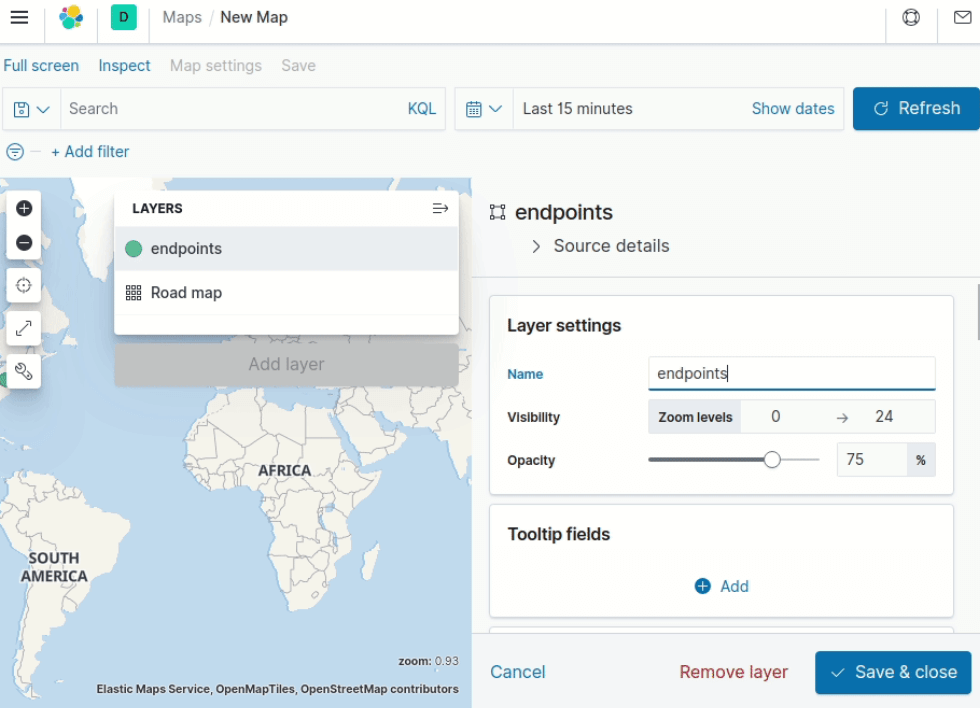
Step 3 – Add index patterns as endpoints.
Step 4 – Geo.location field should be chosen, and start typing endpoints in the index pattern field.
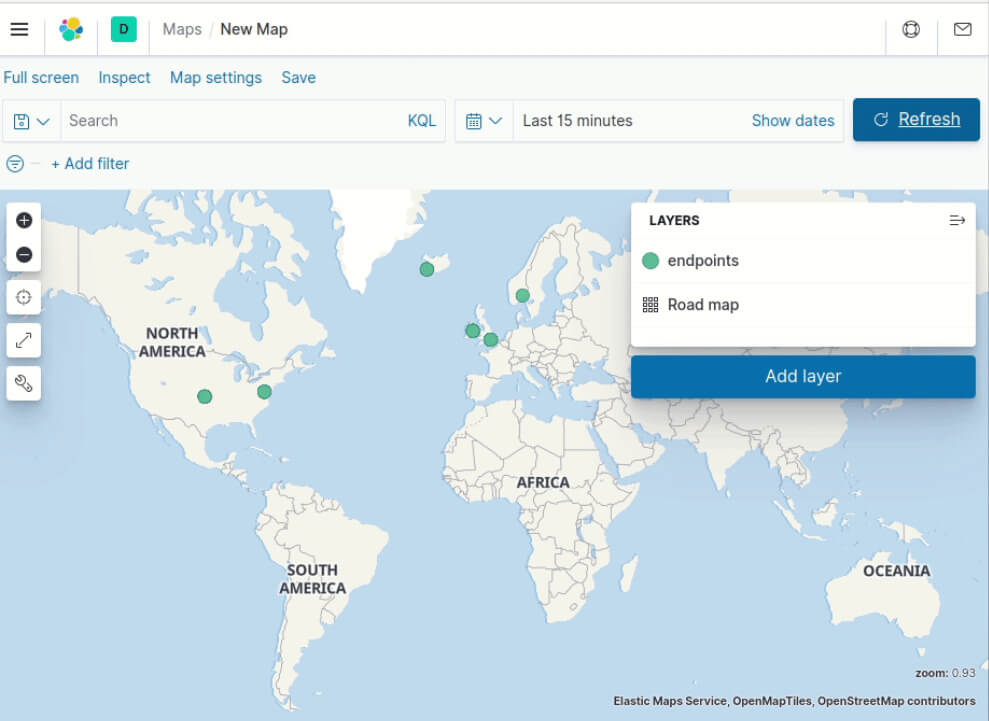
Step 5 – We can observe the two layers of the road map and endpoints on the map, respectively.
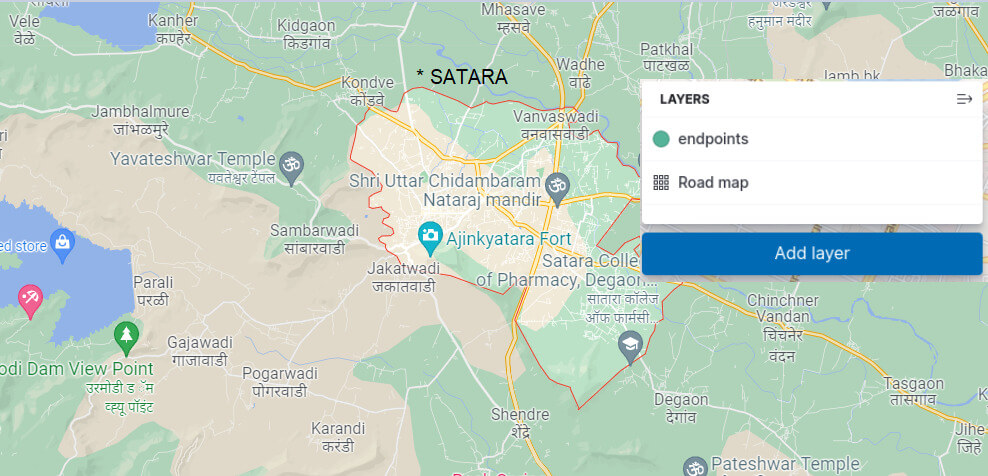
Step 6 – We can see that the Satara city is located on the map as our data set that was passed as an input contained the city_name field as SATARA –
logstash geoip Configure
We will first need to find an application with a public IP address that we can further filter using a distinct field and generate the logs. A web server is an application that helps generate the logs containing all the necessary information. Some of the web servers are Apache and Nginx.
Let’s consider the Nginx server for the usage and getting the access logs. We will have to make certain adjustments when we use various logs.11-nginx-filter.conf is the file containing the nginx filter. In case the filter is located somewhere differently at a different place, we can go for editing that particular respective file.
We can edit the nginx file using the following command –
Sudo vi /etc/logstash/conf.d/11-nginx-filter.conf
The execution results in the following output –
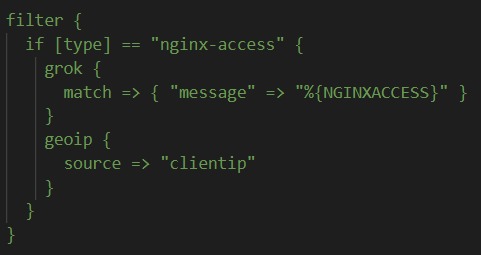
We can add the following portion of code in the grok section –
This leads to converting the specified address to the required client ip mentioned in the source value and configuring accordingly. The ip address of the Nginx is stored inside the field whose name is stored in clientip. This is the reason why it is set as a source. If you change the value of the ip address and store it in a different field, make sure you update the clientip field as well. You can now save and then exit the system. To make all the changes effective, it is necessary to restart the system, which can be done by using the below command –
sudo service logstash restart
This results in the following output generated as a result –
After all the steps mentioned above are followed properly, logstash will store the coordinates of Geoip with the specified logs of Nginx or any other whichever you use. The process is not retroactive; hence, the previous records will not contain the information of geoIP.
There are certain configurations that we can set for the geoip plugin that includes cache size, default database type, database, fields, ECS compatibility, source, target, tags on failure, enable metric, id, add a field, periodic flush, add a tag, remove a tag, remove a field, etc. that we can set to define the behavior of the geoip plugin and vary its execution as per our requirement. All these configurations should be specified in their respective Boolean, array, string, hash, number, system path, ASN, or City as per the specifications. You can refer to this link for a complete reference of their purpose and usage.
Conclusion
Logstash geoip is the filter plugin available in logstash, which helps add the required info to the location in a geographic position of the specific IP address that takes the reference of database data of MaxMild Geolite2. Here, we can also make use of any other GeoIP2 database. For example, Kibana can be used for the visualization of maps.
Recommended Articles
This is a guide to Logstash Geoip. Here we discuss the logstash geoip and its subtopics, including what geoip is, create map geoip, geoip configure, and conclusion. You may also look at the following articles to learn more –
