Updated March 24, 2023
Introduction to Loops in Matlab
In this article, we will learn about Loops in Matlab. Originally developed focusing on mathematical simulations, MATLAB had been great for working with static numerical data in vectors and matrices. But it can now read data from flat files, databases, cloud storage, data acquisition hardware and even live financial data feeds. MATLAB is very capable in the field of data science and is currently being widely applied in many different industries.
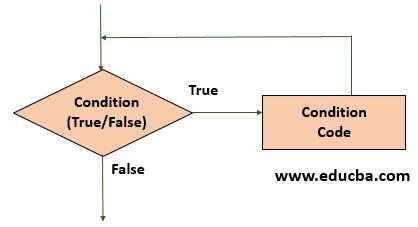
In all computer programming languages, there exist some ‘loop’ statements which are used for repeatedly executing instructions. More specifically, LOOPS allows the coder(s) to write shorter codes bypassing certain sets of repeating codes into conditional loops. Essentially, a loop is a set of instructions that is executed repeatedly until a certain condition is reached or as long as a certain condition is met.
Loops in MATLAB
MATLAB uses for loops and while loops. There are also nested loops, which allow using either for or while loops within a loop.
FOR Loop
The FOR loop is used when the number of iterations that a set of instructions is to be executed is known. Hence, it is used to execute code repeatedly as long as a certain condition is met. This condition is defined at the beginning of the FOR loop, also called as initialization of the FOR loop. Syntax of a for loop in MATLAB is as follows:
Syntax:
for index = value

…

program statements

… ;

end
Values can be one of the following forms:
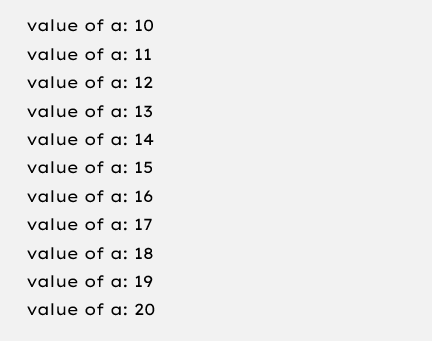
1. initialvalue:endvalue
Increases the index variable from the initial value to end value by 1, and repeats the execution of program statements until the index is greater than the end value.
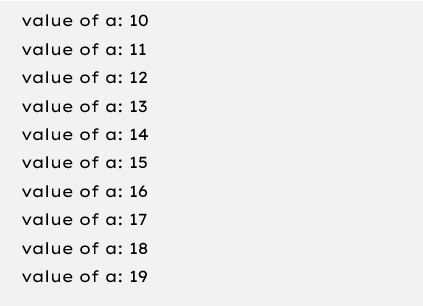
for a = 10:20

fprintf(‘value of a: %d\n’, a);

end
Output:
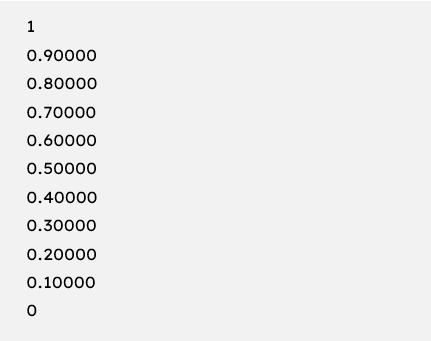
2. Initialvalue:step:endvalue:
Increases index by the value step on each iteration, or decreases when the step is negative.
Code:
for a = 1.0: -0.1: 0.0

disp(a);

end
Output:
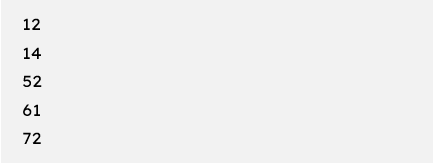
3. valArray
Generates a column vector index from successive columns of array valArray on each iteration. The loop executes for n times, and n is the number of columns of valArray, set by numel(valArray, 1, :). The input valArray can be of any MATLAB data type, including a cell array, string, or struct.
Code:
for a = [12, 14, 52, 61, 72]
disp(a);

end
Output:
WHILE Loop
The while loop will execute the statements repeatedly as long as the specified condition is true. The syntax for the while loop is as below.
Syntax:
while <condition>

…

program statement

… ;

end
A condition is true when the result is not null and contains all nonzero elements (either logical or real numeric). Otherwise, the condition is false. The comparative value for the condition is defined before beginning the while loop, and the comparison condition is set in the while loop initialization.
For example, let us take the same condition as the first for loop example. Notice how the structure changes using the while loop.
Code:
a = 10;

while ( a < 20 )

fprintf(‘value of a: %d\n’, a);

a = a+1;

end
Here the initial value of ‘a’ is set before starting the loop, and the condition set in the loop is that ‘a’ should be less than 20. ‘a’ is then incremented by 1, and the loop reiterates as long as a < 20. This is how the result is shown, different from the result of the for a loop.
Output:
Since at a = 20 the condition is False, the code inside the loop is not executed. Hence the output shows only values of a from 10 to 19.
NESTED Loops
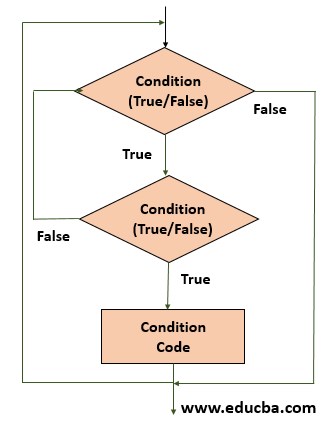
This means using one loop inside another loop. It could be using one for loop inside another for loop or one while loop inside another while loop creating compound statements. The resulting loop has to satisfy two conditions. That is, the condition in the outer loop is checked first, and if True, the condition in the second nested loop is checked. This allows the programmer to accomplish more complex conditional programming than simple numeric or Boolean tests.
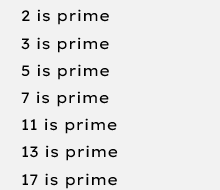
For example, a program to show all prime numbers between 1 and 100 would be as follows.
Code:
for i = 2:100

for j = 2:100

if (~mod(i,j))

break;

end

end

if (j > (i/j))

fprintf(‘%d is prime\n’, i);

end

end
Output:
..and so on until the prime number 97.
Loop Control Statements in Matlab
A control statement is a combination of conditions that govern the body of the loop to execute until the specified condition becomes False. Control statements also direct the syntax of the loop. For example, in a while loop, the comparative value(s) are defined before the loop initializes, whereas in a for loop the value conditions are defined when initializing the loop, in the for the statement.
Most importantly, loop control statements are used to control the execution of the loop or to change execution from the normal sequence of commands. MATLAB supports two specific loop control statements, the ‘break’ statement and the ‘continue’ statement. These commands are similarly used in other programming languages too.
Break Statement
The break command terminates execution of the for or while loop. Statements in the loop that are written after the break statement are skipped / not executed. In the case of nested loops, break exits only from the loop in which it is encountered. The control then passes to the statement after the end of the loop.
Continue Statement
The continue command is used for giving control to the next iteration of the loop. The continue statement works comparable to the break statement. Instead of forcing termination, ‘continue’ skips any code in between and forces the next iteration of the loop to be executed.
Conclusion
MATLAB allows using various types of loops in the code to handle looping requirements including: for loops, while loops and nested loops. There are also specific loop control statements to control the execution of these loops. Creating loops for repetitive statements is a great way of shortening the final code.
Recommended Articles
This is a guide to Loops in Matlab. Here we discuss various types of loops including: for loops, while loops and nested loops with loop control statements. You can also go through our other related articles to learn more –

