Updated August 28, 2023
Introduction to Adobe After Effects
Adobe After effects is an extraordinary program built with loads of tools and functions used for video editing and adding effects on the videos after they are shot or produced; in simple words, Adobe After Effects is mostly used for post-production editing and modifying. Masking Layers in Adobe After Effects is used mostly by graphic designers, Game artists, video editors, and Television and film editors. The most important use of the program is to compose, animate, and track videos and compositions. As said earlier, After effects are the powerhouse of effects, and one such function that can be termed as Effects is the use of Masks. Masking a layer in After Effects is easier and simpler as compared to other video editors.
What is Masking Layers in After Effects?
- The masking process may seem tricky, but once understood and performed practically, you can gain a lot of knowledge about how to create amazing effects with the help of masking. The process can be achieved with two different methods. The first method is using the Simple Regular masking technique, while the second method involves using a shape layer mask.
- The difference between the two arises if we create a shape when the layer is selected, it creates a normal mask on the layer. While, if nothing is selected, and we create a shape on the composition, a shape layer mask is created.
- A more important criterion here to note is the use of different modes in the masking process. We have at least six different modes that pose different effects and results. These modes play an important role when creating masks with the layers.
Illustrations on Masking Layers in After Effects
Practically, a mask in After Effect is a feature that covers or displays particular or multiple areas of a layer in your design. Below we will look at a few illustrations.
Illustration #1
- Launch After effects.
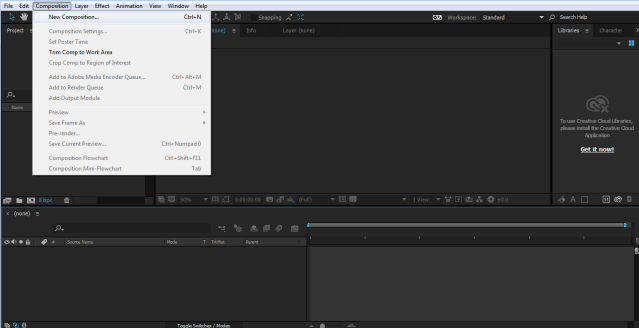
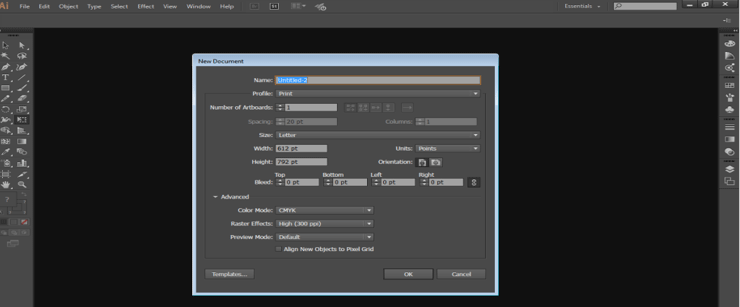
- Create a new project and composition.
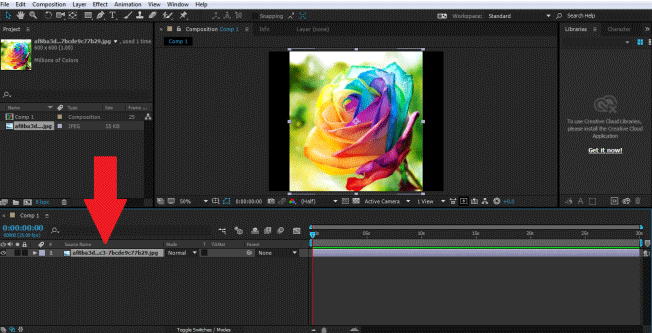
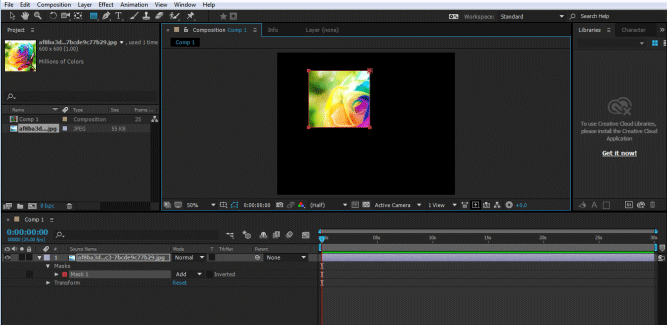
- Import an image as shown in the image given below.
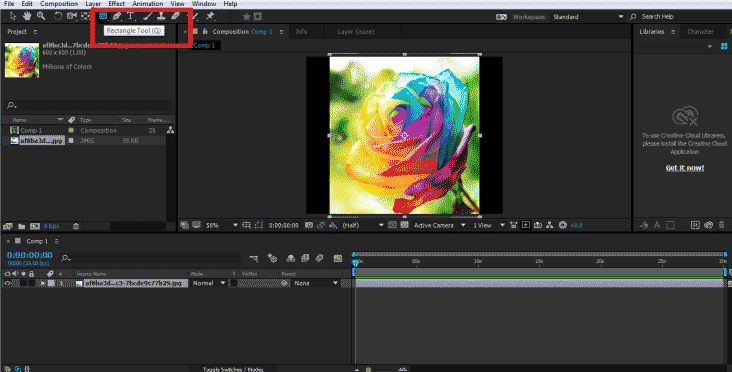
- Keep the image selected and click on the shape tool, to create a mask on the layer.
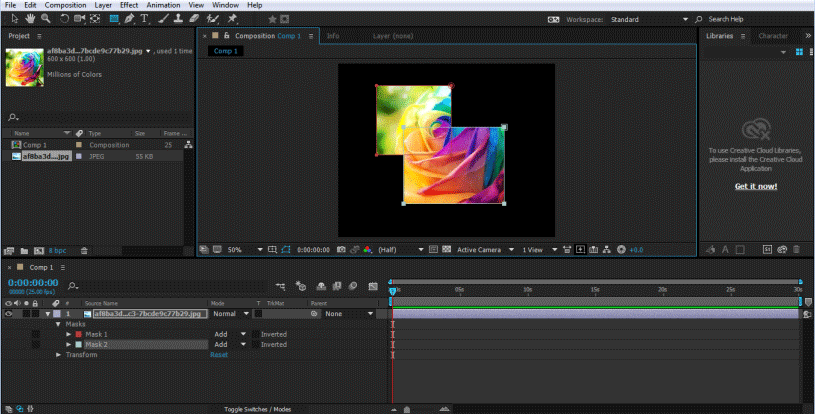
- Create Another Mask Using the Rectangle Tool as shown in the image.
- The mask created will be inside the image option in the Timeline menu. We can see the Mask Path on the timeline in the drop-down menu.
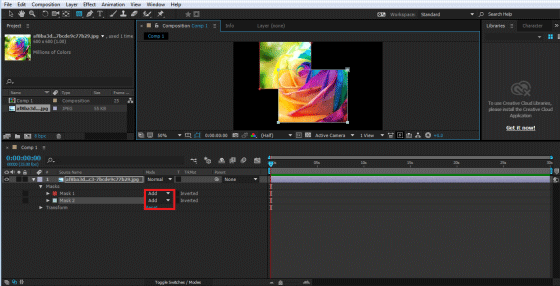
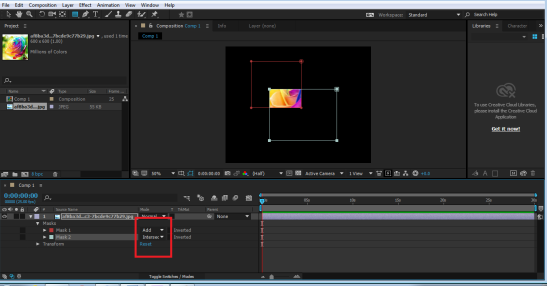
- By default, the mode selected is always ADD, while we can change and see the effects that take place while changing the modes in the timeline panel.
- Edit this path uses the shortcut V or M to modify the Masks properties. Similarly, we can use any shape or path to create a mask on the layer.
Illustration #2
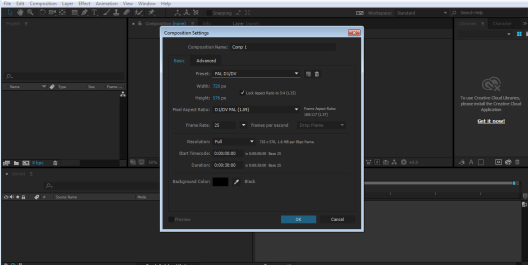
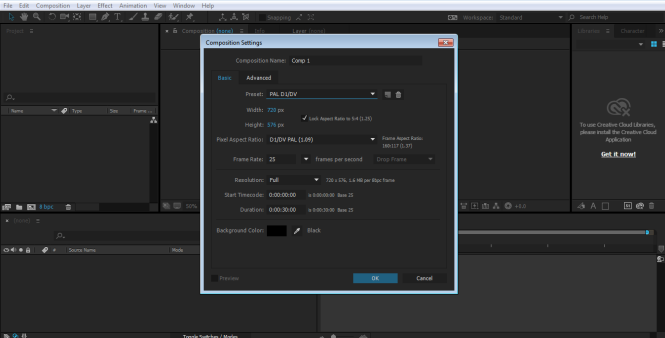
- Create a new composition and check the settings of the composition
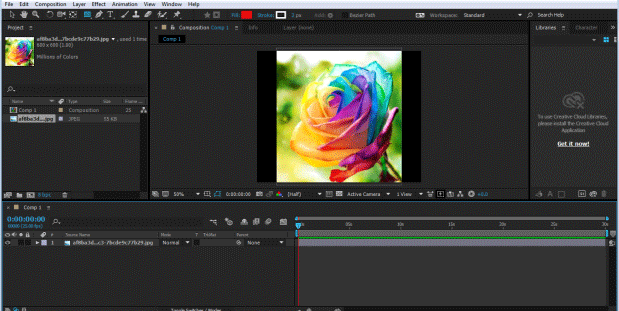
- Import an image in the Timeline menu, as shown in the image.
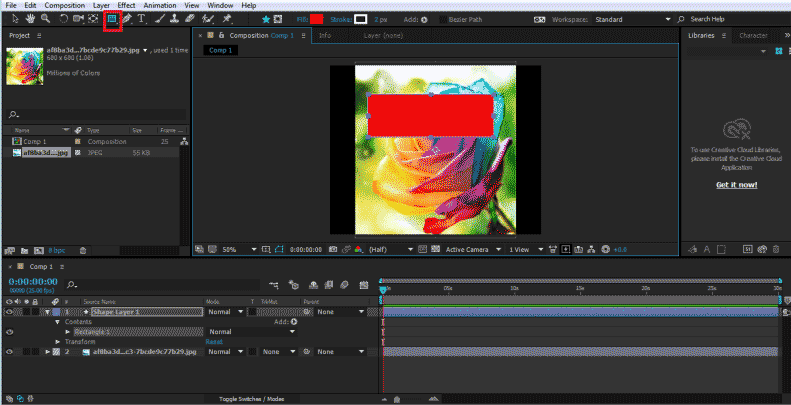
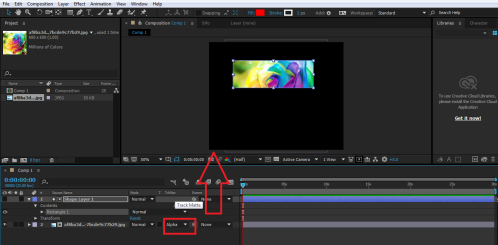
- Make sure nothing is selected, click on the shape tool and create Rectangle as shown in the image.
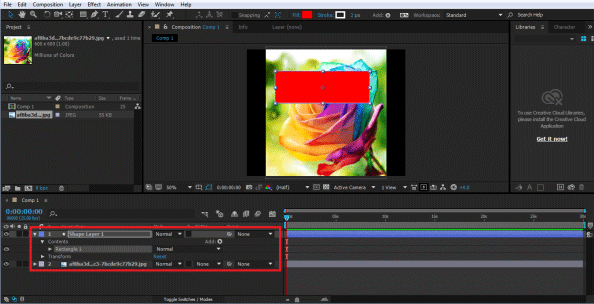
- Make sure the shape create is above the layer of the image to be masked.
- Now, to create a mask, use the option Alpha Matte from the Tracking options in the Timeline menu.
- This method of creating a mask is also easier and doesn’t involve the use of the Modes as used in the above example.
Illustration #3
This example shows how to create an animation using the Masking process of a layer. In this example, we have used the regular masking technique to show how to mask a text and animate it at the same time.
- Create a new composition and check the settings of the composition.
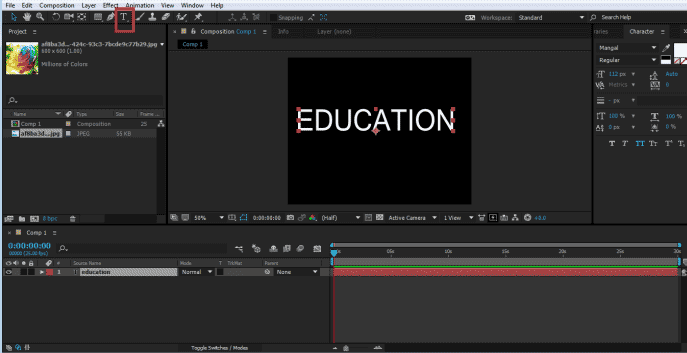
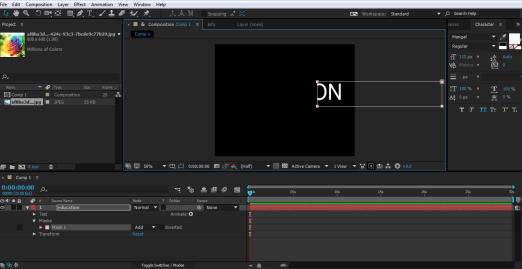
- Using the Text tool, write a text in the Composition panel.
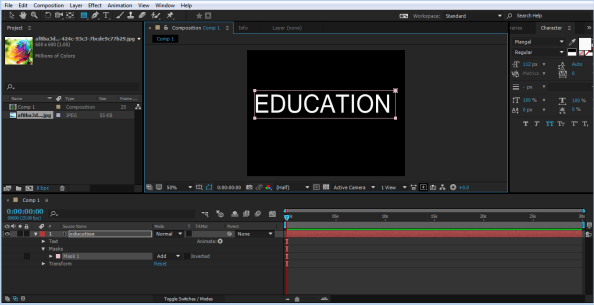
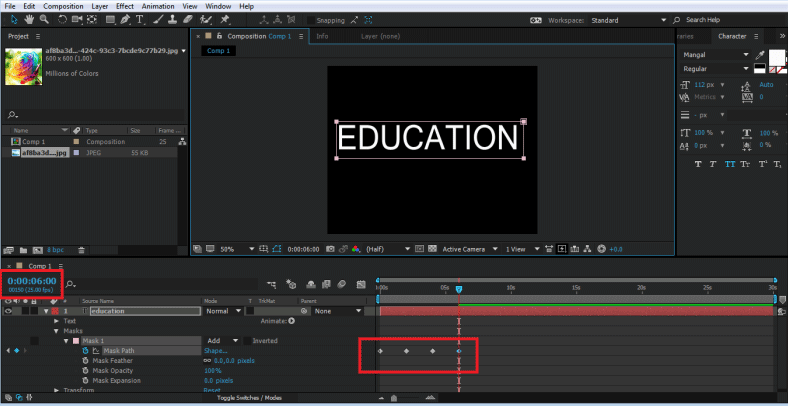
- Now, make sure that the layer is selected and create a rectangle as shown in the figure; this will create a mask on the text.
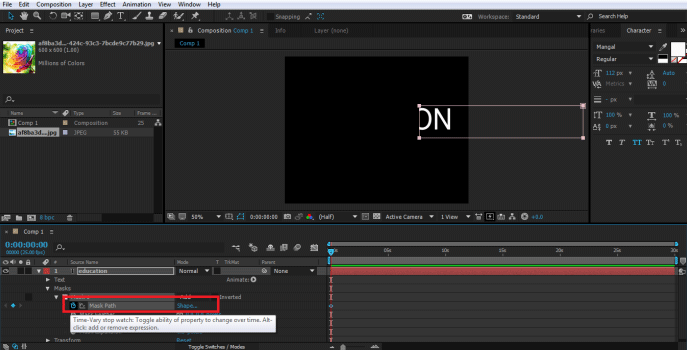
- From the Timeline panel, click on the Text drop-down menu, we will see an option of Mask Path. Using this option, we will create an animation of the text.
- Now, select the mask and move it as shown in the image
- Click on the KEY option of the Mask Path at the origin of the timeline.
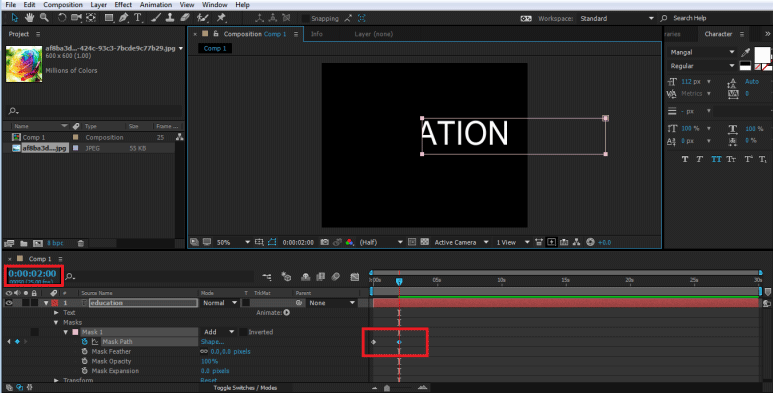
- After 2:00 seconds, change the position of the Mask as shown in the image.
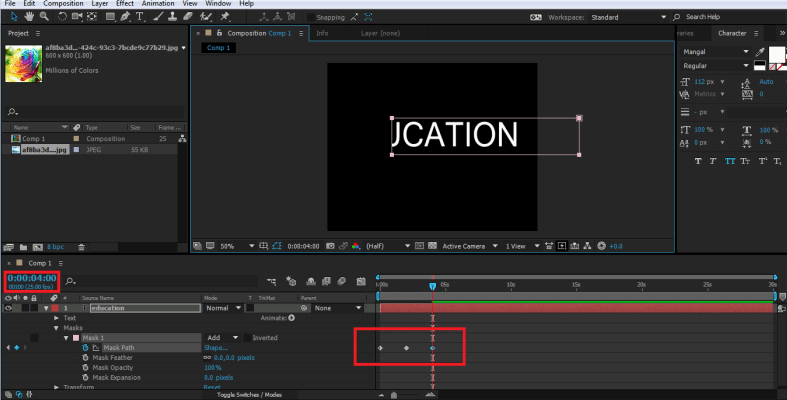
- Again after 2:00 seconds, change the position of the Mask.
- Finally, change the position as shown in the image.
- When you will play the animation using the Space bar, you will see, a text effect is created using the masking process. We can even change the Mode and see the desired results by changing different modes in the Text.
Conclusion
In the above lesson, we learn a lot about masking the layers and their different techniques and procedures. How to resize and move or rotate the masks is also shown in the above examples. The techniques are easy and understandable to the users and will help them to perform various masking functions and create advanced effects with this process. While only some of the tools are used in the above example, we can use more shapes and pen tools to create masks and paths.
Recommended Articles
This is a guide to Masking Layers in Adobe After Effects. Here we discuss Mask Layers in After Effects with a few illustrations. You can also go through our other related articles to learn more –
- Learn How to Animate Logo in After Effects
- How to Use Adobe After Effects Plugins?
- Adobe Premiere Pro vs After Effects | Top Differences
- Top 6 Adobe Premiere Pro Plugins
- Methods for Creating Rain Effects
- Different Ways to Create Glitch Effect in After Effects
- After Effects Transitions | How to Make?
