Introduction to Maya Render Settings
In Maya Render Settings, we will see all the options which Maya provides for rendering. Those settings can be applied per object basis or to the entire scene. Different types of effects can be applied during and post-render to achieve the desired effect. You can create a photorealistic render to a cartoony vector-based render from the same object by tweaking the render settings. Maya render settings can be found in Window > Rendering Editors > Render Settings. Scene-wide render options can be set in this window.
Render Settings Window
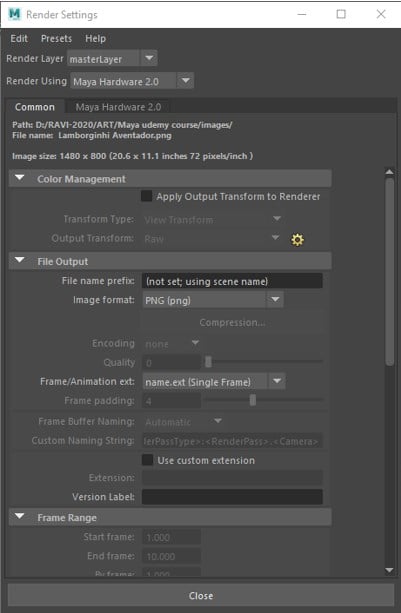
Following are the options in the render settings window:
- Render Layer: The render layer can be selected from the drop-down menu.
- Presets: You can export your render settings from the preset menu in a .json file. This same setting can be used when you render next time in a different scene by importing this file. You can also delete existing previous render settings. Also, you can set your preferred render settings to global or user.
- Render Using: The renderer can be selected from the drop-down list, which can be either Maya Software, Maya Hardware 2.0 or Maya Vector
Common Tab
Below is the explanation for Maya Render Settings common tab:
Color Management
Depending on the renderer you have selected, this section may be present.
Apply Output Transform:
- Set it on if you are rendering images for preview, displayed on software that does not handle scene-linear images properly.
- Set if off if the final image is rendered and those tasks which require scene-linear color values.
Output Transform:
- Color space can be selected, which is applied to the rendered images.
File Output
- Rendered images files name consists of 3 separate parts: file name, frame number extension and file format extension. This combination is referred to as file name syntax.
- Image format can be selected, and depending on the type, you get an option for compression, encoding and setting quality.
- Frame/Animation ext. can be selected from the drop-down, and it determines if a static image is rendered or sequence.
- Frame padding is the number of digits in the extension of the frame. E.g. testFrame.001 means Frame padding is 3.
- Version label can be added to the output filename. You can right-click in the input field to add a number, current date or current time.
Frame Range
Start frame, End frame – It specifies the first and last frames to render and is available only if Frame/Animation ext is set to an option containing #.
Renderable Cameras
- You can select one or more Renderable cameras. By default, you can render using one camera. You can also remove the camera by clicking the dustbin icon if there are multiple cameras.
- Alpha channel (Mask): Determines whether rendered images contain a mask channel. By default setting is on.
- Depth channel (Z Depth): Determines whether rendered images contain a depth channel. By default setting is off.
Image Size
- This attribute governs the pixel aspect ratio of rendered images.
- You can select from the preset or enter custom values.
- Maintain width/height ratio: If either of width or height is entered, the image size will be scaled proportionally.
- Maintain ratio: You can set it to pixel aspect if you want to maintain pixel width to height ratio or Device aspect if you want to maintain the device aspect ratio.
- Width, height, size unit and resolution can be selected from which device aspect ratio will be calculated.
Maya Software Tab
Below we will learn about the Maya Render Settings software tab:
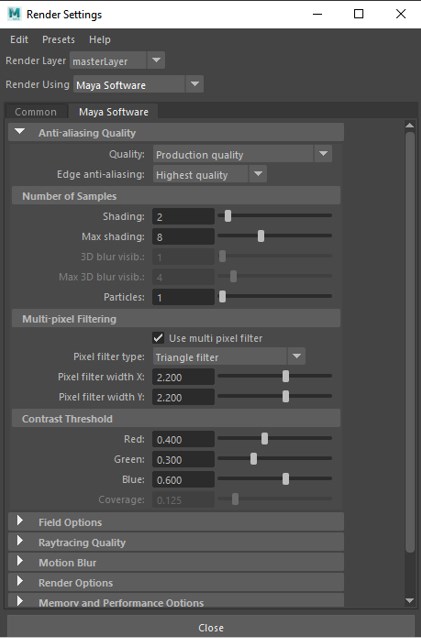
Anti-aliasing Quality
It controls how objects are anti-aliased during rendering.
- Quality: The type of antialiasing can be selected using this dropdown which can be custom or any Maya preset.
- Edge anti-aliasing: It controls how the edges of objects respond to the anti-aliasing during rendering.
- A number of samples: It controls a number of times Maya shades a pixel.
- Multi-pixel filtering: It is used to blur or soften the entire image by reducing the jagged edges and flickering by selecting the appropriate filter type.
Field Options
- This controls how images are rendered as a field.
Raytracing Quality
- This controls how the scene is raytraced during rendering, and the quality of raytracing is controlled.
- Reflections mean the max number of times light ray can be reflected.
- Refraction means max number of times a light ray can be refracted.
- Shadows mean the number of times light ray can be reflected or refracted and still cast a shadow.
- Bias can help reduce dark areas or incorrect shadows in 3d motion blurred objects.
Motion Blur
- It gives the effect of movement by blurring objects in the scene. Motion blur attributes and stutter angle is used to determine how much blur is applied.
- Motion blur type can be 2D in which blur is a post-process done after rendering the image based on motion vector or 3D, which is done in real-time but it takes longer to render than 2D.
Render Options
- In post-processing, you can apply environment fog. In-camera ignore film gate is selected by default.
Memory and Performance Options
This option makes the scene render faster by optimizing it.
- Tessellation – It controls how Tessellation information is handled for surfaces.
- Ray tracing is controlled by Recursion depth, leaf primitives and subdivision power.
- Multi-processing is used in multi-threaded interactive rendering in which the number of CPU can be selected.
IPR Options
- This determines which shading elements are saved to the disk when IPR (Interactive photorealistic rendering) is done, which save disk space and time.
Paint Effects Rendering Options
- This is the options for enable stroke rendering with oversampling and post-filter or renders only strokes using a depth file.
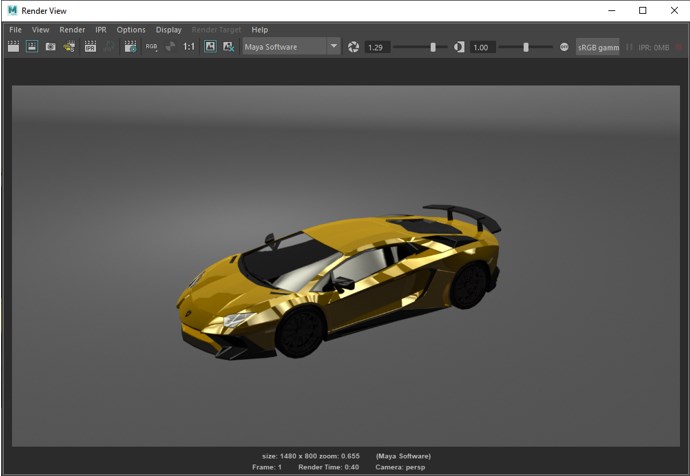
- Following is a Maya software render.
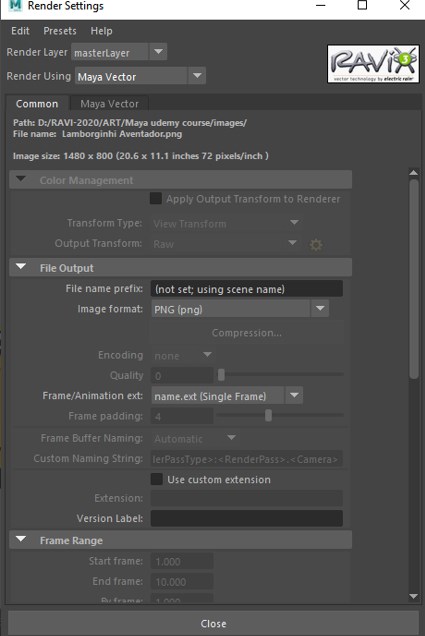
Maya Vector Tab
Below we will learn the Maya Render Settings vector tab:
Image Format Options
This option is enabled only for swf and svg files to select the frame rate and flash version.
Appearance Options
- Curve Tolerance determines how objects are represented by curved lines or series of straight-line segments. Adjust it on the scene by scene basis depending on the balance between outline accuracy and file size.
- Secondary curve fitting can be used to have more control by adding a second pass to convert line segments into a curve.
- Detail Level Preset and Detail Level determines the LOD in the rendered image. It can be adjusted to high, medium, low or custom depending on the render quality you want, but high details take longer to render and increase file size.
Fill Options
- Based on the fill style, different effects can be achieved while rendering a vector image or motion. Also, highlight and reflection depth can be configured.
Edge Options
- This is the options to control the edges of the model and its style and details.
Render Optimizations
- It determines how the vector renderer optimises the current frame with a safe, good, and aggressive option to reduce the file size.
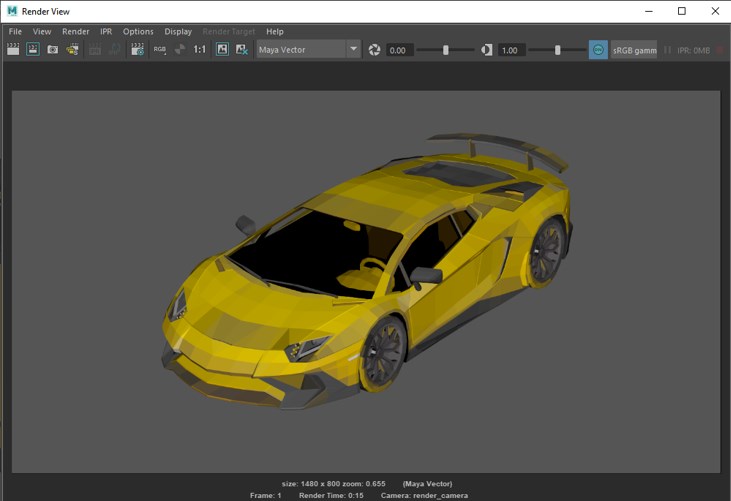
- Following is a Maya Vector average render.
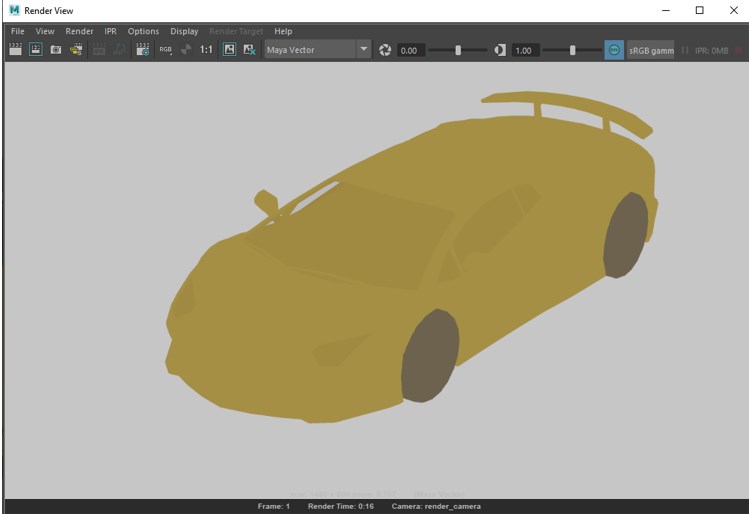
- Following is a Maya Vector single render.
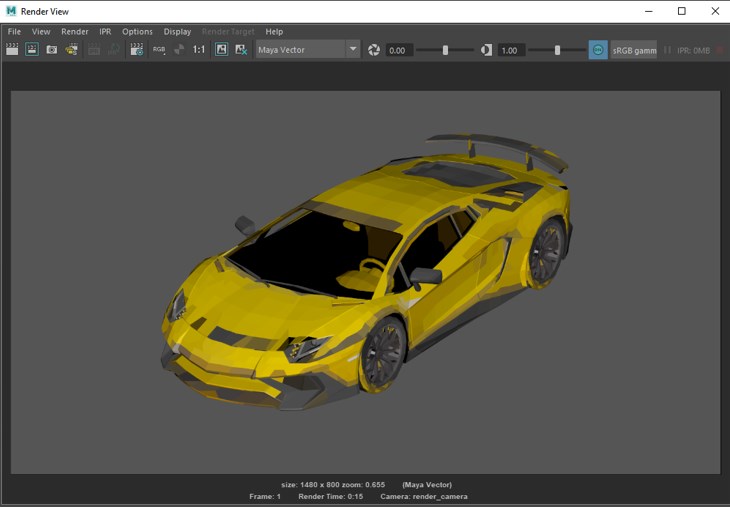
- Following is a Maya Vector two-colour render.
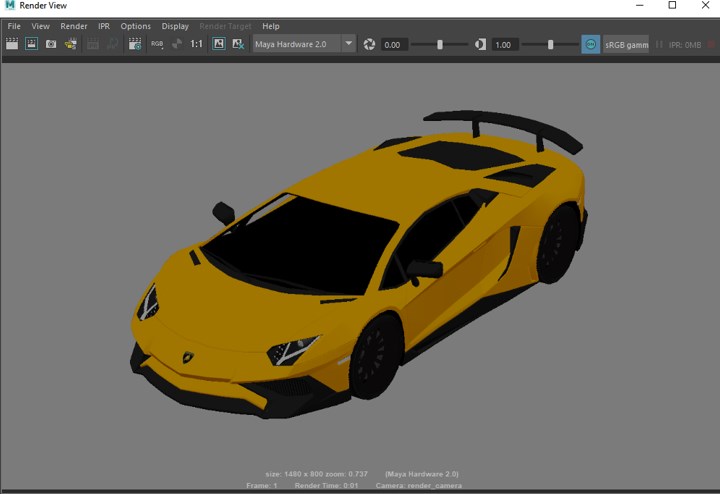
- Following is a Maya hardware render.
Recommended Articles
This is a guide to Maya Render Settings. Here we discuss the various options in the render settings window, three tabs common, vector and software. You can also go through our other related articles to learn more –
