What is the Measure Tool?
Measure tool, as the name suggests, is used to measure the distance between two points. In this topic, we are going to learn about the Measure Tool in Illustrator.
Location of the Tool
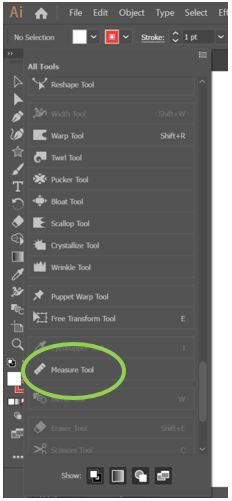
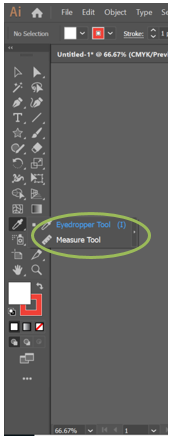
Firstly let us look at the location of the measure tool in the illustrator toolbar. The measure tool looks like this.
With the Basic Toolbar
If you are using the Basic toolbar, the measure tool is not among the visible tools.
If you click on the three dots at the bottom, you can edit the toolbar. You can see that the grayed out ones are already part of the toolbar, and the ones in white are not available currently and can be added to the existing toolbar. If you scroll down the list of tools, you will find the measure tool.
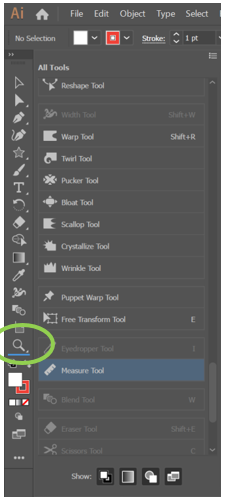
This can now be dragged and dropped onto the existing toolbar. It could be placed at the bottom of the panel where the blue line appears, as shown in the screenshot.
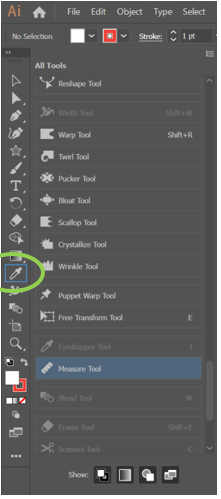
Alternately if it is dragged onto an existing tool (highlighted in blue), it will be grouped along with it, as illustrated in the screenshot.
Advanced Toolbar
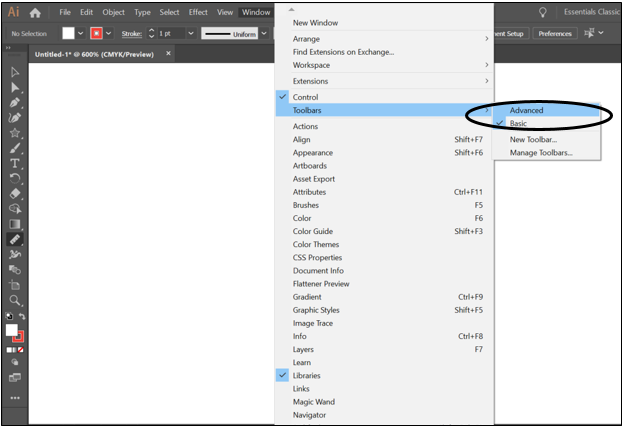
The advanced toolbar can be selected by clicking on the Window menu -> Toolbars -> Advanced.
This has the Measure tool by default. It has been grouped with the eyedropper tool.
Various Measurements
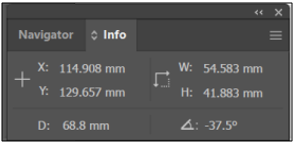
Now that we know how to access the Measure Tool let us understand all the information we can understand. The information is available in the info panel.
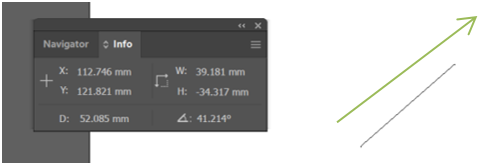
Measure tool draws a line along the path that needs to be measured. If you were to click and draw a line using the measure tool, you would get the:
- Horizontal Distance of the starting point of the line from the X-axis (X)
- Vertical Distance of the starting point of the line from the Y-axis (Y)
- The diagonal measure of line (D)
- Width of the line – it is the distance along the horizontal or X-axis (W)
- Height of the line – it is the distance along the vertical or Y-axis and (H)
- The angle of the line – the angle formed with respect to the horizontal or the X-axis. ( )
Signs of Measurements
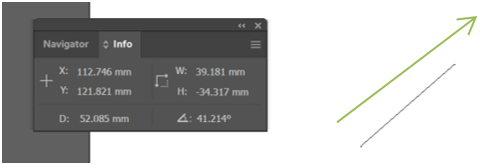
If the measurement is taken in the upward right direction,
- the width is positive.
- the height is negative.
- the angle is positive.
In the upward left direction,
- the width is negative.
- the height is negative.
- the angle is positive
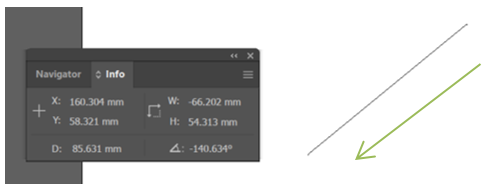
In the downward left direction,
- the width is negative.
- the height is positive.
- the angle is negative.
In the downward right direction,
- the width is positive.
- the height is positive.
- the angle is negative.
As shown in the green arrows in the accompanying figures.
Uses of Measure Tool
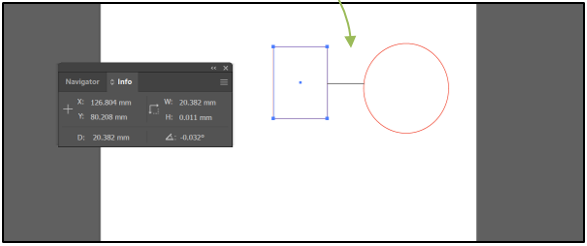
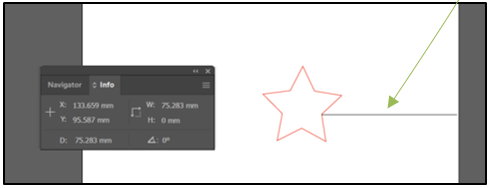
It can be used to measure the distance between any two points. This could be:
- Between two objects.
- Between any object and the edge of the artboard.
Practical Applications
The information can be extremely useful for an architect or an interior designer to know the width of rooms, doors, and windows and know what furniture pieces would fit in a particular space. Tailors and fashion designers can use it to measure their designs accurately. It can be used by graphic and web designers to create layouts.
It can be summarized that the Measure Tool is an aid that Adobe offers to Illustrator users for accurate measurements.
Recommended Articles
This is a guide to the Measure Tool in Illustrator. Here we discuss How to Use Measure Tool in Illustrator and the signs of measurements along with uses of the measurement tool. You may also have a look at the following articles to learn more –

