Introduction to Mocha in After Effects
After Effects is video editing software developed by Adobe systems as its graphics editing software, we have many different types of plugins in this software to make our work easy. Mocha is one of the plugin software of After Effects. Mocha is tracking software that tracks three-dimensional points of any tracking object, while in After Effects software, you can only track two dimensions of any object. Mocha gives you very fine tracking of any particular sections of any object of any video footage. Here in this article, we will understand the mocha plugin of After effects software and also learn how to track any particular sections of video footage in mocha through After Effects software with an example. So let us start our learning.
How to Use Mocha for Tracking in After Effects?
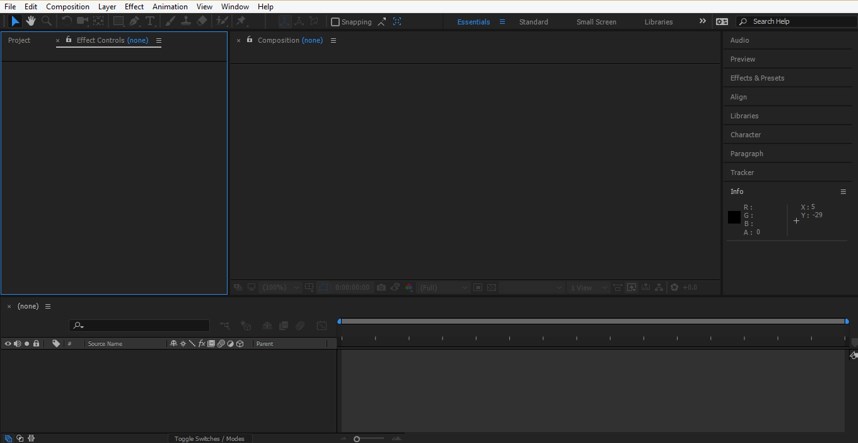
We will understand the Mocha plugin of After Effects software through a good example of video footage in this article with a few simple steps. So before starting it, let us look at the working screen of After Effects software to better understand this topic throughout this article.
Step 1: At the top of the working screen, we have ribbons of the Menu bar and Toolbar; below this, three sections are the Project panel at the left side of the working screen, the Composition window at the center of the working screen and Parameters panel at the right side of working screen, below this we have two sections that are Layer panel at the left side of bottom end and Timeline panel at the right side of bottom end. You can adjust these sections according to your requirements.
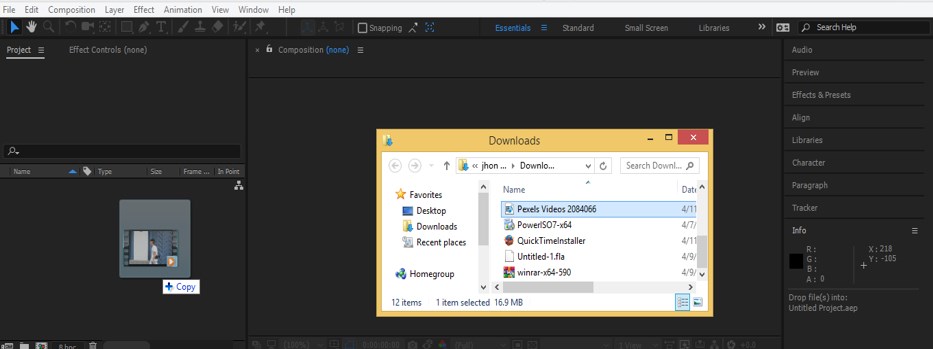
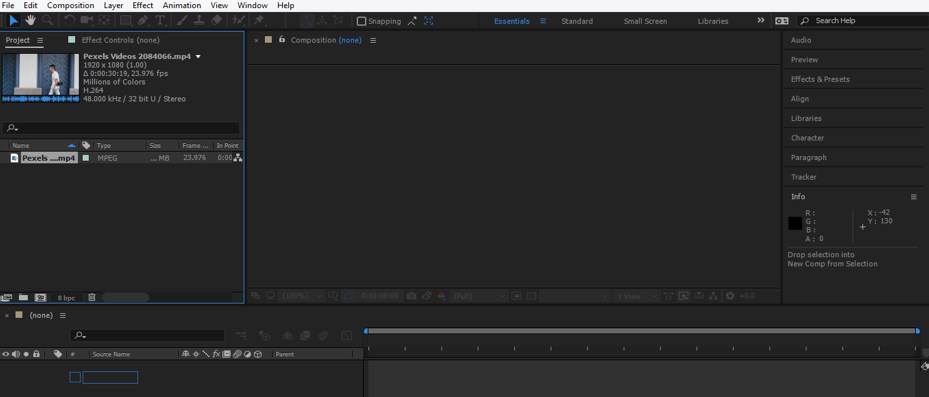
Step 2: Now, let us have video footage for our learning. You can download it from the internet or take your video footage made by you for your learning in this software. Placing this video footage in After Effects goes to that folder of your personal computer where you have saved it and pick it from there, then drop it in the Project panel section of this software.
Step 3: Now drag this video footage from the Project panel section of this software to the mouse button’s layer panel.
Step 4: Now go to the Animation menu of the Menu bar of this software which is at the top of the working screen. A drop-down list will be open. Click on the ‘Track in Mocha AE’ option of this list.
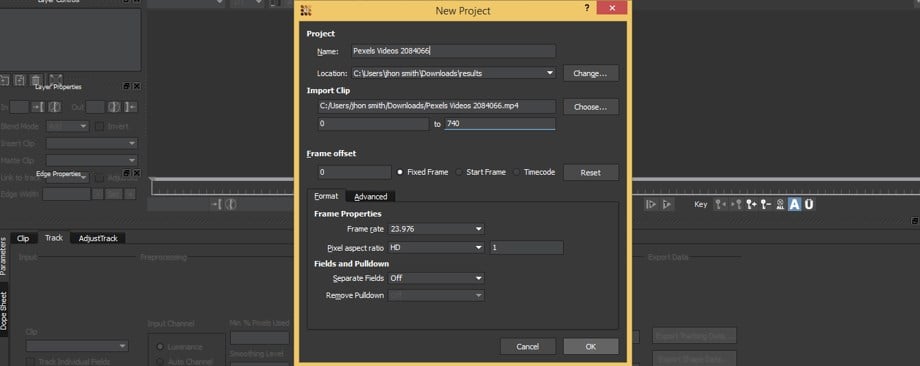
Step 5: Once you make click on this option, Mocha AE CC plugin software will open with this ‘New Project’ dialog box. Mocha will automatically enter data of this video footage in this box. If you haven’t this setting appeared in this box, then you should download the QuickTime installer from the internet and install it on your computer. Now press the Ok button of this dialog box.
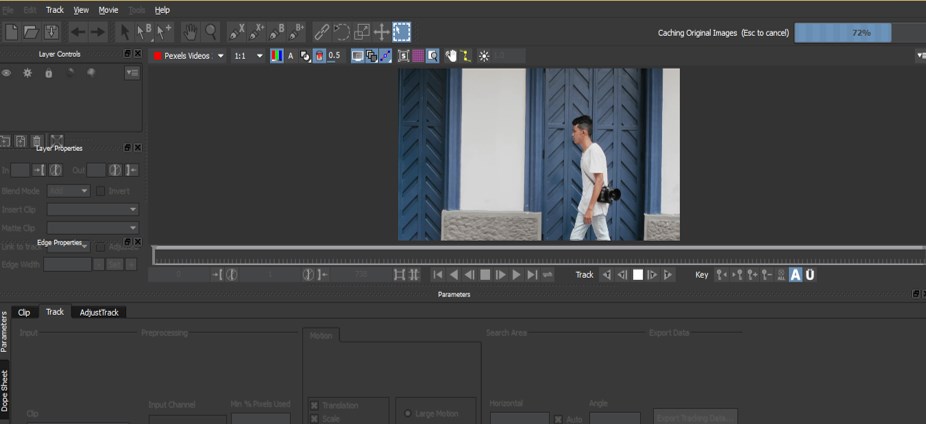
Step 6: Now, the footage will open in the mocha AE CC working window. It will take some time to open video footage in the working window of mocha AE.
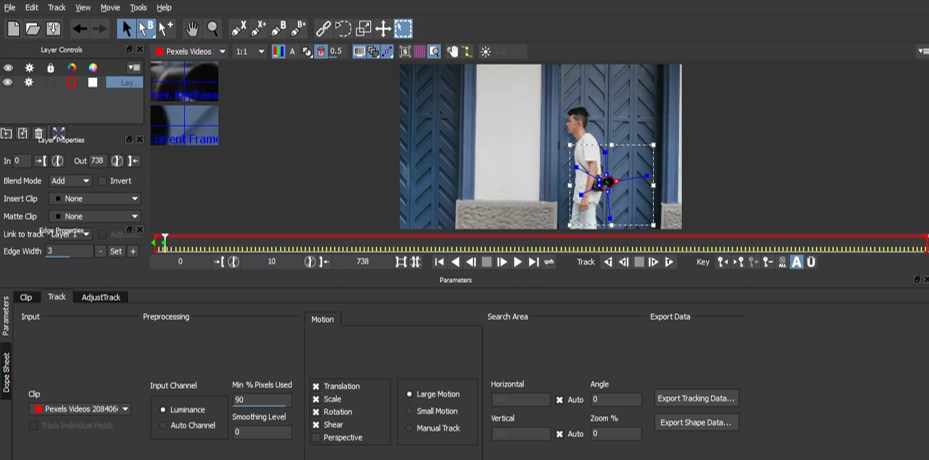
Step 7: Now, for tracking, take ‘create X-Spline Layer tool’ from the tool panel of mocha software.
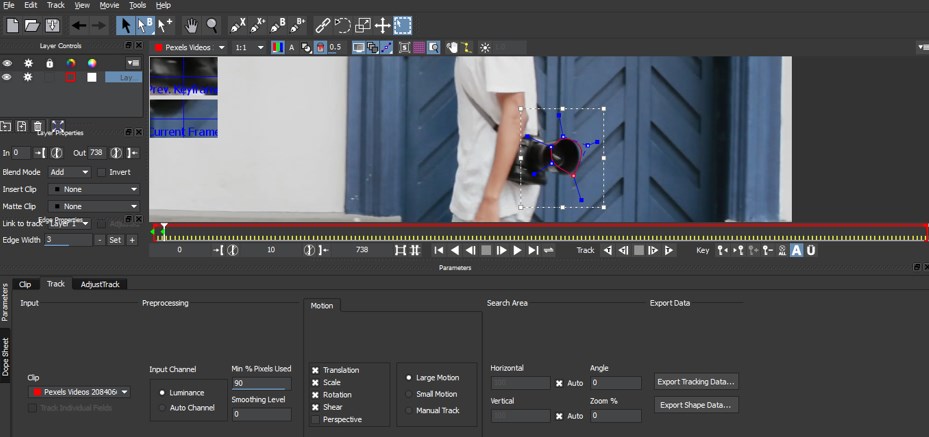
Step 8: Now, make a mask around the section of that object which you want to track with this tool.
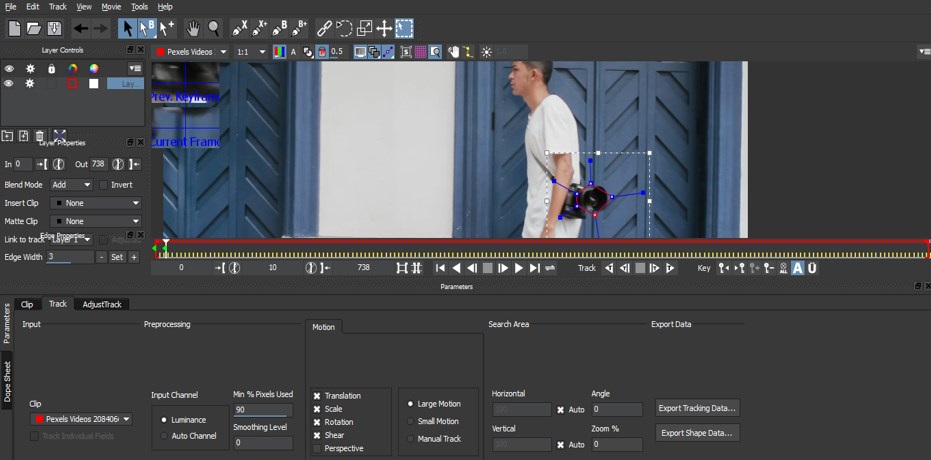
Step 9: You can zoom in by pressing the Z button from the keyboard and then drag the mouse’s left button for zoom in or zoom out.
Step 10: You can pan it by pressing the X button or scroll button of the mouse and then move the mouse to pan it.
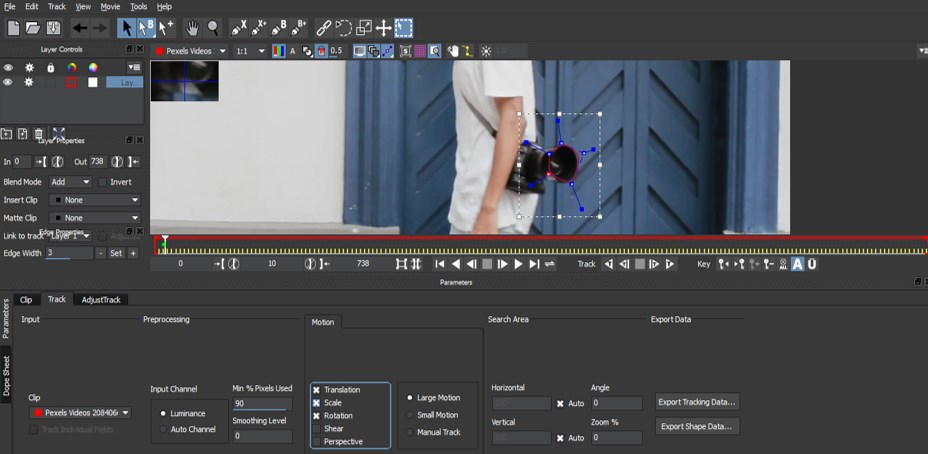
Step 11: Once you make the proper selection of mask around the object you want to track in your video footage, go to the Motion tab of this software below the working window in the Track option section. Here you can choose the option of tracking in the list of Motion options that are you can choose Translation, scale, rotation, shear or perspective property of tracking object according to you. I will go with Translation, scale, and rotation because I want to track my object based on these three properties.
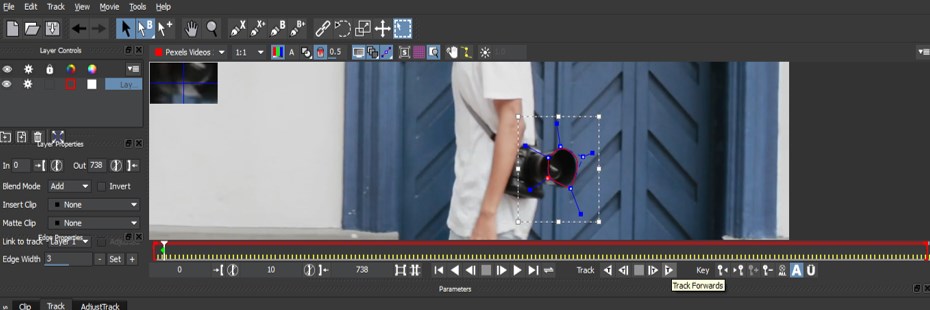
Step 12: Now click on the Track forward button of this software to track our selected video footage object.
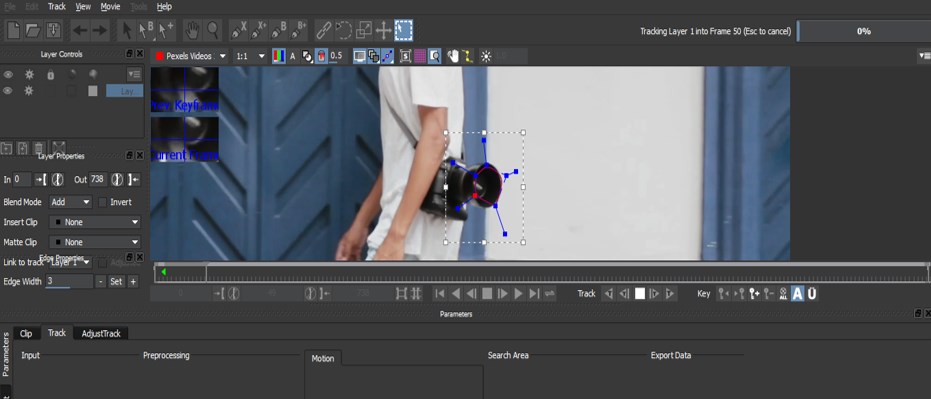
Step 13: Tracking will take some time for completion in this software.
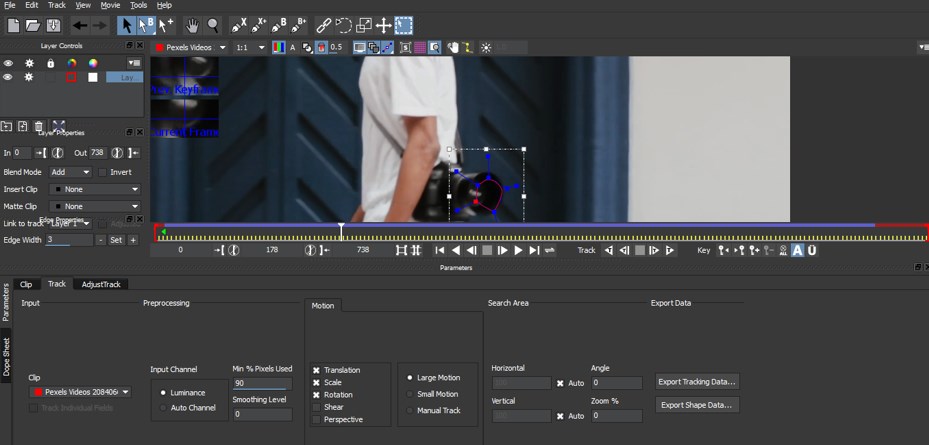
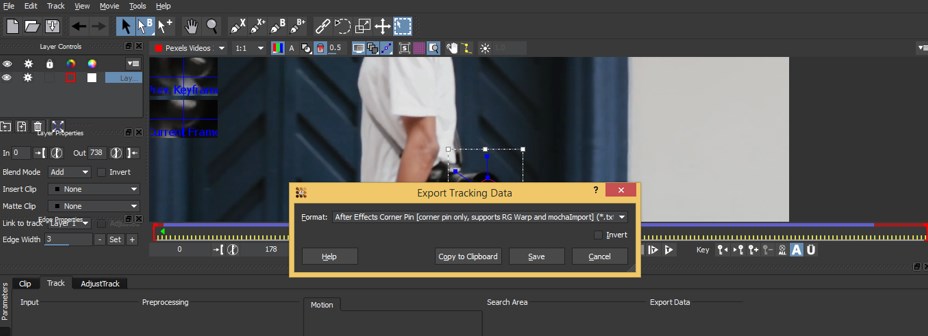
Step 14: Once tracking has been completed, go to the ‘Export Tracking Data’ option of the Export data tab of this software and click on it for exporting this data in After Effects software.
Step 15: Once you make click on this option, an Export Tracking Data dialog box will be open.
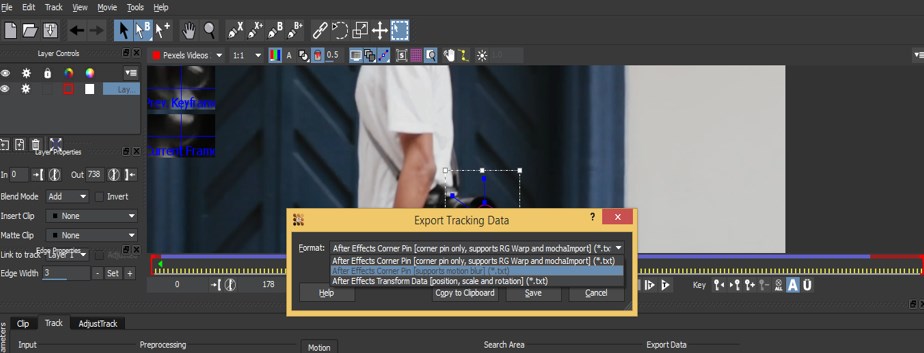
Step 16: You can choose any one of the formats in which you want to export this data from the list. I will go with the second one, and then I will click on the ‘copy to clipboard’ tab of this dialog box for copying this data.
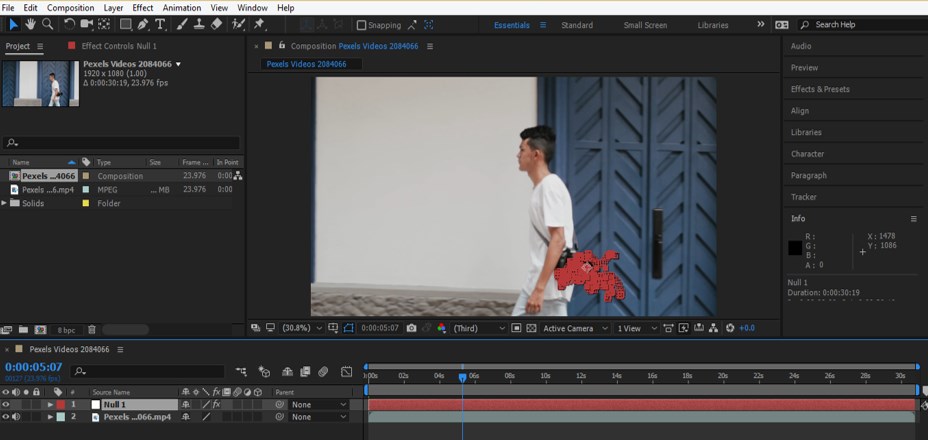
Step 17: Now, I will switch to After Effect and make a Null object for pasting tracked data in the Null object layer. For the Null object, make right-click with mouse button anywhere in the Layer section of After Effects software. A drop-down list will be open, click on the ‘New’ option of this list and choose the Null object from the new drop-down list.
Step 18: Now select this Null object layer by click on it and go to the ‘Edit menu of the Menu bar of this software which is at the top of the working screen, then click on the Paste option of the drop-down list of Edit menu.
Step 19: All the tracked data of Mocha AE CC plugin software will paste into the footage of After Effects software.
- Now you can use this tracking path for adding any effect to this video footage.
- In this way, you can use Mocha plugin software in After Effects for getting the best tracking result in any video footage and also, you can handle parameters of the mocha plugin without any problem.
Conclusion
After going through this article, you can understand Mocha in context with After Effects software and use mocha AE to track any object of video footage with more précised tracking data. You can use this tracking facility for making a high professional effect on any video footage with a high impact result.
Recommended Articles
This is a guide to Mocha in After Effects. Here we discuss an Introduction on how to to use Mocha in After Effects in a step by step manner. You can also go through our other related articles to learn more –
