Updated April 10, 2023
Introduction to MongoDB Atlas Login
MongoDB Atlas Login is used to provide an easier way of hosting and managing data in the cloud. MongoDB Atlas is a fully managed cloud database which is developed by people who build MongoDB. Atlas being the cloud database service handles deploying, managing, and healing deployments on a cloud of user’s choice such as AWS, Azure, Google, etc. MongoDB has a robust ecosystem of integrations, drivers, and tools that help in creating faster and to spend less time in managing databases. Before looking into what is Atlas and how it works, we need to first sign up or register on the MongoDB atlas portal. Here we will see step by step login process and work on creating and accessing MongoDB account and services.
Step by Step Process of MongoDB Atlas Login
It involves the creation of a MongoDB account, accessing MongoDB services like creating a cluster, whitelisting the IP address, creating a database, and connecting the cluster to the database.
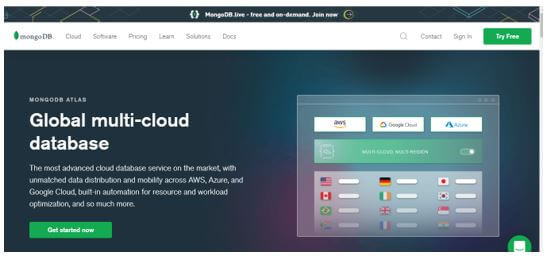
Step 1: Visit https://www.mongodb.com/cloud/atlas first to register for an Atlas account.
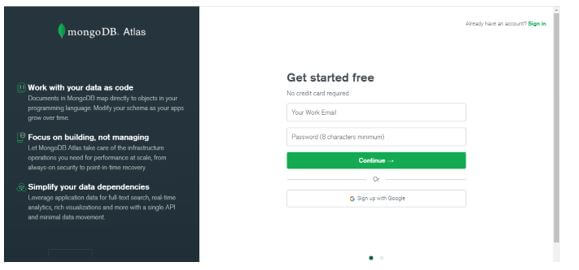
Step 2: Click on “Get started now”, which redirects to the registration form for creating an account in MongoDB Atlas.
Step 3: Provide mail id, password, first name, and last name, company name would be optional, and select “I am learning MongoDB” in the dropdown of field “How are you using MongoDB?” as we are now using it for the first time.
Step 4: Email ID has to verify and account setup is to be done. Here, selecting a programming language would be optional so that the user can skip.
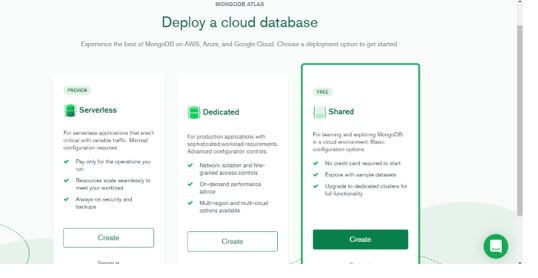
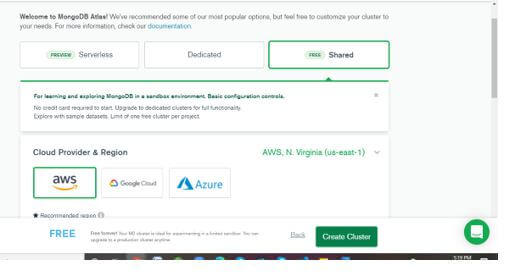
Step 5: Select “Shared” and click on Create. This is for people who are learning and exploring MongoDB in the cloud.
Step 6: Now, select the preferable cloud provider and the region. MongoDB supports M0 free tier clusters on AWS, Google GCP, and Azure cloud. Regions supporting M0 free tier clusters are marked as “Free Tier Available”.
Step 7: Select cluster tier as M0 Sandbox. Selecting it will automatically lock the remaining configuration options.
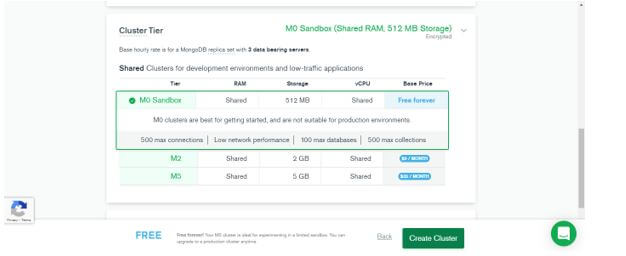
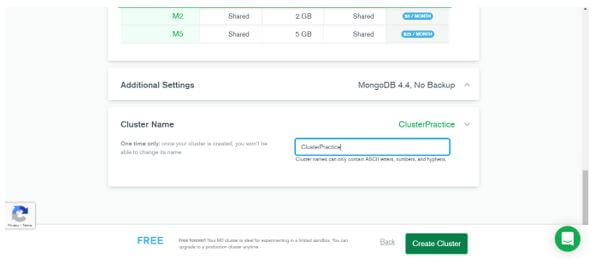
Step 8: Enter cluster name for selected M0 sandbox.
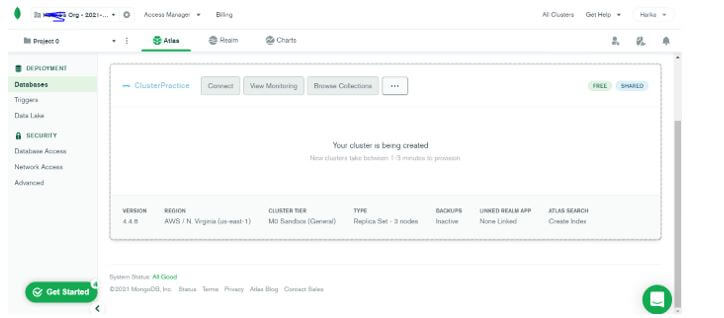
Step 9: Click on create a cluster, which will deploy the cluster in the selected region. Once the cluster is created, it may take 5-10 minutes for the cluster to provision and be ready for usage.
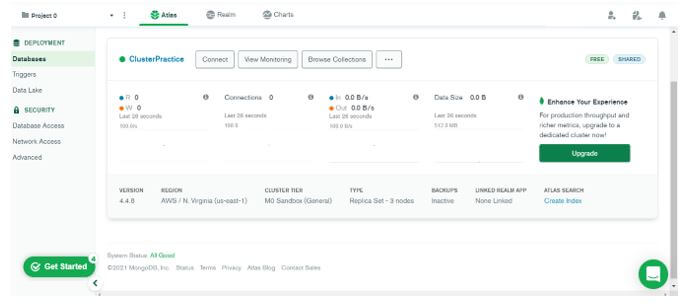
As you can see below, the cluster has been created now.
Step 10: Once registered, Atlas will automatically create a default organization and project for deploying the first cluster.
Now, we shall see how we can add our IP address to the IP access list.
As we all know, IP Address is a unique identifier for a device to connect to a network.
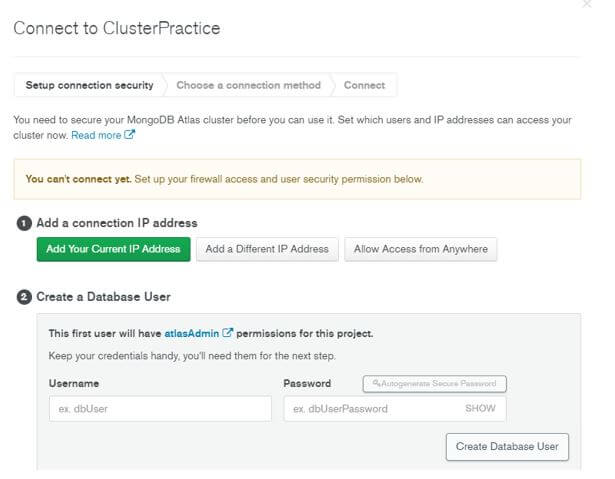
Step 1: Click on connect on the cluster view.
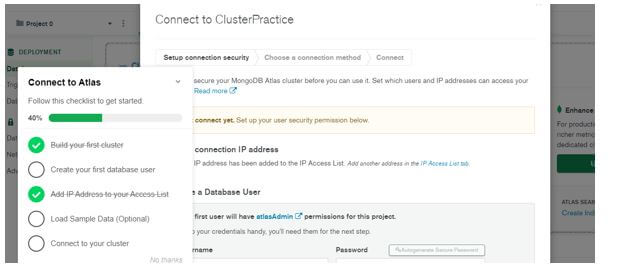
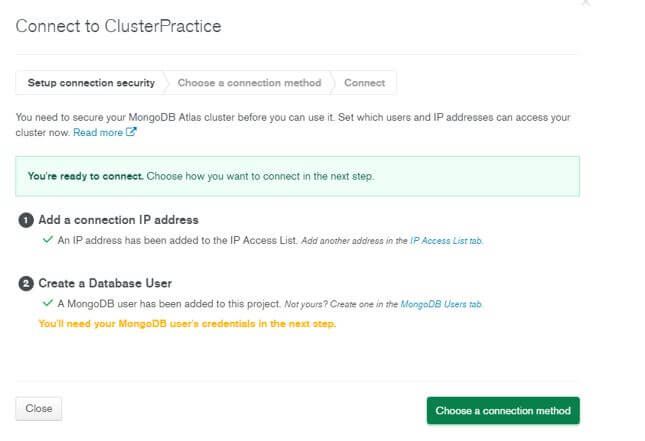
Step 2: Add an IP address, and provide a username and password for the Database.
Clicking on create database user will create a MongoDB user and get added to the project.
Step 3: Now, select a connection method, as “Connect with MongoDB shell”, under that, select “I do not have MongoDB shell installed”.
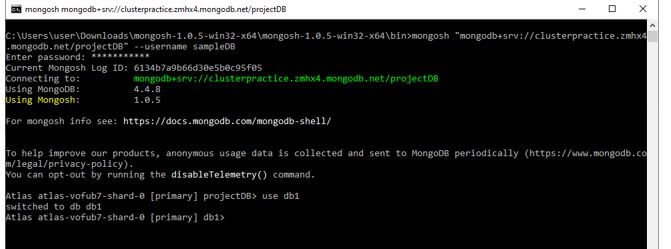
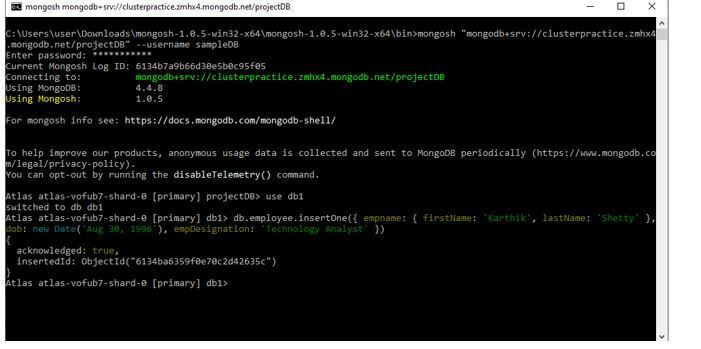
Step 4: Install MongoDB, and change the PATH variables on your system, and use the below command line to start connecting to the cluster.
mongosh "mongodb+srv://clusterpractice.zmhx4.mongodb.net/myFirstDatabase" --username sampleDB
It will prompt for the password, once entered, it will start connecting to the cluster.
Hence now we are connected to the created Atlas cluster “ClusterProject”.
Insert data into the cluster and view data.
Step 1: Use <database_name> will create a database with the given name, and will switch automatically to that database on creation.
Step 2: Insert data into database db1.
We have inserted a record for an employee with his last name and first name, date of birth, and designation as below.
It creates a collection employee and has one document, on entering, we can see the following output as “acknowledged”.
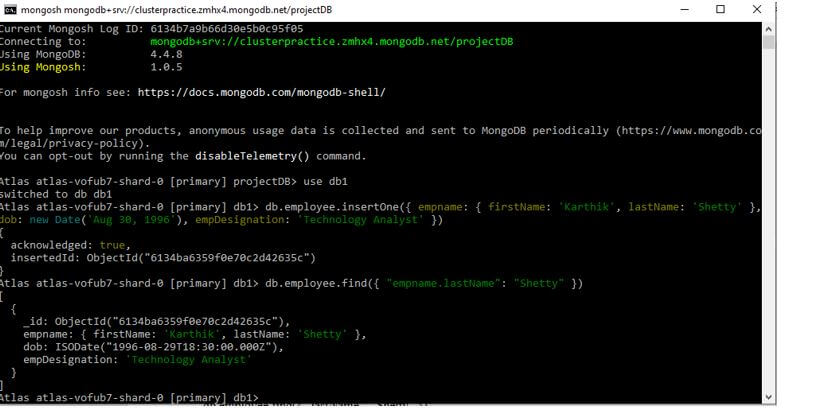
Step 3: To find the document from the collection of employees.
db.employee.find({ "lastName": "Shetty" })
Output:
User details are printed on the console.
These were some of the basic services of MongoDB Atlas.
Benefits of MongoDB Atlas
Given below are the benefits mentioned:
- It provides high throughput and low latency for most demanding workloads.
- It has a consistent and predictable performance that eliminates the need for separating caching tiers.
- It delivers a better price-performance ratio to traditional database software comparatively.
- It provides mobile access and is used for remote devices which is a huge advantage.
- With built-in redundancy and 24/7 support, this cloud database provides disaster recovery that is measured in seconds or minutes.
- It is safe and secure, adopting DBaaS infrastructure delivers a world-class security user can rely on.
Conclusion
With this, we shall conclude the topic “MongoDB Atlas Login”. We have seen what MongoDB Atlas login means and how it is used to manage databases on the cloud. We have seen how to create an account in MongoDB Atlas and to login to create clusters, databases, and link up both using command prompt or shell scripting based on the programming language selected. We have also seen an example of database creation, along with the creation of entry and viewing the entry. We have also seen few benefits that are the most relevant and best uses for users to start with.
Recommended Articles
This is a guide to MongoDB Atlas Login. Here we discuss the introduction, step-by-step process of MongoDB atlas login, and benefits respectively. You may also have a look at the following articles to learn more –
