Updated March 6, 2023

Definition of MongoDB Replica Set
MongoDB provides different kinds of functionality to the user, in which that replica is the one of functionality that is provided by the MongoDB. Basically, replica sets the instance MongoDB process that is useful to maintain the same kind of data set. In another word, we can say that the replica set provides data redundancy and high availability of data as well as it stores the replica set on multiple servers. The main advantage of the MongoDB replica set is that if the system fails or crushes at that time we can easily recover data from another server. It also provides security to our data.
Syntax:
mongod –port specified port number – dbpath “specified path of our db” – “specified replica instance name”
Explanation
The above-mentioned syntax we can divide into three parts as follows.
First, we need to specify the port, which means we need to start the instance of MongoDB that has the specified port number.
The specified path of DB means the path of our database.
In the third part, we need to assign the same name to the replica set that specified replica instance names as shown.
How to replica set in MongoDB?
Now let’s see how a replica set works in MongoDB as follows.
There are different steps we need to follow to set a replica set available in MongoDB as follows.
1. We can add the first member by using rs. initiate():
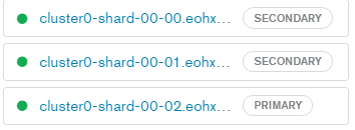
This is the first replica set in MongoDB. In this replica set first, we need to create the MongoDB instance. Let’s assume we have 4 servers and we call server 1, server 2, server 3, and server4. In this example, our primary server is that of server 1, and all remaining servers that are server 2, server 3, and server 4 are secondary servers.
Now we can create the replica set by using the following steps as follows.
Step 1: We must ensure that all MongoDB instances we already added into the replica set that we must need to install the replica set on a different server. The main advantage of this process is that if anyone server goes down, at that time we can use another server that has a MongoDB instance available on another server.
Step 2: In the second step, we need to connect all MongoDB instances to each other.
Step 3: In a third step, we need to start the MongoDB instance with the replSet option. This option is useful to combine all servers and it is part of the replica set.
Step 4: In the fourth step, the first server successfully added the replica set and after that, we need to initiate the replica set by using rs. initiate () command.
Step 5: Now we need to verify the replica set by using the rs. conf() command.
2. Now we need to add a replica set on the secondary server by using rs. add():
Now we need to add the replica set on the secondary server by using rs. add command.
Execution of this command is very simple; it just takes the name of the server and adds it with the replica set.
3. We can remove the replica set as follows:
After adding the server we can also remove the server by using rs. remove command but we need to follow certain steps as follows.
Step 1: First we need to power off all MongoDB instances which we need to remove. For shutting down the server, we can use the db.shutdownServer command.
Step 2: After that, we need to connect to the primary server.
Step 3: Finally we need to use the rs. remove command to remove the server from the replica set.
4. Troubleshooting of Replica Sets as follows.
If any issues are encountered then we need to follow the following steps as follows.
Step 1: We must ensure that all instances of MongoDB are connected with each other and it depends on the number of servers.
Step 2: In the second step, we need to run the rs. status command. This command gives the situation or actual status of the replica set. Naturally, every server will send messages to one another called a “heartbeat” message which simply demonstrates that the worker is alive and working. The “status” command gets the situation with these messages and shows if there are any issues with any individuals in the replica set.
Step 3: In this step, we need to check the size of the oplog – The Oplog is an assortment in MongoDB that stores the historical backdrop of composes which were done to the MongoDB information base. MongoDB then, at that point utilizes this Oplog to reproduce the keeps in touch with different individuals in the imitation set. To check the oplog, associate with the necessary part occasion and run the rs.printReplicationInfo order. This order will show the size of the log and how long it can hold exchanges in its log document before it turns out to be full.
Examples
Now let’s see the example of the replica set in MongoDB for better understanding as follows.
First, we need to make a directory by using the mkdir command. After that, we created three different instances by using the following command.
create_replica_set.sh
Explanation
By using the above command we created three different replica sets. The final output of the above statement we illustrated by using the following screenshot as follows.
Now create the instance with port number by using the following statement as follows.
mongod –port 27117 –dbpath”D:\set up\mogodb\data” – replSet sample
Explanation
In the above example, we use the 27117 port number for the replica set, and here we also specified the path of DB as shown after that we provide the specified name of the replica set as a sample as shown in the above statement.
After that, we need to start the mongodb instance through the command line. We can also check the status of the replica set by using rs. status() command.
Conclusion
We hope from this article you learn the MongoDB replica set. From the above article, we have learned the basic syntax of the replica set and we also see different examples of the replica set match. From this article, we learned how and when we use MongoDB replica set.
Recommended Articles
This is a guide to MongoDB Replica Set. Here we discuss the definition, How to replica set in MongoDB? with examples respectively. You may also have a look at the following articles to learn more –

