Updated June 5, 2023

Introduction to MySQL ODBC Driver
ODBC or MySQL connector represents the collection of the MySQL ODBC drivers. MySQL ODBC drivers were called myODBC drivers in the early days. MySQL ODBC driver is responsible for enabling access to the MySQL database with the help of open database connectivity API (ODBC API). The latest version of ODBC, i.e., ODBC 8.0, comes with Unicode and ANSI drivers. We can use the native interface of driver-manager-based interfaces to connect to the MySQL database when we use the MySQL ODBC driver. This driver provides complete support for all the MySQL functionalities, such as transaction and stored procedures. If we use an ODBC driver with a 5.1 or higher version, we also get complete Unicode compliance with MySQL.
When we use the Windows platform on our machine, we need to install the ODBC driver to connect to MySQL from a certain application. When working on the Mac or Linux/Unix platform, applications can utilize named pipes of the native MySQL network for communication with the MySQL database. Sometimes, the application that you are using on Linux/Unix or Mac os demands the ODBC interface to communicate with the database; at that time, it is required to install the MySQL ODBC driver on that platform too. Applications such as Filemaker Pro, Microsoft Office, and ColdFusion require ODBC for communication with MySQL.
Downloading ODBC Connector/Driver
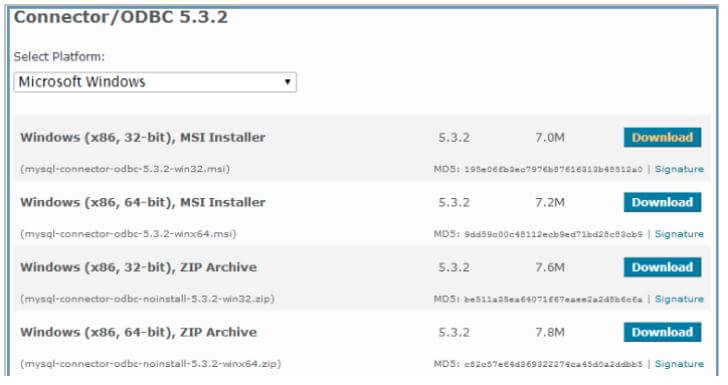
You can download the latest ODBC driver version that will support your MySQL version for the platform you are using by going to the following link – https://downloads.MySQL.com/archives/c-ODBC/.
You need to specify the version of the ODBC driver you want to download and mention the operating system you are using and the version of the operating system. After choosing all these parameters, your file will be ready for download. All you need to do is to click on the download button. The MySQL ODBC driver is licensed under the GPL, a completely open-source software. We have entered the following details for the Windows machine as per my platform.
Installation Methods
You can install MySQL ODBC driver on your platform by using any one of the methods from the two methods mentioned below:
- Binary Installation: This method is highly preferable and widely used due to its simplicity and ease of implementation. All the libraries necessary for the ODBC driver and other related files are pre-built. Along with that, there is a program for installation and scripts of the batch that can help to copy and configure the files and stuff automatically.
- Source Installation: To install the ODBC driver on a platform without a binary package, you can use this method. Suppose you want to change the installation process and customize the MySQL ODBC driver before installation.
Installation Steps
Given below are the installation steps:
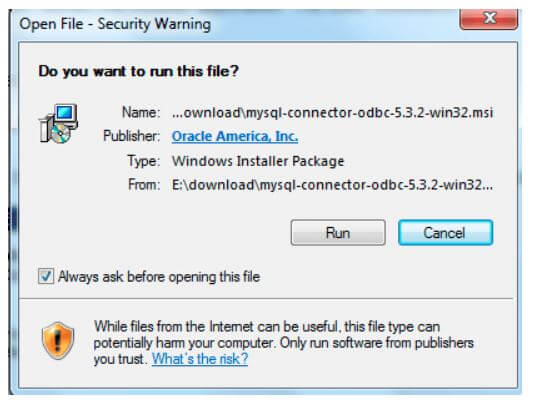
Step #1 – Double-click on the file downloaded in MSI format. In my case, the file that got downloaded is named MySQL-connector-ODBC-5.3.2-win32.msi. The output that can be seen after double-clicking is as follows – Click on the run.
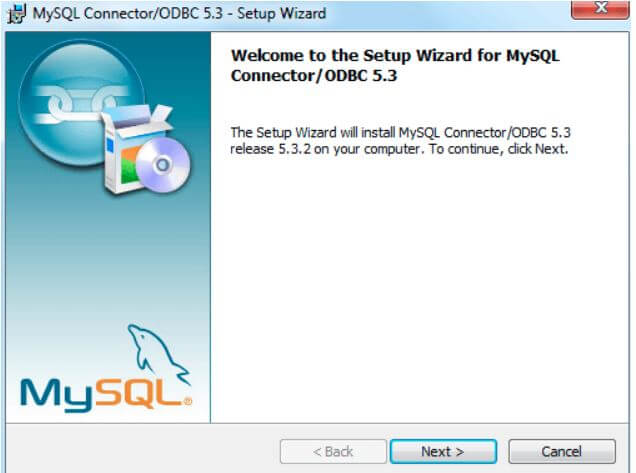
Step #2 – Next, you will see the wizard setup for the ODBC driver, as shown below. Click on next.
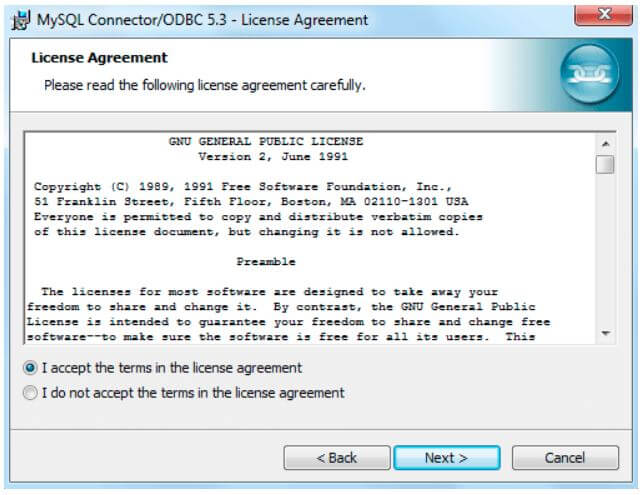
Step #3 – Agree on the license agreement and click on next.
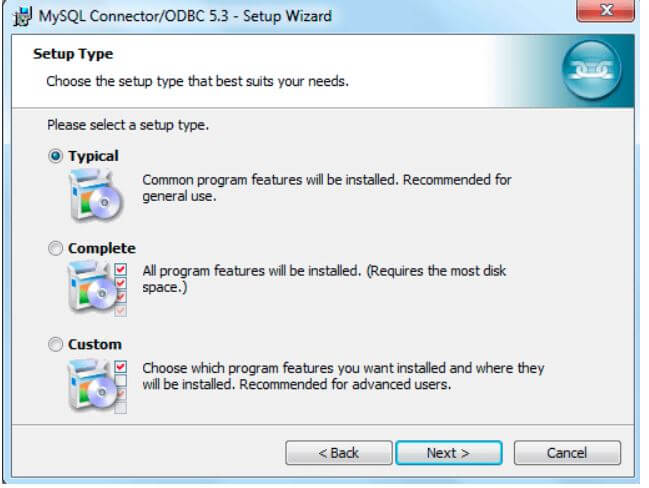
Step #4 – You can choose any option – typical, custom, or complete. Select the Typical option and click on Next.
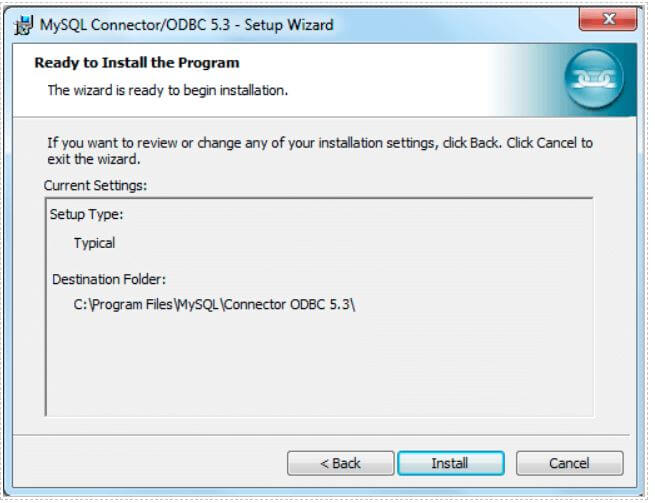
Step #5 – There you go. The program is ready for installation. Click on the install button.
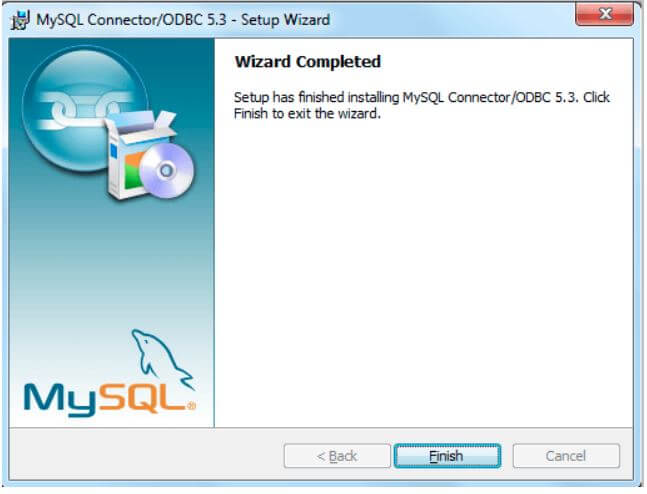
Step #6 – Now, click the finish button to complete the installation.
Configuration of ODBC Driver
After the installation, we must configure the ODBC driver and its related connections.
For this, we will need to follow the following steps:
Step #1
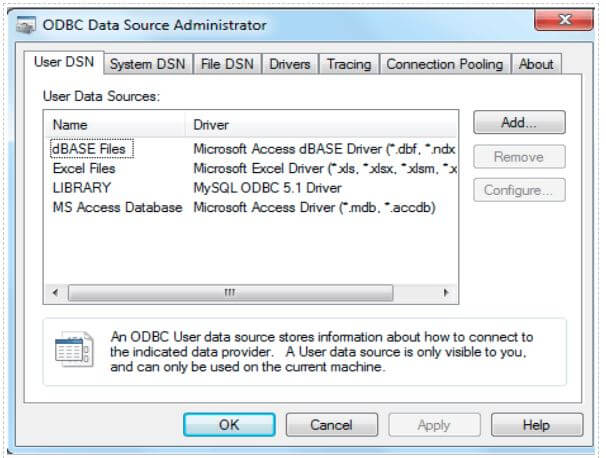
My platform is Windows 7, so to configure ODBC connections, start the button, click on it, and then choose the Control Panel option. After that, select the System and Security option that opens a list from which we must choose Administrative Tools and then click Data Sources (ODBC). This will lead to a pop-up of the following window.
Step #2
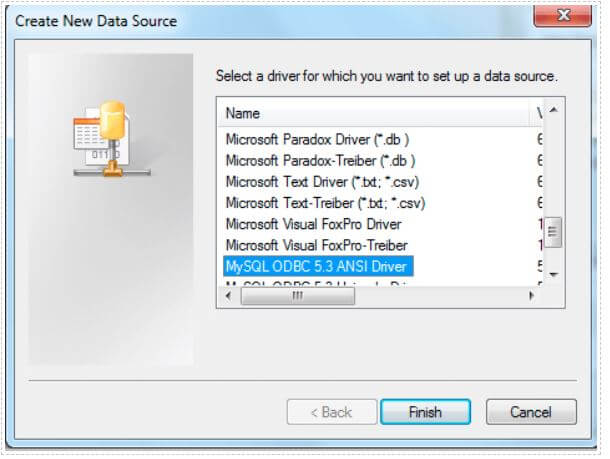
Now, you must click the Add button and select the ODBC 5.3 option from the list, as shown below.
Step #3
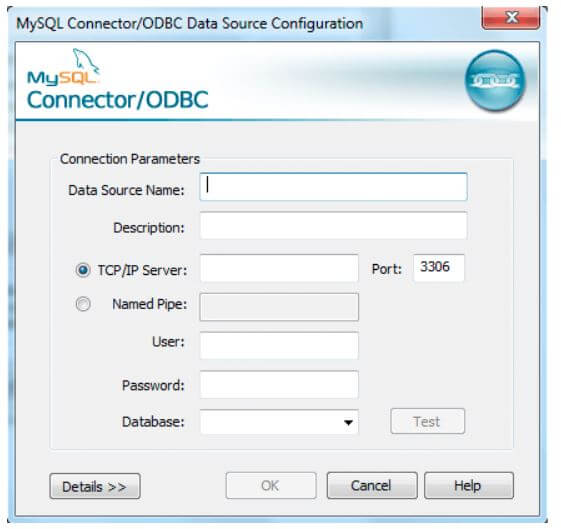
After clicking the finish button, you must specify the required fields for configuring the DSN connection using the window of connection parameters, as shown below.
- Data Source Name: To access the data source with a particular name, you must provide the name in the data source name field.
- Description: To identify the connection for future use, you can add some descriptions in this input field.
- TCP/IP Server: By default, localhost is used for accessing the database server. If you want to use another host, you can specify the server host of MySQL in this field.
- User: This field is used to specify which user should be used while trying to connect with the database server of MySQL.
- Password: You can enter the password for the MySQL database connection in this field.
- Database: This field will display all the databases allowed for access for the user you have entered above. You can select the database name you want to connect to in this field.
- Port: 3306 is the default port that is used for the connection. For the port other than this, you can mention the TCP/IP port in this field.
Step #4
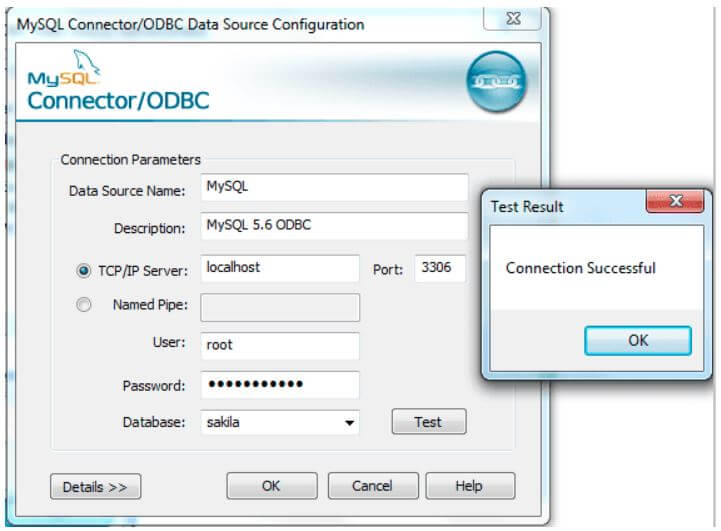
Now, click the test button after entering the above details to verify the proper pinging of the database connection, as illustrated below.
Step #5
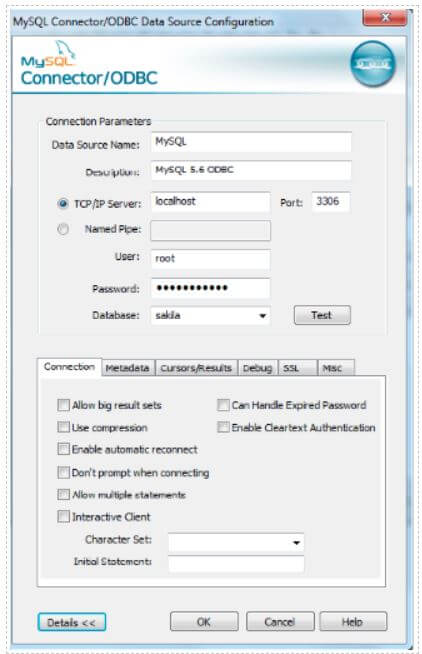
If you want to enter other DSN details, click on the details button located below as shown below.
Step #6
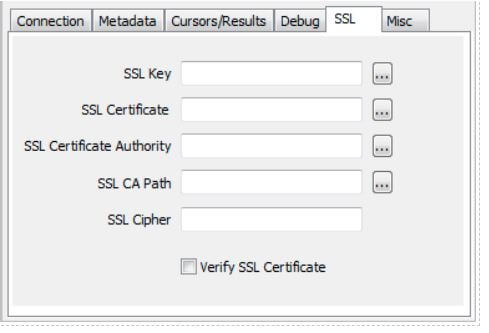
You can specify other network details related to the secure socket layer by clicking the SSL button below.
The connection is now ready. You can use the connection in different applications such as Microsoft Excel Word to connect the database, retrieve data, and manipulate the same.
Conclusion
We can use the ODBC driver of MySQL to establish a connection with the MySQL database from many applications. You can easily install it when you want to use it by following the above steps in the Windows platform.
Recommended Articles
We hope that this EDUCBA information on “MySQL ODBC Driver” was beneficial to you. You can view EDUCBA’s recommended articles for more information.
