Updated March 13, 2023
Definition of Nginx GUI
Nginx GUI contains the dashboard which was built in and used for the metrics of detailed monitoring, this dashboard is built on the API of Nginx. The module of load balancing nginx controller is a centralized platform used to manage the Nginx balancers across the environment of the cloud environment. Using the GUI wizard style we can configure all the instances of Nginx. We can also build custom dashboards.
What is Nginx GUI?
To track the metrics of the Nginx server we are building the custom dashboards. To configure the Nginx with a web server by using the support of variables, error handling, and response rewriting. For configuring we need to check which URLs it will handle and how it will process the requests of HTTP for the resource URLs. At lower level configuration will define the set of virtual servers which was controlling the request processing for particular IP addresses of the domain. Every virtual server for HTTP traffic will define its own scenario that what will happens for requests mapped location.
How to use Nginx GUI?
We need to install the Nginx in our system. After installing the Nginx we need to install the nginx GUI. The configuration file of Nginx includes one server directive for defining the virtual server. At the time when Nginx will process the request, it will first select the virtual server which was serving the request. The server of virtual is defined in the server directive in the context of HTTP. It is also possible for adding multiple directives into the context of HTTP.
Nginx gui error page directive we can configure the custom page with the error code which was substituting the different error code into the response or redirecting the browser by using the URI which was different. This directive is not mean that will return the error immediately but it will specify how we will treat errors when they will occur. The error code is coming from the proxied server and it was occurring during the processing of the Nginx server. At the time nginx is not able to find the page it will substituting the code of 301 to 404 and redirect it to another HTML file. This configuration is very useful when the client is trying to access the page which contains the old URI.
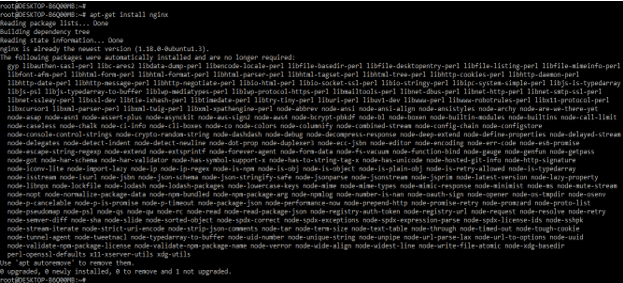
First, we are installing the Nginx server in our system as follows:
- First we need to install the nginx server in our system are as follows.
apt-get install nginx
2. After installing the nginx server it will not start by default to start the same we need to start by using the service command. We can check the version of nginx server and supported modules as follows.
service nginx start
service nginx status
nginx –V
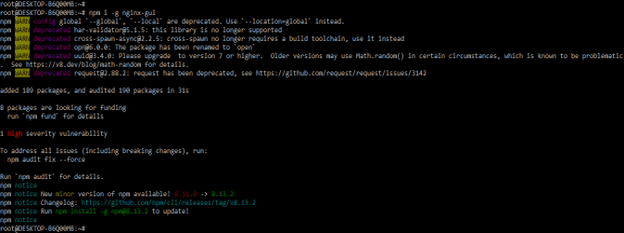
3. We are now installing the package of nginx GUI by using the npm command. Npm command is used to install the nginx GUI package. While installing we are using the location of nginx gui as global, so by using global location anywhere we can access the nginx GUI by putting the URL.
npm i -g nginx-gui
4. After installing the nginx GUI we are running the below command to open the GUI of Nginx. After running the nginx-gui command it will show the URL to open the GUI of nginx. While executing this command it will show the DB path of nginx-gui also it will show the server listening port as 9004, this port is the default used by nginx server. After executing this command also nginx-gui DB is initialized to do the operations. In the below image, we can see that nginx GUI will listen from the port as 9004 and server is started with same port no.
nginx-gui
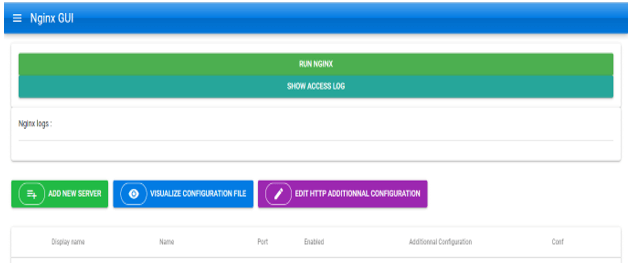
5. After executing the Nginx-gui command it will generate the below URL, after opening this URL by using a browser it will display the below page as follows. We can use any browser to open this URL. In the below example, we are using the chrome browser to open the nginx dashboard as follows.
http://localhost:9004/#/
6. We can start the server by using the dashboard by the clicking on run nginx tab as follows.
Nginx GUI Management and Dashboard
Dashboard is the same as another application dashboard that was used to manage the server and its applications. The below example shows how we can manage the nginx dashboard as follows.
- Suppose we need to add a new server then we need to click on add new server tab, after clicking on this tab it will show the below info.
2. After adding the new server, we can also change the info of the newly added server as follows. In the below example, we have changed the display name, name, and port of the server.
3. We can add multiple servers to the monitoring. we are adding a second server as follows.
4. We can check and edit the configuration file of the nginx server by clicking on visualize configuration file tab as follows.
5. We can also edit the additional configuration of http by clicking on the edit http additional configuration tab.
6. We can also remove the specified server by clicking on the delete symbol, in the below example we are deleting the second server as follows. In the below example, we can see that after clicking on the yes button it will delete the server.
Conclusion
Every virtual server for HTTP traffic will define its own scenario that what will happens for requests mapped location. It contains the dashboard which was built in and used for the metrics of detailed monitoring, this dashboard is built on the API of nginx.
Recommended Articles
This is a guide to Nginx GUI. Here we discuss the Definition, What is Nginx GUI, How to use Nginx GUI, and examples with code implementation. You may also have a look at the following articles to learn more –


