Updated March 31, 2023
Introduction to nhibernate net core
NHibernate is the ORM, an object-relational platform that works on the ASP.Net core. Therefore, we can easily deploy the core project developed in ASP.NET that uses NHibernate on the Linux server without any effort. The application works in the same way as it will do on a windows platform. In this article, we will see what is meant by NHibernate net core, created net core, using it and its core methods along with its implementation with the help of examples.
What is nhibernate net core?
NHibernate net core is when the application created by using NHibernate and ASP.Net can work equivalently efficiently on a Linux or Windows platform. It can also be considered an extension to the NHibernate application when developed by using .Net core. Furthermore, NHibernate can be used along with the standard .Net 2.0 version, which means that we can integrate NHibernate with .Net core 2.0, which we will be using in this article.
created nhibernate net core
NHibernate net core is the open-source object-relational mapper that will be useful in your real-time projects. The created libraries can be added to your project simply by using this github link https://github.com/nhibernate/nhibernate-core, where you will find the complete NHibernate project.
Using nhibernate net core
When you are using NHibernate along with the .Net core in your application, you will have to perform the following tasks to use it –
- Setting the configurations of the system can be simply done by adding the properties without changing anything in hibernate.cfg.xml or app.config.
- You will have to perform dependency infection and set up the classes of ISession and ISessionFactory in your service files after registering NHibernate.
- The next step will be initializing your factory of sessions, the class SessionFactory. Again, this step becomes quite easy if you are using the Nuget package in your system.
- Now, you are all set to use NHibernate in your core ASP.Net projects.
nhibernate net core method
The methodology for using net core is as described in the below steps –
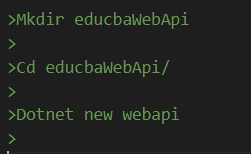
- Firstly, by using the below commands, we can create an application of Web API that will be having the base of .NET core –
Mkdir educbaWebApi
Cd educbaWebApi/
Dotnet new webapi
The output of following the above commands is as shown below –
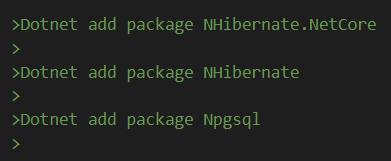
- Now, you can add the NHibernate package and the driver that will be corresponding to the database. Consider, for example, Npgsql package addition. Commands for the same will be as shown below –
Dotnet add package NHibernate.NetCore
Dotnet add package NHibernate
Dotnet add package Npgsql
The output of the above commands is as shown below –
- You can now open the file of the project named educbaWebApi.csproj and check whether the packages we have added are added to the file or not. The file on my end looks as shown below –
- Now, it’s time to create the model’s directory inside the project and the mapping XML files and corresponding classes of the entity. The code of the file could be as written below –
namespace EMPNHibernate.Models
{
public class Employee
{
public virtual int writer_id { get; set; }
public virtual string f_name { get; set; }
public virtual string l_name { get; set; }
public virtual string email_id { get; set; }
public virtual string mobile_number { get; set; }
public virtual string join_date { get; set; }
public virtual string domain_id { get; set; }
public virtual string pay_amount { get; set; }
public virtual string guide_id" />
public virtual string department_id" />
}
}
The XML file corresponding to the above entity class file for mapping will be as written below –
<?xml version="1.0" encoding="utf-8" ?>
<hibernate-mapping xmlns="urn:nhibernate-mapping-2.2" auto-import="true" assembly="EducbaWriterHiber" namespace="EducbaWriterHiber.Models">
<class name="Educba_writers" table="Educba_writers" dynamic-update="true" xmlns="urn:nhibernate-mapping-2.2">
<cache usage="read-write"/>
<id name="Id" column="writer_id" type="int">
<generator class="native" />
</id>
<property name="f_name" />
<property name="l_name" />
<property name="email_id" />
<property name="mobile_number" />
<property name="join_date" />
<property name="domain_id" />
<property name="pay_amount" />
<property name="guide_id" />
<property name="department_id" />
</class>
</hibernate-mapping>
This is the most common practice while working with NHibernate, and there are many documents out there available to use without thinking much about it.
- The XML mapping file can be compiled to form some embedded resources by simply opening the file of a project named educbaWebApi.csproj and adding a new node named ItemGroup to it. This can be done by using the below code –
- We will not create a new file for setting the configurations of NHibernate and further arrange such a system that the file will further be copied to the output directory. The code of the configuration file will be as shown below –
<?xml version="1.0" encoding="UTF-8"?>
<hibernate-configuration xmlns="urn:nhibernate-configuration-2.2">
<session-factory>
<property name="dialect">NHibernate.Dialect.PostgreSQL83Dialect</property>
<property name="show_sql">true</property>
<property name="adonet.batch_size">10</property>
<property name="connection.driver_class">NHibernate.Driver.NpgsqlDriver</property>
<property name="connection.connection_string">server=localhost;database=educba_writers;user id=payal;password=GreatEducba;</property>
<property name="format_sql">true</property>
<mapping assembly="NaturalReserveApi" />
</session-factory>
</hibernate-configuration>-
- Now, you are all set to open the file of the project and add the group of items that is ItemGroup node in the code using below code –
<?xml version="1.0" encoding="UTF-8"?>
<hibernate-configuration xmlns="urn:nhibernate-configuration-2.2">
<session-factory>
<property name="dialect">NHibernate.Dialect.PostgreSQL83Dialect</property>
<property name="show_sql">true</property>
<property name="adonet.batch_size">10</property>
<property name="connection.driver_class">NHibernate.Driver.NpgsqlDriver</property>
<property name="connection.connection_string">server=localhost;database=educba_writers;user id=payal;password=GreatEducba;</property>
<property name="format_sql">true</property>
<mapping assembly="NaturalReserveApi" />
</session-factory>
</hibernate-configuration> Now, you can add the new node of Itemgroup to the file of the project as shown below –
<ItemGroup>
<Content Update="hibernate.config">
<CopyToOutputDirectory>Always</CopyToOutputDirectory>
</Content>
</ItemGroup>- You will now need to integrate the built-in framework of dependency injection to the NHibernate of .Net by changing the startup.cs file. You will have to change the using section of the file by adding the below two statements –
using NHibernate.NetCore;using Microsoft.Extensions.Logging;- Perform certain changes in the constructor of the project file and write the below code –
public Educba(
IConfiguration sampleConfig,
ILoggerFactory sampleFactory
) {
Configuration = sampleConfig;
sampleFactory.UseAsHibernateLoggerFactory();
}
Now, perform certain changes in the configuration services method so that the new services related to NHibernate can be added –
public void ConfigureServices(IServiceCollection sampleEducbaService) {
var samplePath = System.IO.Path.Combine(
AppDomain.CurrentDomain.BaseDirectory,
"hibernate.config"
);
sampleEducbaService.AddHibernate(samplePath);
sampleEducbaService.AddMvc()
.SetCompatibilityVersion(CompatibilityVersion.Version_2_1);
}- We will now need to change the values controller that was set to default. Change the constructor, inject the requirements of the session factory, and then you will be all set to use NHibernate. Let us change the constructor and perform injection of ISessionFactory in it –
public ValuesController(ISessionFactory sampleValue) {
this.factory = sampleValue;
}
Perform certain changes in the get method of the query of NHibernate –
[HttpGet]
public ActionResult<IEnumerable<GpsPosition>> Get() {
using (var sampleEducbaSess = factory.OpenSession()) {
var sampleStatement = sampleEducbaSess.Query<GpsPosition>();
return sampleStatement.ToList();
}
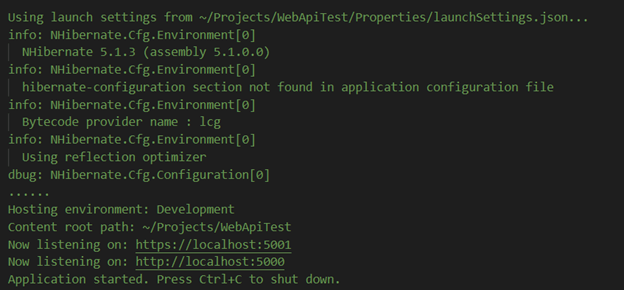
}- The last step will be to compile the project, run it and check the output. For this, you can make the use of the following statements –
Dotnet runIn the output of initialization info of NHibernate, we can observe the below results –
Nhibernate Net Core Examples
In order to understand its implementation, you can understand the above example mentioned in the core methods section. Then, we can observe the class file for the entity, XML mapping file, DB context, and the main file for implementation, service files, and controllers.
Conclusion
NHibernate is the matured, object-relational mapper that comes along with the support and implementation in .Net applications. This article gives the details about the same.
Recommended Articles
This is a guide to nhibernate net core. Here we discuss the Implementations of nhibernate net core along with the examples and outputs. You may also have a look at the following articles to learn more –


