Updated April 18, 2023
Introduction OpenCV haar Cascade
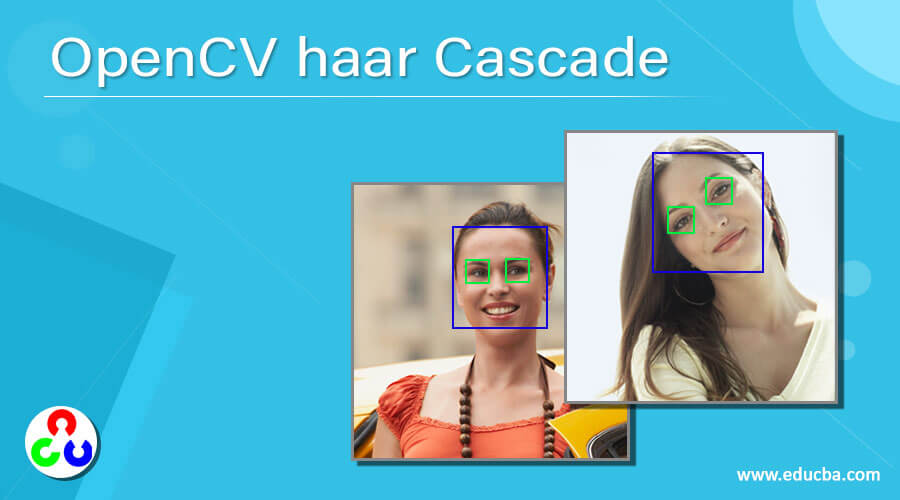
Haar Cascade algorithm is one of the most powerful algorithms for the detection of objects specifically face detection in OpenCV proposed by Michael Jones and Paul Viola in their research paper called “Rapid Object Detection using a Boosted Cascade of Simple Features” and this algorithm was proposed in the year 2001which uses a function called cascade function for the detection of objects in the image and a lot of negative images and positive images are used to train this cascade function and this cascade function returns the image with rectangles drawn around the faces in the image as the output.
The syntax to define HoughLines() function and HoughLinesP() function in OpenCV is as follows:
cv2.CascadeClassifier.detectMultiScale(gray_image, scale_factor, min_neighbours)where gray_image is the grayscale version of the input image in which the faces are to be detected,
scale_factor specifies the scale by which the size of the image must be reduced and
min_neighbours specifies the number of rectangles each rectangle should have.
How to work haar cascade algorithm in OpenCV?
Working of haar cascade algorithm in OpenCV is as follows:
The haar cascade algorithm makes use of a kind of filter to perform feature extraction from the given image. These filters inspect only one portion of the image at a time. Then the intensity of the pixels in the white portion and in the black portion is added. The result of subtraction of these two summations is the feature extracted value. There are three kinds of haar-like features extracted using the haar cascade algorithm, they are edge features, line features, and center-surround features. In order to detect the faces in the image, we load the pre-trained XML classifier file.
Then we make use of the detectMultiScale() function to detect the faces in the image. The positions of the detected faces are returned using the detectMultiScale() function. Then a region of Interest is drawn around the detected faces in the image. The detectMultiScale() function returns the image with rectangles drawn around the faces in the image as the output.
Examples
Let us discuss examples of OpenCV haar Cascade.
Example #1
OpenCV program in python to detect a face in the given image by using pre-trained haar cascade XML classifier and implementing haar cascade algorithm to display the image rectangles drawn around the faces in the image as the output on the screen:
#importing the module cv2
import cv2#loading the pre trained XML classifier for face detection
cascade_object = cv2.CascadeClassifier('C:/Users/admin/Desktop/images/haarcascade_frontalface_default.xml')#reading the input image in which the faces are to be detected
imageread = cv2.imread('C:/Users/admin/Desktop/images/image.jpg')#converting the input image to grayscale image
imagegray = cv2.cvtColor(imageread, cv2.COLOR_BGR2GRAY)#using detectMultiScale() function to detect the position of faces in the image
face_positions = cascade_object.detectMultiScale(imagegray, 1.1, 4)#drawing the rectangles around the position of the faces detected in the image
for (x, y, w, h) in face_positions:
cv2.rectangle(imageread, (x, y), (x+w, y+h), (0, 255, 0), 2)
#displaying the resulting image as the output on the screen
cv2.imshow('Resulting_image', imageread)
cv2.waitKey()
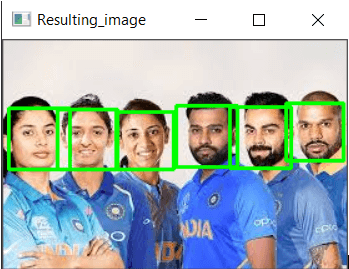
Output:
In the above program, the necessary module cv2 is imported. Then we reading the image in which the faces must be detected using the imread() function. Then we are converting the input image to grayscale image using cvtColor() function. Then we are using detectMultiScale() function to detect the position of faces in the image. Then we are drawing the rectangles around the position of the faces detected in the image. Then we are displaying the resulting image with rectangles drawn around the detected faces as the output on the screen. The output is shown in the snapshot above.
Example #2
OpenCV program in python to detect a face in the given image by using pre trained haar cascade XML classifier and implementing haar cascade algorithm to display the image rectangles drawn around the faces in the image as the output on the screen:
#importing the module cv2
import cv2#loading the pre trained XML classifier for face detection
cascade_object = cv2.CascadeClassifier('C:/Users/admin/Desktop/images/haarcascade_frontalface_default.xml')#reading the input image in which the faces are to be detected
imageread = cv2.imread('C:/Users/admin/Desktop/images/image_mars.jpg')#converting the input image to grayscale image
imagegray = cv2.cvtColor(imageread, cv2.COLOR_BGR2GRAY)#using detectMultiScale() function to detect the position of faces in the image
face_positions = cascade_object.detectMultiScale(imagegray, 1.1, 4)#drawing the rectangles around the position of the faces detected in the image
for (x, y, w, h) in face_positions:
cv2.rectangle(imageread, (x, y), (x+w, y+h), (0, 255, 0), 2)
#displaying the resulting image as the output on the screen
cv2.imshow('Resulting_image', imageread)
cv2.waitKey()
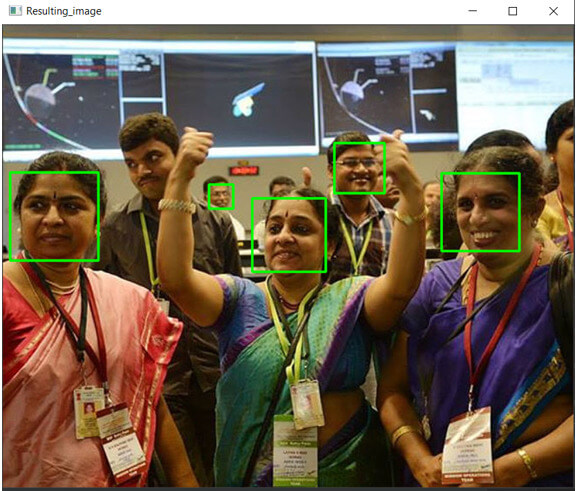
Output:
In the above program, the necessary module cv2 is imported. Then we reading the image in which the faces must be detected using imread() function. Then we are converting the input image to grayscale image using cvtColor() function. Then we are using detectMultiScale() function to detect the position of faces in the image. Then we are drawing the rectangles around the position of the faces detected in the image. Then we are displaying the resulting image with rectangles drawn around the detected faces as the output on the screen. The output is shown in the snapshot above.
Example #3
OpenCV program in python to detect face in the given image by using pre trained haar cascade XML classifier and implementing haar cascade algorithm to display the image rectangles drawn around the faces in the image as the output on the screen:
#importing the module cv2
import cv2#loading the pre trained XML classifier for face detection
cascade_object = cv2.CascadeClassifier('C:/Users/admin/Desktop/images/haarcascade_frontalface_default.xml')#reading the input image in which the faces are to be detected
imageread = cv2.imread('C:/Users/admin/Desktop/images/image_mars1.jpg')#converting the input image to grayscale image
imagegray = cv2.cvtColor(imageread, cv2.COLOR_BGR2GRAY)#using detectMultiScale() function to detect the position of faces in the image
face_positions = cascade_object.detectMultiScale(imagegray, 1.1, 4)#drawing the rectangles around the position of the faces detected in the image
for (x, y, w, h) in face_positions:
cv2.rectangle(imageread, (x, y), (x+w, y+h), (0, 255, 0), 2)
#displaying the resulting image as the output on the screen
cv2.imshow('Resulting_image', imageread)
cv2.waitKey()
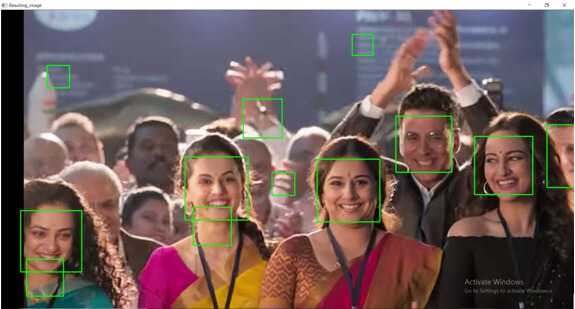
Output:
In the above program, the necessary module cv2 is imported. Then we reading the image in which the faces must be detected using imread() function. Then we are converting the input image to grayscale image using cvtColor() function. Then we are using detectMultiScale() function to detect the position of faces in the image. Then we are drawing the rectangles around the position of the faces detected in the image. Then we are displaying the resulting image with rectangles drawn around the detected faces as the output on the screen. The output is shown in the snapshot above.
Conclusion
In this article, we have learned the concept of the haar cascade algorithm using the detectMultiScale() function to detect the faces in a given image with corresponding programming examples and their outputs to demonstrate them.
Recommended Articles
We hope that this EDUCBA information on “OpenCV haar Cascade” was beneficial to you. You can view EDUCBA’s recommended articles for more information.


