Updated April 18, 2023

Introduction to OpenCV inRange
Whenever we want to check the elements of a given array with the corresponding elements of the two arrays among which one array represents the upper bounds and the other array represents the lower bounds, we make use of a function called inRange() function in OpenCV and this inRange() function returns an array of elements equal to 255 if the elements of the given array lie between the two arrays representing the upper bounds and the lower bounds or the inRange() function returns an array of elements equal to 0 if the elements of the given array do not lie between the two arrays representing the upper bounds and the lower bounds.
Syntax to define inRange() function in OpenCV:
resultarray = inRange(sourcearray, upperboundarray, lowerboundarray)Where,
- sourcearray is the array whose elements are to be compared with the arrays representing upper bounds and lower bounds.
- upperboundarray is the array consisting of elements representing upper bounds.
- lowerboundarray is the array consisting of elements representing lower bounds.
- resultarray is the array representing the elements equal to either 255 or 0 returned from inRange() function.
Working of inRange() Function in OpenCV
- In order to determine if the elements of a given array lie between the elements of two arrays representing upper bounds and lower bounds, we make use of a function called inRange() function in OpenCV.
- The inRange() function in OpenCV takes three parameters namely source array, upperboundsarray and lowerboundsarray.
- The parameter sourcearray is the array whose elements are to be compared with the two arrays representing the upper bounds and lower bounds.
- The parameter upperboundsarray is the array consisting of elements representing the upper bounds.
- The parameter lowerboundsarray is the array consisting of elements representing the lower bounds.
- The inRange() function returns an array consisting of elements equal to 255 if the elements of the source array lie between the elements of the two arrays representing the upper bounds and the lower bounds.
- The inRange() function returns an array consisting of elements equal to 0 if the elements of the source array lie between the elements of the two arrays representing the upper bounds and the lower bounds.
Examples of OpenCV inRange
Given below are the examples of OpenCV inRange:
Example #1
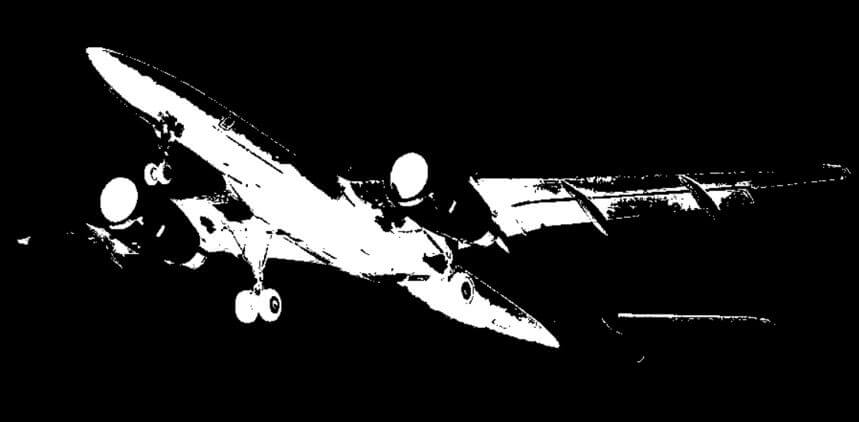
OpenCV program in python to mask the given image by specifying the lower bounds and upper bounds then displaying the resulting image as the output on the screen using inRange() function.
Code:
#importing the module cv2 and numpy
import cv2
import numpy as np
#reading the image which is to be masked
imagergb = cv2.imread('C:/Users/admin/Desktop/plane.jpg')
#defining the lower bounds and upper bounds
lower_bound = np.array([0, 0, 0])
upper_bound = np.array([350,55,100])
#masking the image using inRange() function
imagemask = cv2.inRange(imagergb, lower_bound, upper_bound)
#displaying the resulting masked image
cv2.imwrite("C:/Users/admin/Desktop/logo1.png", imagemask)
Output:
In the above program, we are importing the modules cv2 and numpy. Then we are reading the image to be masked using imread() function. Then we are specifying the upper bounds and lower bounds of the two arrays to be passed as the parameter to the inRange() function along with source image to mask the image and display it as the output on the screen.
Example #2
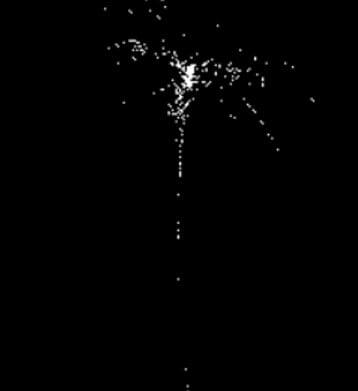
OpenCV program in python to mask the given image by specifying the lower bounds and upper bounds then displaying the resulting image as the output on the screen using inRange() function.
Code:
#importing the module cv2 and numpy
import cv2
import numpy as np
#reading the image which is to be masked
imagergb = cv2.imread('C:/Users/admin/Desktop/tree.jpg')
#defining the lower bounds and upper bounds
lower_bound = np.array([0, 0, 0])
upper_bound = np.array([350,55,100])
#masking the image using inRange() function
imagemask = cv2.inRange(imagergb, lower_bound, upper_bound)
#displaying the resulting masked image
cv2.imwrite("C:/Users/admin/Desktop/logo1.png", imagemask)
Output:
In the above program, we are importing the modules cv2 and numpy. Then we are reading the image to be masked using imread() function. Then we are specifying the upper bounds and lower bounds of the two arrays to be passed as the parameter to the inRange() function along with source image to mask the image and display it as the output on the screen.
Example #3
OpenCV program in python to mask the given image by specifying the lower bounds and upper bounds then displaying the resulting image as the output on the screen using inRange() function.
Code:
#importing the module cv2 and numpy
import cv2
import numpy as np
#reading the image which is to be masked
imagergb = cv2.imread('C:/Users/admin/Desktop/car.jpg')
#defining the lower bounds and upper bounds
lower_bound = np.array([0, 0, 0])
upper_bound = np.array([350,55,100])
#masking the image using inRange() function
imagemask = cv2.inRange(imagergb, lower_bound, upper_bound)
#displaying the resulting masked image
cv2.imwrite("C:/Users/admin/Desktop/logo1.png", imagemask)
Output:
In the above program, we are importing the modules cv2 and numpy. Then we are reading the image to be masked using imread() function. Then we are specifying the upper bounds and lower bounds of the two arrays to be passed as the parameter to the inRange() function along with source image to mask the image and display it as the output on the screen.
Example #4
OpenCV program in python to mask the given image by specifying the lower bounds and upper bounds then displaying the resulting image as the output on the screen using inRange() function.
Code:
#importing the module cv2 and numpy
import cv2
import numpy as np
#reading the image which is to be masked
imagergb = cv2.imread('C:/Users/admin/Desktop/logo.png')
#defining the lower bounds and upper bounds
lower_bound = np.array([0, 0, 0])
upper_bound = np.array([350,55,100])
#masking the image using inRange() function
imagemask = cv2.inRange(imagergb, lower_bound, upper_bound)
#displaying the resulting masked image
cv2.imwrite("C:/Users/admin/Desktop/logo1.png", imagemask)
Output:
In the above program, we are importing the modules cv2 and numpy. Then we are reading the image to be masked using imread() function. Then we are specifying the upper bounds and lower bounds of the two arrays to be passed as the parameter to the inRange() function along with source image to mask the image and display it as the output on the screen.
Recommended Articles
We hope that this EDUCBA information on “OpenCV inRange” was beneficial to you. You can view EDUCBA’s recommended articles for more information.


