Updated April 18, 2023
Introduction to OpenCV Morphology
The simple operations performed on the images based on the shape of the images are called morphological transformations and there are several morphological operations namely erosion, dilation, opening, closing, morphological gradient, top hat, and black hat and we make use of dilate() function for dilating the image, erode() function to erode the image and morphologyEx() function to perform the operations of opening, closing, morphological gradient, top hat and black hat on the image and these operations are used to remove noise from the image, to remove small holes in the foreground objects in the image, etc. and morphologyEx() function returns an image with morphological operations performed on them.
The syntax to define morphologyEx() function in OpenCV is as follows:
morphologyEx(source_image, operation, kernel)
where source_image is the image on which the morphological operations must be performed,
operation represents the morphological operation to be performed on the source image and
kernel represents the kernel matrix.
How to work Morphology function in OpenCV?
Working of morphologyEx() function in OpenCV is as follows:
- The simple operations performed on the images based on the shape of the images to remove noise from the image, to remove small holes in the foreground objects in the image, etc. are called morphological transformations.
- There are several morphological operations namely erosion, dilation, opening, closing, morphological gradient, top hat, and black hat.
- The operation of erosion followed by the operation of dilation is called opening morphological operation.
- We make use of the operation MORPH_OPEN in morphologyEx() function to perform opening morphological operations on a given image.
- The operation of a dilation followed by the operation of erosion is called closing morphological operation.
- We make use of the operation MORPH_CLOSE in morphologyEx() function to perform a closing morphological operations on a given image.
- The difference between the operation of dilation and the operation of erosion of an image is called morphological gradient operation.
- We make use of the operation MORPH_GRADIENT in morphologyEx() function to perform morphological gradient operation on a given image.
- The difference between the input image and the operation of the opening of an image is called the Top Hat operation.
- We make use of the operation MORPH_TOPHAT in morphologyEx() function to perform Top Hat morphological operation on a given image.
- The difference between the operation of closing of the input image and the input image is called the Black Hat operation.
- We make use of the operation MORPH_BLACKHAT in morphologyEx() function to perform Black Hat morphological operation on a given image.
Examples
Let us discuss examples of OpenCV Morphology.
Example #1
OpenCV program in python to demonstrate morphologyEx() function to read the given image using imread() function, perform opening morphological operation on the given image and display the output on the screen:
#importing the required modules
import cv2
import numpy as np
#reading the image on which opening morphological operation is to be performed using imread() function
imageread = cv2.imread('C:/Users/admin/Desktop/images/educba1.jpg')
#defining the kernel matrix
kernel = np.ones((4,4),np.uint8)
#using morphologyEx function by specifying the MORPH_OPEN operation on the input image
openingimage = cv2.morphologyEx(imageread, cv2.MORPH_OPEN, kernel)
#displaying the morphed image as the output on the screen
cv2.imshow('Morphed_image', openingimage)
cv2.waitKey(0)
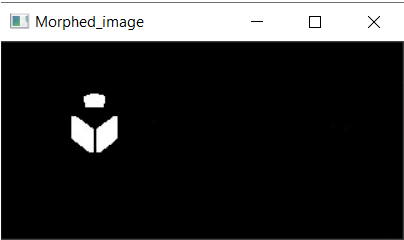
The output of the given program is shown in the snapshot below:
In the above program, we are importing the required modules. Then we are reading the image on which morphological operation is to be performed using imread() function. Then we are defining the kernel matrix. Then we are making use of morphologyEx() function by specifying the opening operation on the image. Then we are displaying the morphed image as the output on the screen.
Example #2
OpenCV program in python to demonstrate morphologyEx() function to read the given image using imread() function, perform closing morphological operation on the given image and display the output on the screen:
#importing the required modules
import cv2
import numpy as np
#reading the image on which opening morphological operation is to be performed using imread() function
imageread = cv2.imread('C:/Users/admin/Desktop/images/educba1.jpg')
#defining the kernel matrix
kernel = np.ones((4,4),np.uint8)
#using morphologyEx function by specifying the MORPH_CLOSE operation on the input image
closingimage = cv2.morphologyEx(imageread, cv2.MORPH_CLOSE, kernel)
#displaying the morphed image as the output on the screen
cv2.imshow('Morphed_image', closingimage)
cv2.waitKey(0)
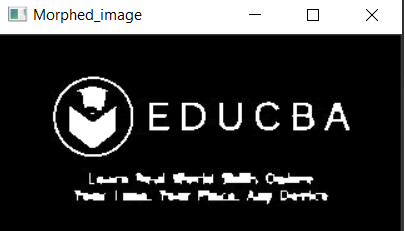
The output of the given program is shown in the snapshot below:
In the above program, we are importing the required modules. Then we are reading the image on which morphological operation is to be performed using imread() function. Then we are defining the kernel matrix. Then we are making use of morphologyEx() function by specifying the closing operation on the image. Then we are displaying the morphed image as the output on the screen.
Example #3
OpenCV program in python to demonstrate morphologyEx() function to read the given image using imread() function, perform morphological gradient operation on the given image and display the output on the screen:
#importing the required modules
import cv2
import numpy as np
#reading the image on which opening morphological operation is to be performed using imread() function
imageread = cv2.imread('C:/Users/admin/Desktop/images/educba1.jpg')
#defining the kernel matrix
kernel = np.ones((4,4),np.uint8)
#using morphologyEx function by specifying the MORPH_GRADIENT operation on the input image
gradientimage = cv2.morphologyEx(imageread, cv2.MORPH_GRADIENT, kernel)
#displaying the morphed image as the output on the screen
cv2.imshow('Morphed_image', gradientimage)
cv2.waitKey(0)
The output of the given program is shown in the snapshot below:
In the above program, we are importing the required modules. Then we are reading the image on which morphological operation is to be performed using imread() function. Then we are defining the kernel matrix. Then we are making use of morphologyEx() function by specifying the morphological gradient operation on the image. Then we are displaying the morphed image as the output on the screen.
Example #4
OpenCV program in python to demonstrate morphologyEx() function to read the given image using imread() function, perform top hat operation and black hat operation on the given image, and display the output on the screen:
#importing the required modules
import cv2
import numpy as np
#reading the image on which opening morphological operation is to be performed using imread() function
imageread = cv2.imread('C:/Users/admin/Desktop/images/educba1.jpg')
#defining the kernel matrix
kernel = np.ones((4,4),np.uint8)
#using morphologyEx function by specifying the MORPH_TOPHAT operation on the input image
tophatimage = cv2.morphologyEx(imageread, cv2.MORPH_TOPHAT, kernel)
#using morphologyEx function by specifying the MORPH_BLACKHAT operation on the input image
blackhatimage = cv2.morphologyEx(imageread, cv2.MORPH_BLACKHAT, kernel)
#displaying the morphed image as the output on the screen
cv2.imshow('Morphed_image', tophatimage)
cv2.waitKey(0)
#displaying the morphed image as the output on the screen
cv2.imshow('Morphed_image', blackhatimage)
cv2.waitKey(0)
The output of the given program is shown in the snapshot below:
In the above program, we are importing the required modules. Then we are reading the image on which morphological operation is to be performed using imread() function. Then we are defining the kernel matrix. Then we are making use of morphologyEx() function by specifying the top hat operation on the image. Then we are making use of morphologyEx() function by specifying the black hat operation on the image. Then we are displaying the morphed images as the output on the screen.
Conclusion
In this article, we have learnt the concept of morphological operations using morphologyEx() function with corresponding programming examples and their outputs to demonstrate them.
Recommended Articles
We hope that this EDUCBA information on “OpenCV Morphology” was beneficial to you. You can view EDUCBA’s recommended articles for more information.


