Updated August 22, 2023
Introduction to Page Setup in Excel
In this article, we will learn about Page Setup in Excel. Often you may come up with a situation where you need to print the Excel sheet you have with yourself, containing some important data that needs to be shared as a hard copy. In such cases, you will strongly need a page setup. It becomes easy for you to print the pages once you know how to do the same under Microsoft Excel. There are several operations involved under page setup:
- Setting margins for top, bottom, left, and right.
- Add a header or footer to the Excel sheet you will print.
- Page views: Portrait, landscape, or custom.
- Setting printing area etc.
We will go through all the page setup settings and options one by one in this article. It is very easy under Excel to set up the page before printing and preview it to make some amendments as per your need/requirement.
How to Setup Page in Excel?
Page Setup in Excel is very simple and easy. Let’s understand in detail how to set up the page in Excel.
#1 – Page Setup Using Excel View Tab
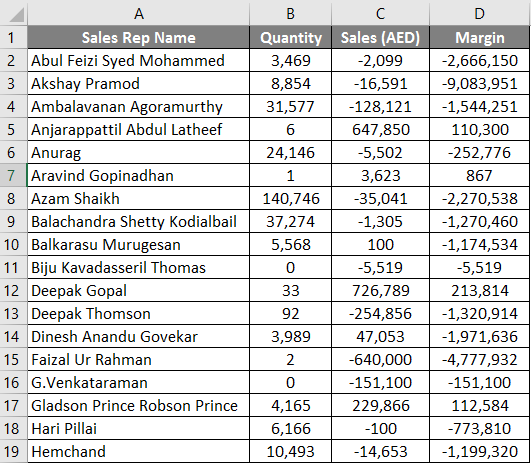
Suppose we have data as shown below:
We will see how a basic page setup can be done using Excel’s View tab, present under the top ribbon.
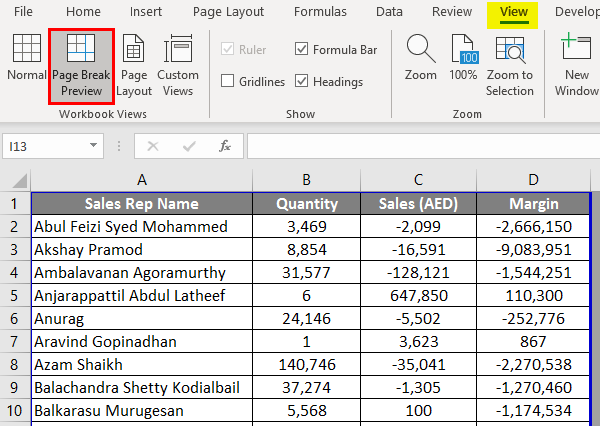
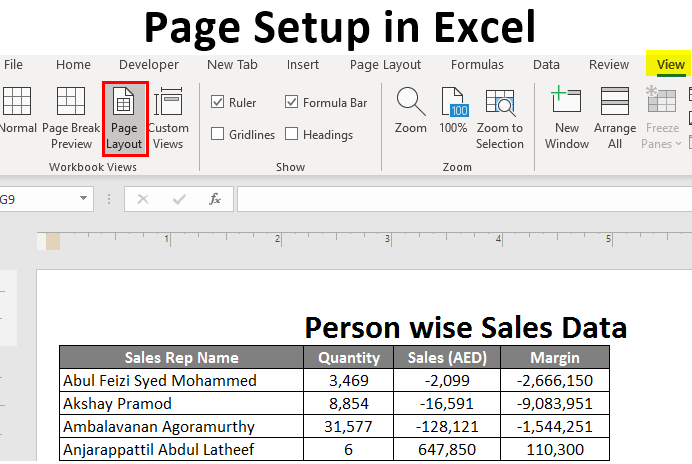
Click on the View tab under the Excel ribbon at your sheet’s top. You’ll see multiple operations under “Workbook Views” and “Show”. Under Workbook views, you have different view types: Normal, Page Break Preview, Page Layout, and Custom Views.
Click on “Page Break Preview”. It will break your page according to the printing area, as shown below.
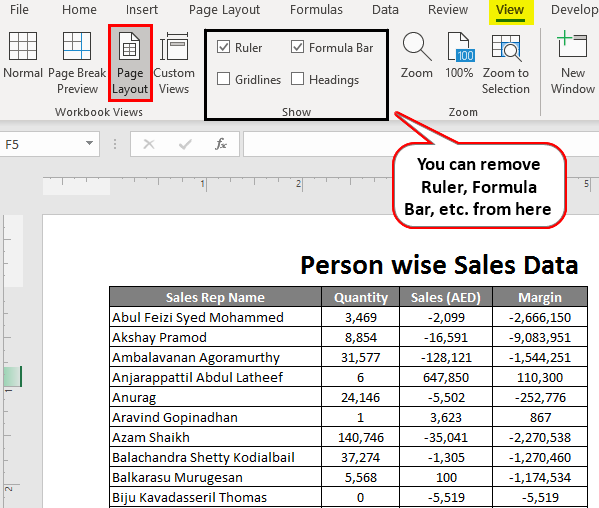
Click on the Page Layout option to show you the Excel sheet in a page layout. It already has a default header option (I will add ‘Person wise Sales Data’ as a title). Under the Show option, you can check or uncheck options like Ruler, Gridlines, etc.
#2 – Setting up Margins in Excel
We often come up with a situation where the columns from your printing page occupy the entire page and still have one column not fitting into the page, and it goes to the next printing page for that document. We can use the margins button/options present under the Page Layout tab in Excel to tackle this issue.
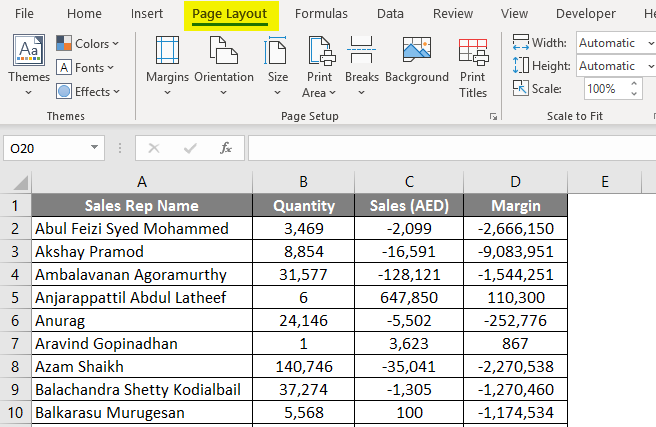
Click on the Page Layout tab in Excel. You will see a range of operations available, each consisting of several options.
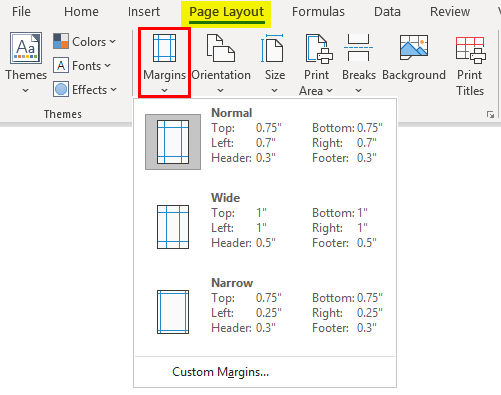
Under “Page Layout”, click on the “Margins” button to see different margin options. Ideally, 4 of them: Last Custom Settings, Normal, Wide, and Narrow margins. You can select anyone as per your requirement.
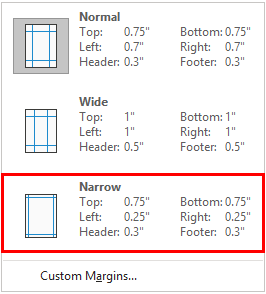
Click on “Narrow” margins. It will narrow down margins and will have more space to acquire the columns.
#3 – Page Orientation under Page Layout
Sometimes, adjusting the margin only will not include all your data columns on one page. In that case, you may need to change the page orientation.
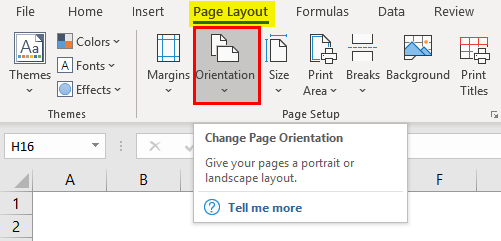
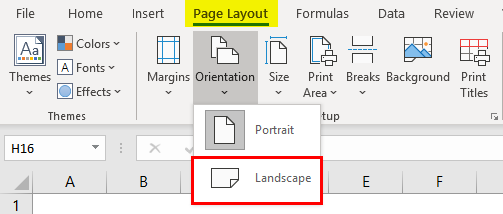
Go to the “Page Layout” tab and select the Orientation button beside the Margins button.
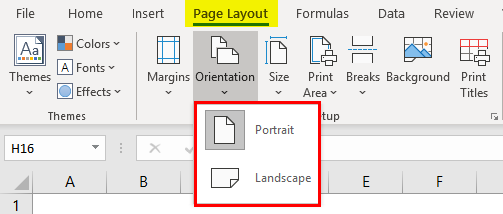
As soon as you click the Orientation button, you will see two options: Portrait and Landscape.
By default, the orientation is in Portrait form. Change it to Landscape, so all your columns can be visible on one printing page.
#4 – Adjusting the Size of the Printing Page under the Page Layout
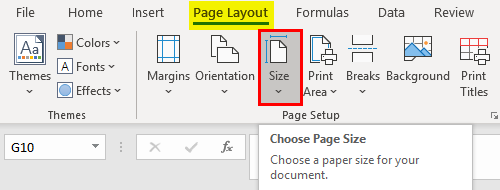
You can also change the page size to get a proper printing page. Go to the “Page Layout” tab and click on the “Size” button under it. This option allows you to set the paper size for your document when it gets printed.
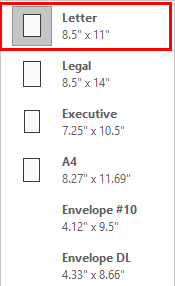
A series of different paper options will appear there. Like Letter, Legal, A4, A3, etc., by default, it will be set to “Letter” page size (As we have changed the orientation to Landscape).
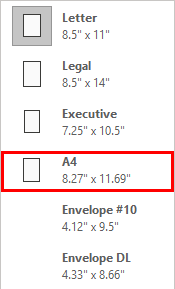
Click on “A4” to set the page size as A4 (the most widely used paper size while printing any document).
#5 – Print Titles Under Page Layout
If your data is long and has many rows (say 10,000), it will not fit on one page anyway. It will go on multiple pages. However, the main concern with this is, the column titles are only visible on the first page. What about the next pages where data is populated. It becomes hectic to decide which column is for what. Therefore, having column titles on each page is mandatory while setting the page.
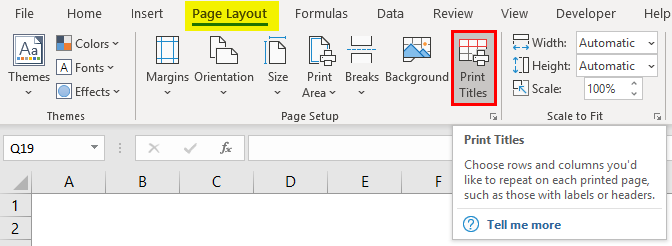
Click on the “Page Layout” tab and go to the “Print Titles” button. Click on that button.
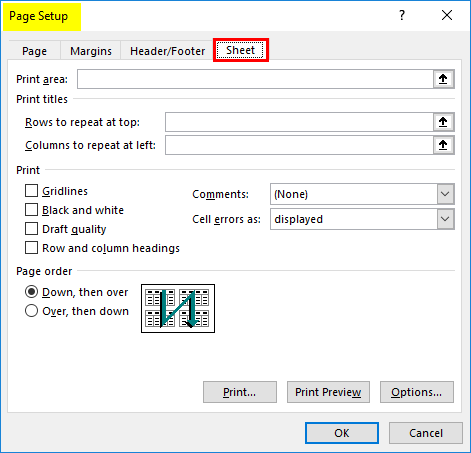
As soon as you click on the “Print Titles” button, a new “Page Setup” window will pop up under which the “Sheet” option is active (As you have clicked on Print Titles).
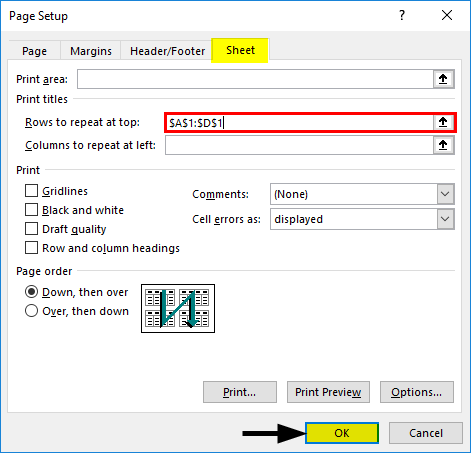
Under it, click on “Rows to repeat at the top option”. This option allows you to add rows with titles on each page. Once you click on it, you will need q d to select the row ranges you want to print at the top of every printing page. In our case, it is $A$1:$D$1. Here, in this Sheet option, we also can set the printing area, columns that we want to repeat at the top, etc. Click on OK once you are done with the amendments.
This is how we set up the page before printing it in Excel. Let’s wrap things up with some things to remember.
Things to Remember About Page Setup in Excel
- You can also add custom margins under Page Layout in Excel.
- Print titles and report headers are both different. Print Title prints the title of each column on multiple pages, whereas the report header is the header of the report/main title.
- If you want to remove the print titles, go to Page Setup under the Print Titles section, select the Sheet tab, and remove the rows provided under the Print Titles section.
Recommended Articles
This is a guide to Page Setup in Excel. Here we discuss How to set up Page in Excel, practical examples, and downloadable Excel templates. You can also go through our other suggested articles –
