Updated August 25, 2023

Introduction to Photoshop Creative
Creative is a technique or feature through which you can explore your idea in the editing of image for giving it a more creative look than usual and also make it relevant for professional works of graphics designing. In Photoshop we can understand it by the creative editing of an image by using different tools and features of this software. For getting knowledge about this topic we will do creative work with our image and also understand different parameters which we include in our learning. So let us start our learning about this topic of Photoshop and understand it through an exciting example.
How to do Creative Work in Photoshop?
You can apply your idea to do any creating work with image editing in this software and make different changes in the parameters of that creative work again and again for getting the best result. So for that, I will give you an idea of creative work here in this article but before starting you must get introduce to the working screen of this software so that you can better understand my explanation about this topic throughout this article.
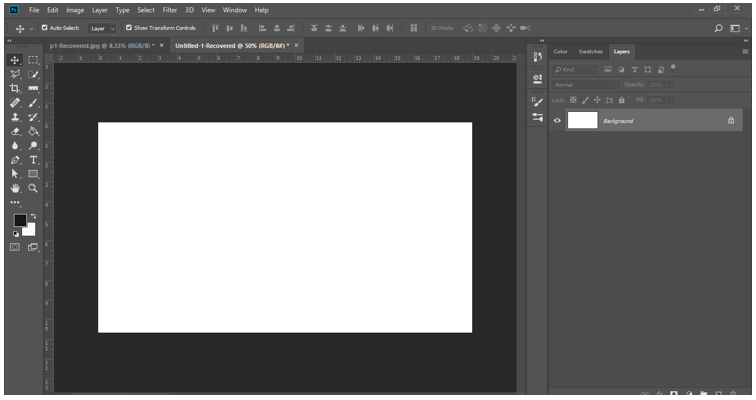
At the top of the working screen, there is a Menu bar of different menus which helps in handling of different parameters of this article and the second part of this screen is Property bar which shows you the parameters of active tool or image and you can make changes in their parameter at any time of your working. The third part of this software has three sections in which on the left side we have a tool panel, at the center we have a display window, at the right side we have some tabs such as color tab, layer panel, and some other important tabs. You can rearrange all these sections as per your choice.
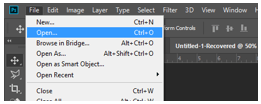
Now let us have two images in this software for our learning about this topic. For placing an image go to the File menu of the menu bar of this software and click on it, choose Open option from the drop-down list.
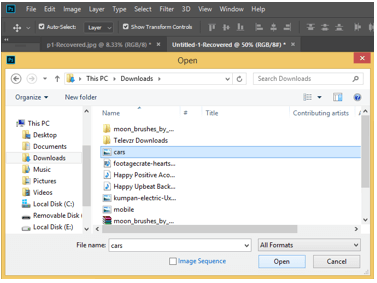
A dialog box for placing image will be open. Go to the desired folder of your personal computer where you have saved your image and select your desired image from there by click on it then click on the Open button of this box.
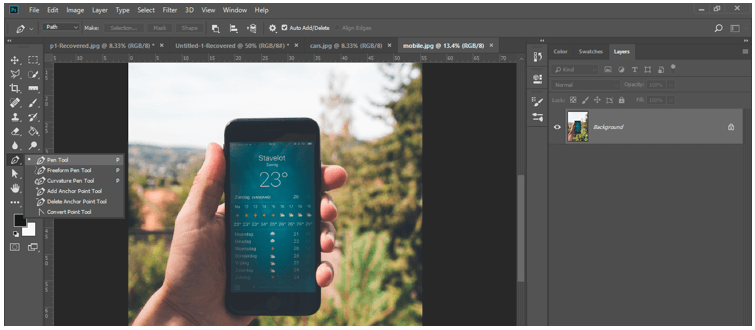
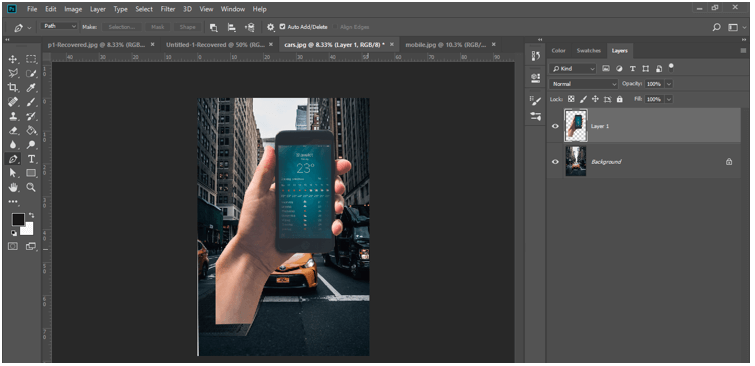
Now I have placed two images in this software. One has a mobile Phone image like this. We will start with this image so take a pen tool from the tool panel of this software by click on the icon of it.
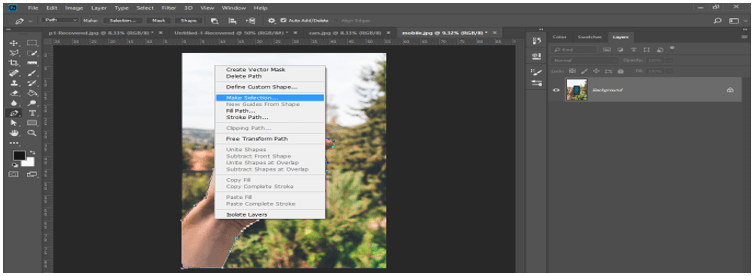
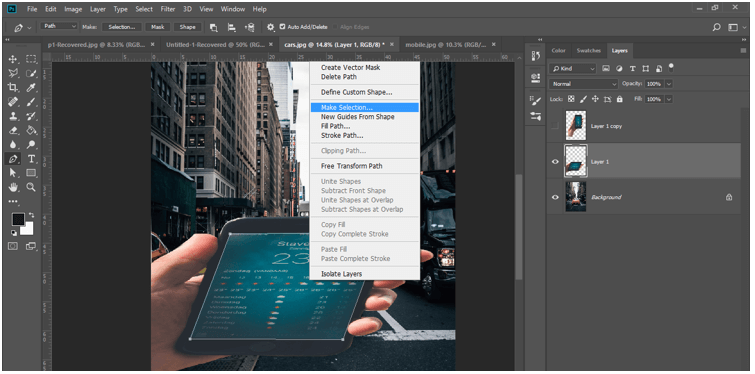
Make a selection around hand and mobile with the help of the pen tool and once you had done make right click on the image with the mouse right button then click on the ‘Make Selection’ option of the drop-down list.
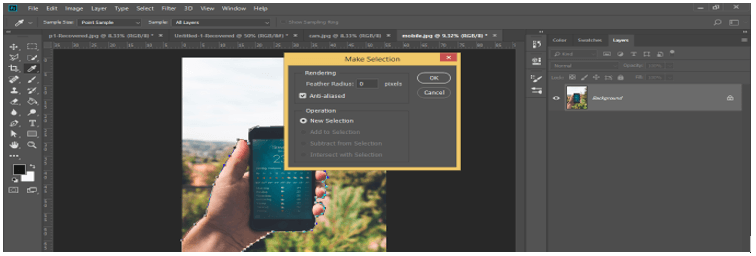
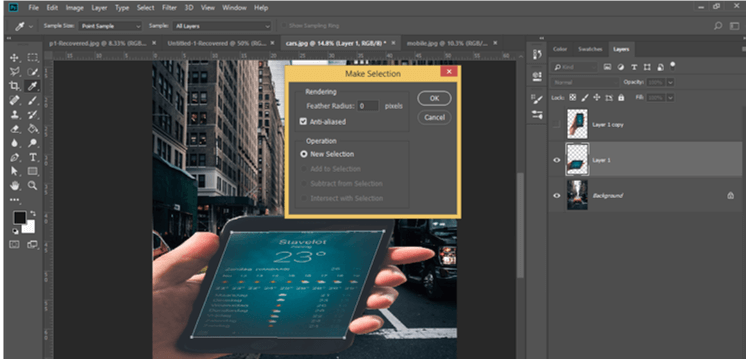
A selection dialog box will be open to making some changes in parameters of selection once you click on this option. Press the Ok button of this box.
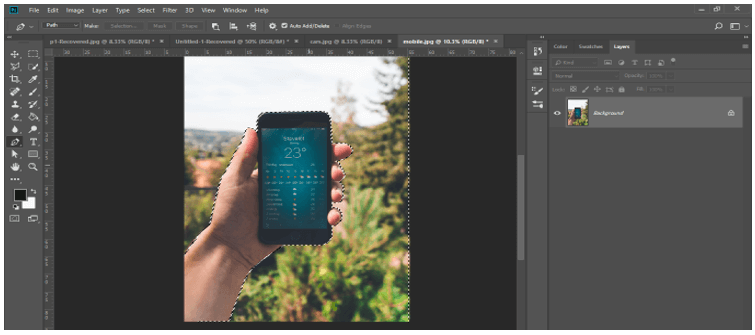
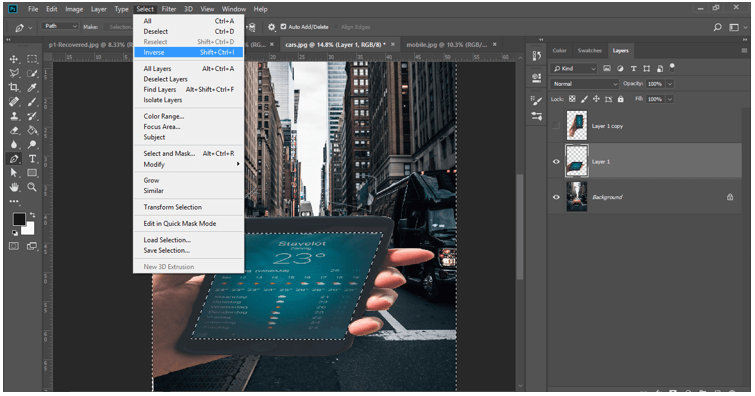
Your selection will make like this once you press the Ok button.
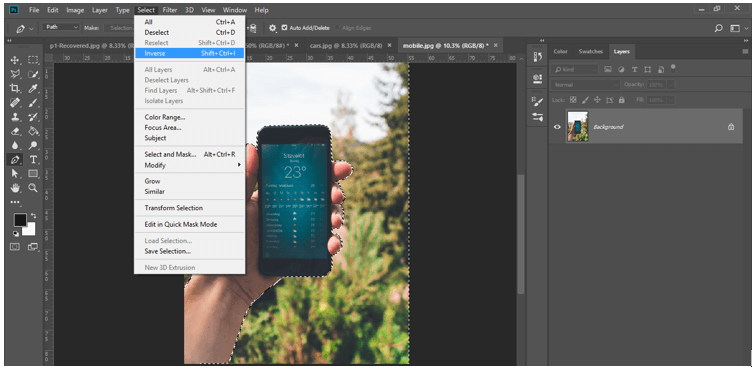
Now go to Select menu of the menu bar of this software and click on the Inverse option of the drop-down list for selecting hand with mobile with selection area. Then press Ctrl + C button of the keyboard for coping with your selected area of hand and mobile of this image.
Go to another image tab of this software and press the Ctrl + V button of the keyboard for pasting your selected area of the mobile image here like this.
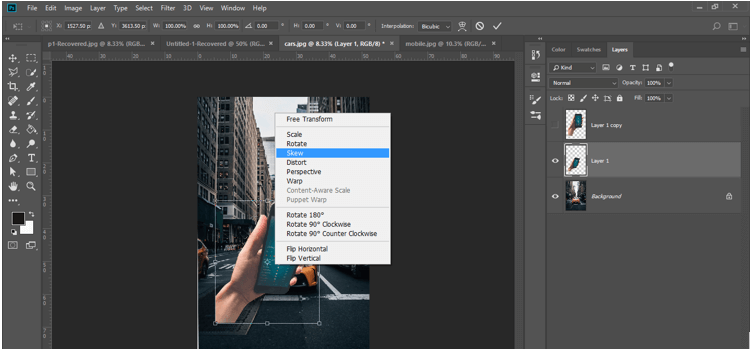
Now press the Ctrl + T button of the keyboard for the transform box of this image and make right-click on it. A drop-down list of transform boxes will be open, choose the Skew option from the list by click on it.
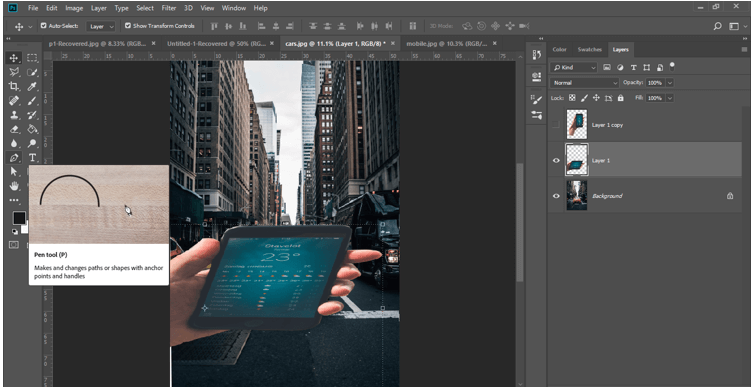
Now adjust this mobile image like this by adjusting the anchor point of the transform box with the help of the skew tool and again take the pen tool from the tool panel by click on the icon of this tool.
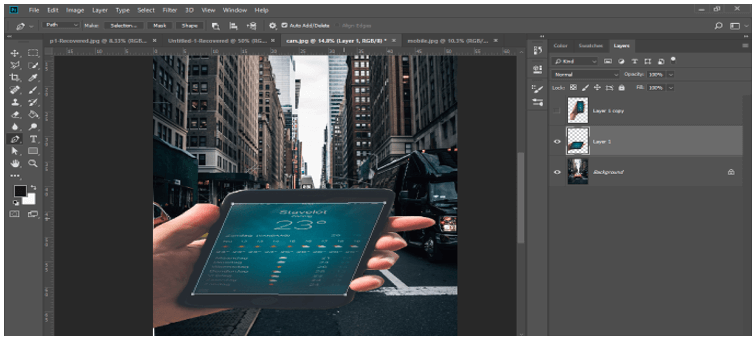
Now make a selection around the screen of mobile with a pen tool like this.
And make the right click. A drop-down list will be open, choose ‘Make Selection’ option from the list by click on it.
A selection dialog box will be open now press the Ok button of this selection box.
For inversing selection again go to Select menu of the menu bar of this software and click on the Inverse option of the drop-down list for choosing it.
Now press the Ctrl + X button of the keyboard for the cutting screen of the mobile.
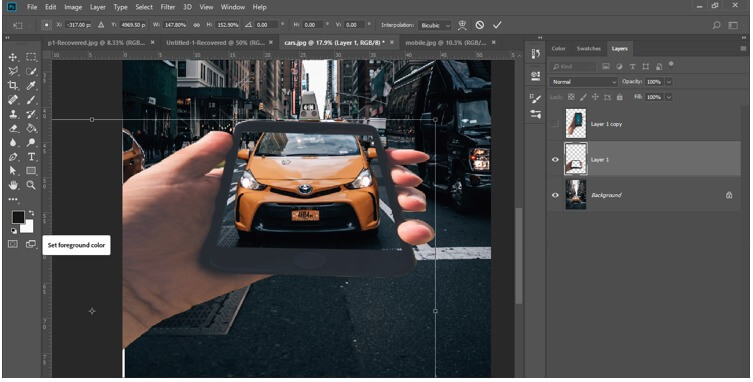
Adjust the perspective of the mobile image again like this by using the skew tool again. Then set black color as foreground color and white as the background color in the color box of the tool panel.
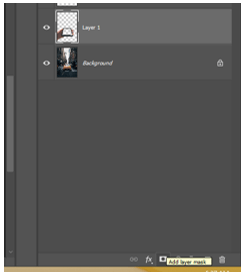
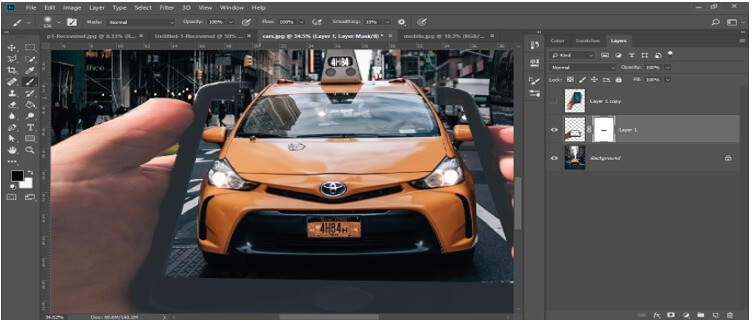
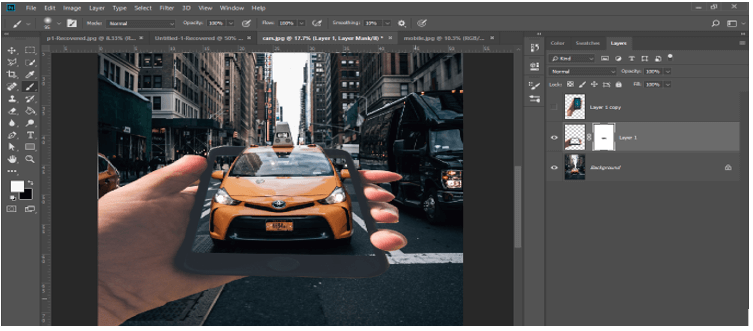
Now go to the bottom of the layer panel of this software and click on Add mask button for adding mask in Layer 1.
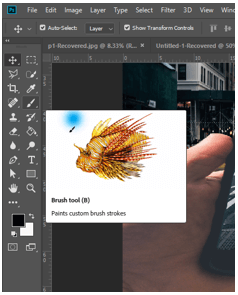
Now take a brush tool from the tool panel of this software by click on it.
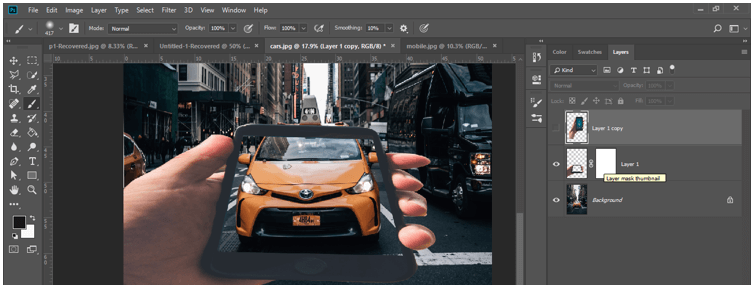
Select the Layer Mask of this layer by click on it if it is not selected.
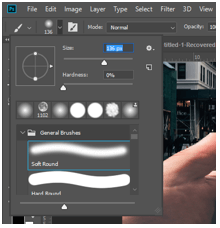
Then take a soft brush and adjust the size of the brush from the size option of the property bar of the brush tool.
Paint the upper area of the border of the mobile image with the help of a brush tool for erasing it from here like this.
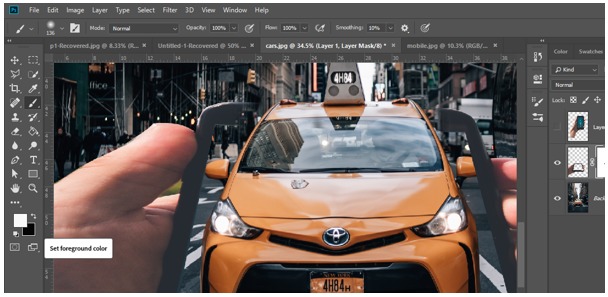
If you have erased more areas by mistake then don’t worry. Go to tool panel and switch foreground color as white.
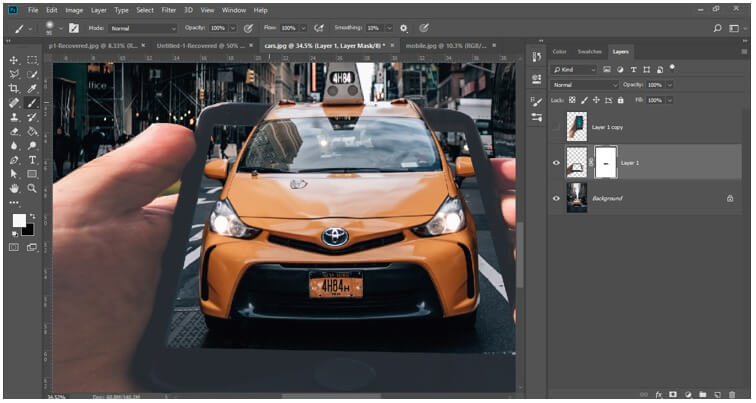
And paint that erased area that you want back again with the brush tool.
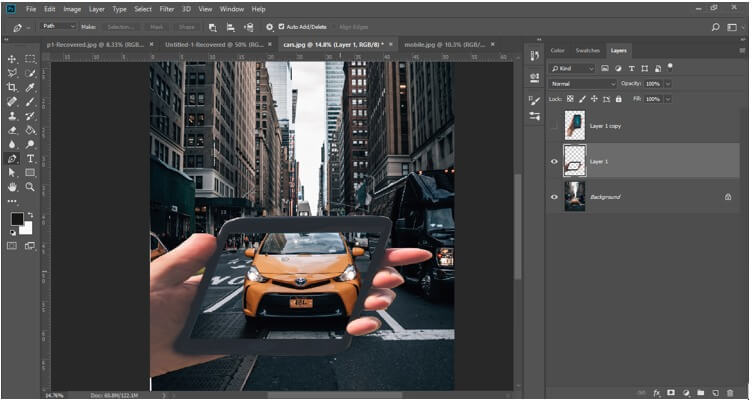
In this way, you can create an illusion for the viewer by this type of creative editing with your images.
Now I think you can understand creative work and able to make creative work with your idea on your image.
Conclusion
Now after this article you can understand what creative work is in Photoshop and how you can edit your image with a creative idea. You can use other tools of this software for making creativity with your image by getting an idea from this article. We just discuss an example of creative work in this article, there are more good things you can do as creative work.
Recommended Articles
This is a guide to Photoshop Creative. Here we discuss how to do Creative Work in Photoshop with an exciting example for better understanding. You may also have a look at the following articles to learn more –
