Updated August 25, 2023

Introduction to Photoshop Extend Background
Extend Background in Photoshop can refer to a technique of this software through which you can expand the background of any image without destroying pixels of the main content of that image. By main content, we mean any object of that image which is our main focus point. For this purpose, we will use the Content-Aware feature of this software and also understand what are the main parameters of this feature through which we can extend the background of any particular image with ease. We will understand this topic through an example by using some other features and tools of this software. So let us have a good discussion about this topic in the step by step manner.
How to Extend Background in Photoshop?
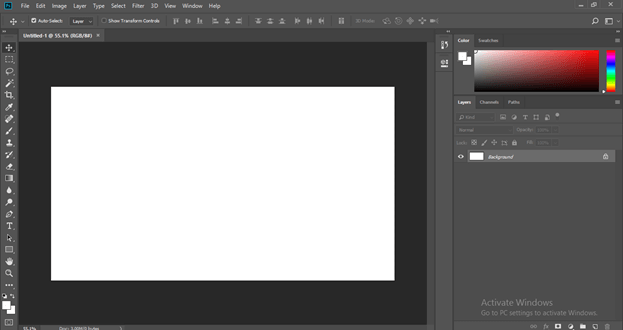
We can learn this topic through an example by just following a few simple and exciting steps, but before starting, let us have a look at the working screen of this software to better understand this topic throughout this article.
There is a Menu bar at the top of the working screen with several menus such as File Menu, Edit menu, Image menu, Layer Menu, and some other important menus. Below this menu bar, we have a Property bar of the active tool of this software or image on which we are working for making different adjustments during our working. Below this property bar, we have three sections are there on the working screen in which at left side we have a tool panel which has the number of tools, at the center we have a document area in which we can see our current working, at the right side we have some tabs such as Color, Layer, and some other important tabs. You can rearrange all these sections anywhere on the working screen as per your choice.
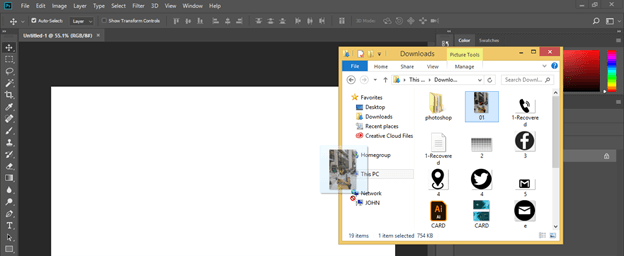
For our learning, let us have an image in this software which background we will extend without destroying the main content of it. For placing an image in this software, go to that folder of your personal computer where you have saved it, then pick it from there and drop it in the document area of this software by releasing the mouse left button. You can have your own image or have any downloaded image of the internet for this purpose. I will use a downloaded image.
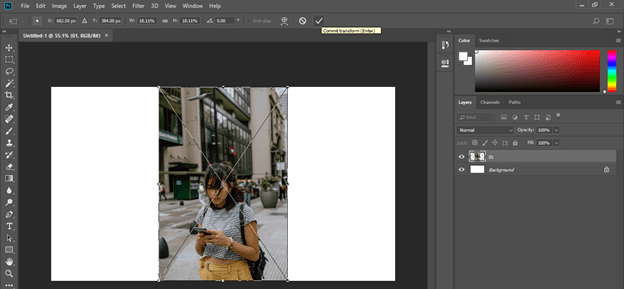
Adjust the size of this image on the document are according to you and press the enter button on the keyboard or click on the ‘Commit transform’ button on the property bar of this image for applying your set size. The main content of this image is a girl who is texting on a mobile phone.
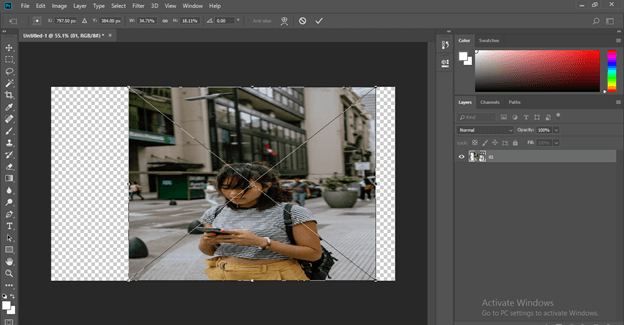
Now press the Ctrl + T button of the keyboard to transform a box of this image and increase the size of this image in the horizontal direction for extending the background of this image, and you will notice the pixels of the girl of the image will destroying with increasing size. Let us resolve this problem by using the content-aware feature of this software.
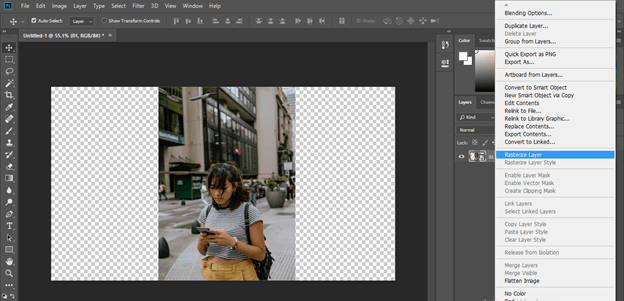
Make this layer Rasterize. For making it rasterize, go to the Layer panel and make right-click on it with the mouse right button. A drop-down list will be open to choosing the Rasterize Layer option from the list.
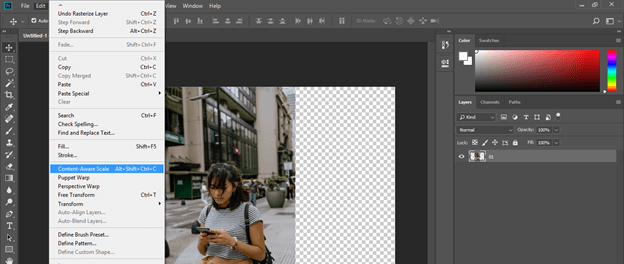
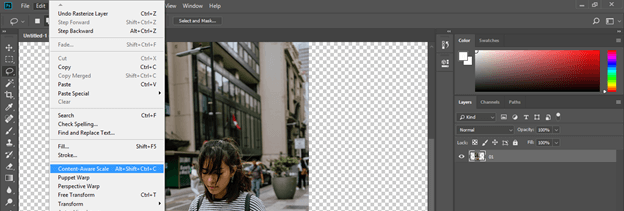
Now go to the Edit menu of the Menu bar and click on it. A drop-down list will be open. Choose the Content-Aware option from the list, or you can press Alt + Shift + Ctrl + C as the shortcut key of this option.
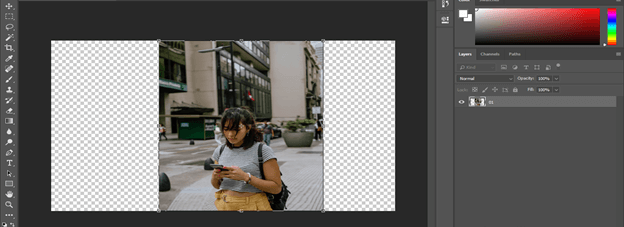
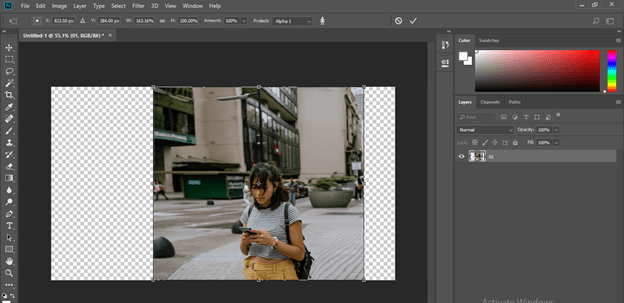
The abounding box will come around this image the same as the transform box. Now you can extend the size of the background of this image without disturbing pixels of the main content of this image.
But you will find that pixel of our main content will disturb after some limit of extension of the background of this image.
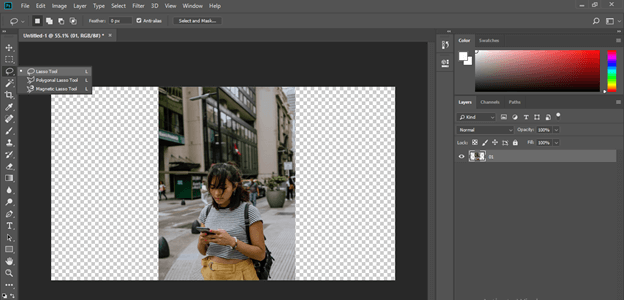
So for avoiding this, let us use another technique of this software. Take any selection tool from the tool panel of this software. I will take the Lasso tool by clicking on it to select this girl, which is our main content. You can make a selection with any other selection tool as per your choice.
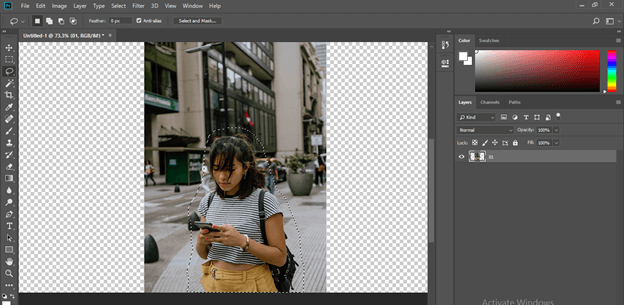
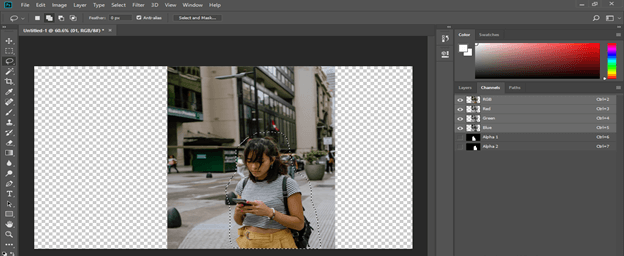
Make a rough selection like this around this girl with the lasso tool.
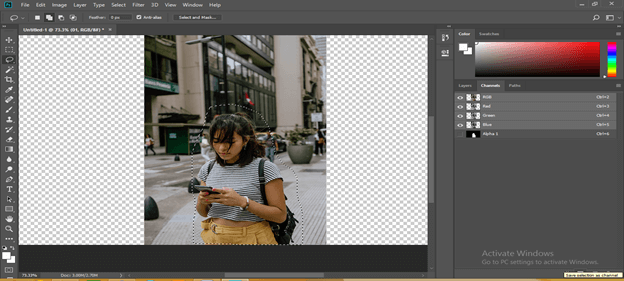
Now go to the Channel tab next to the Layer panel and click on the ‘Save Selection as Channel’ button, which is at the bottom of this tab. You will notice a channel will add to this selection in the list of channels.
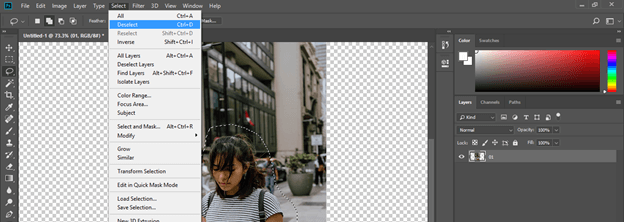
Now go to the Select menu of the Menu bar and click on Deselect option for releasing selection around this girl. You can press Ctrl + D button as a short cut key for this option.
Now again, click on the Content-Aware option of the Edit menu or press Alt + Shift + Ctrl + C
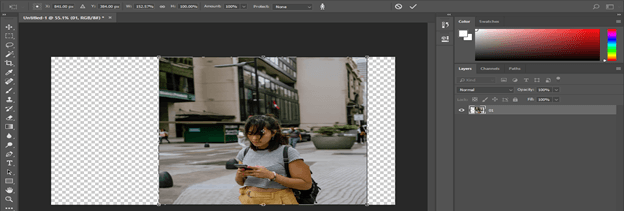
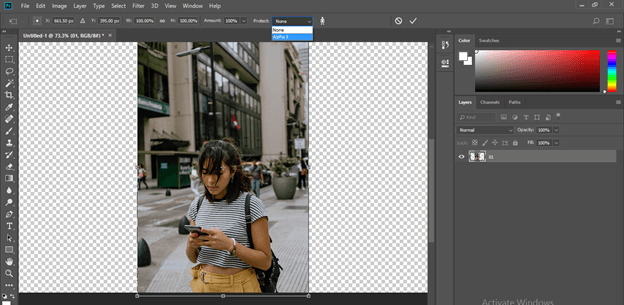
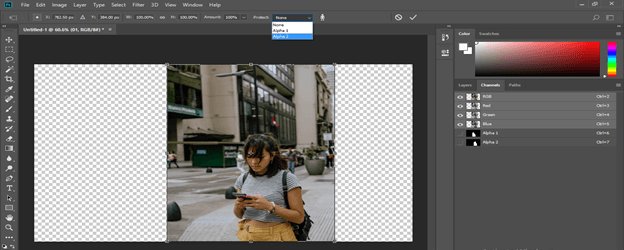
Now go to the property bar of the content-aware option and choose the Alpha 1 option in the Protect option of the property of Content-Aware option. So that during extending the background of the image it will protect the selection of the Alpha 1 channel.
Now you can extend the background of this image more than the previous time, but there is also some limit of extension of background, and after that limit, your main content will again go pixelate.
You can avoid this again by just making the Alpha 2 channel through the same process. Make sure you do this after extending the background in Alpha 1.
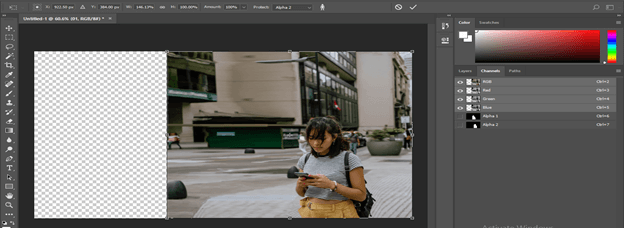
This time select Alpha 2 in the Protect option.
Now you can extend the background more than the previous one. You can repeat this in the step by step manner for getting a more accurate result.
In this way, you can extend the background of any image without disturbing pixels of the main content of your image.
Conclusion
Now, after this article, you can understand what Extend Background is in Photoshop and how you can do this. You also learned from this article that how you can handle different parameters of the option through which you can do this task in Photoshop. You can have a good command of this feature of Photoshop by practicing on it and use it for your professional work purposes.
Recommended Articles
This is a guide to Photoshop Extend Background. Here we discuss what Extend Background is in Photoshop and How to Extend Background. You may also have a look at the following articles to learn more –
