Introduction
If you’re a PHP developer, you know the struggle of managing dependencies. Manually downloading and including libraries, resolving conflicts, and keeping everything up-to-date can be a real headache. Thankfully, Composer comes to the rescue!
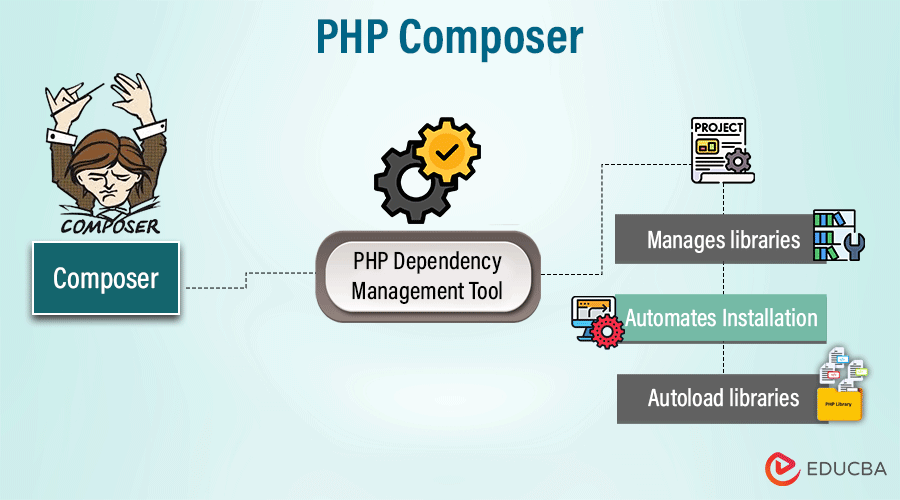
Composer is a dependency manager for PHP. It allows you to easily manage, install, and update all the libraries and frameworks your project needs. It separates and bundles dependencies project-wise in a vendor directory in the project’s root directory. Think of it as a personal assistant for your PHP projects, taking care of all the tedious dependency tasks so you can focus on writing great code. It’s easy to learn, powerful to use, and will save you countless hours of frustration.
Ready to dive in? Let’s explore how to install and use Composer in your next PHP project!
Table of Contents
Key Takeaways
- Composer is a PHP dependency management tool that ensures the writing of clean, maintainable code.
- It helps to install and manage external packages and libraries required for projects from the PHP package repository, Packagist.
- It autoloads the dependencies whenever required, ensuring compatibility among packages.
How Composer Works
Let’s see how to get started with PHP Composer.
Step 1- Installing Composer
First, make sure you have PHP installed (latest version).
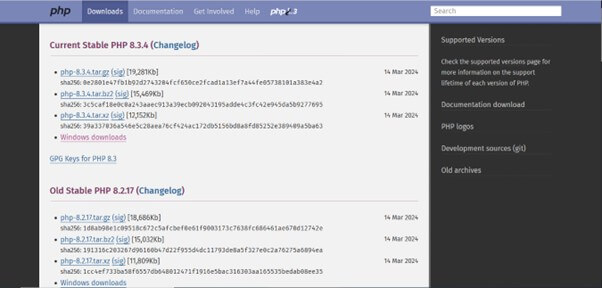
- Install PHP from php.net
Choose the latest version of PHP and download the file.
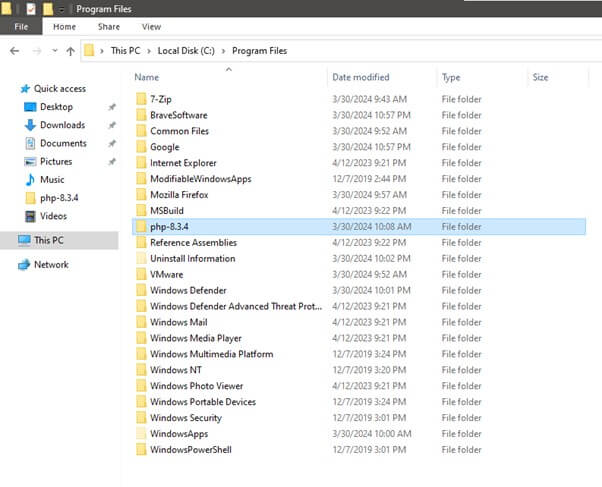
Extract the file and paste it into Program files.
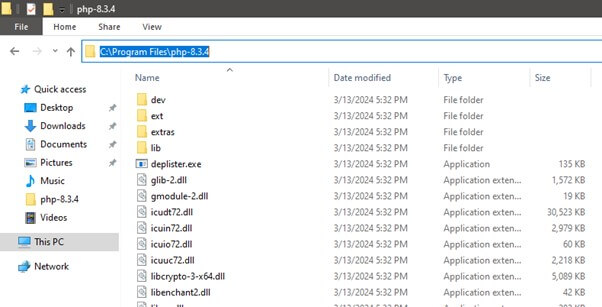
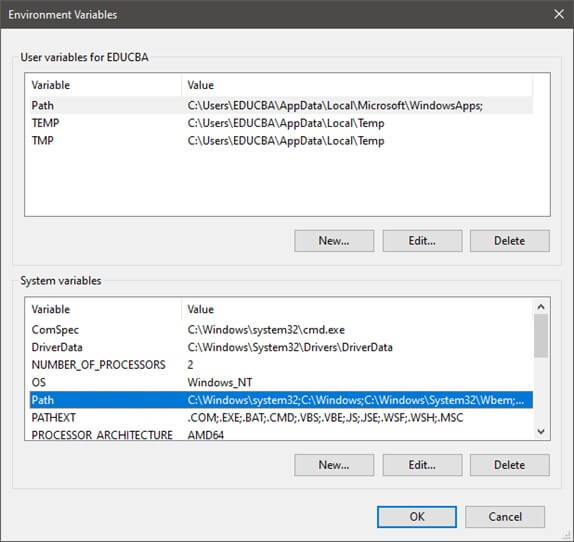
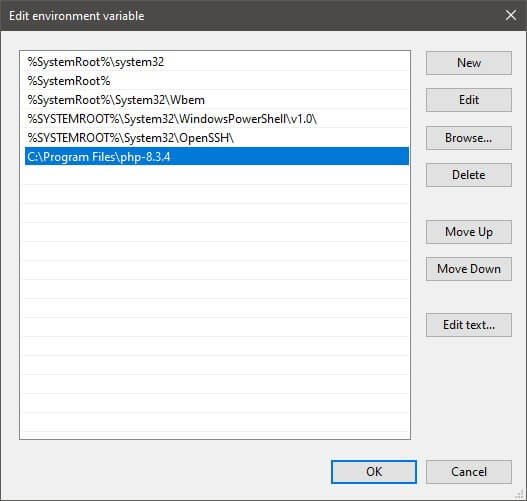
Copy the path of the php folder and add it to the environment variables.
Go to Edit the System environment Variable and select Advance Tab click on Envirmanet Variable.
Click OK. Now you have successfully installed the php.
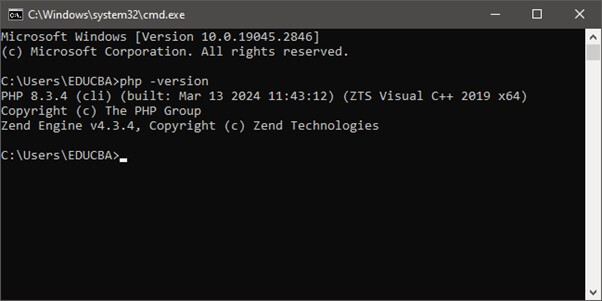
- To check the PHP version-
Confirm the php installation using the command in the command prompt.
php -version
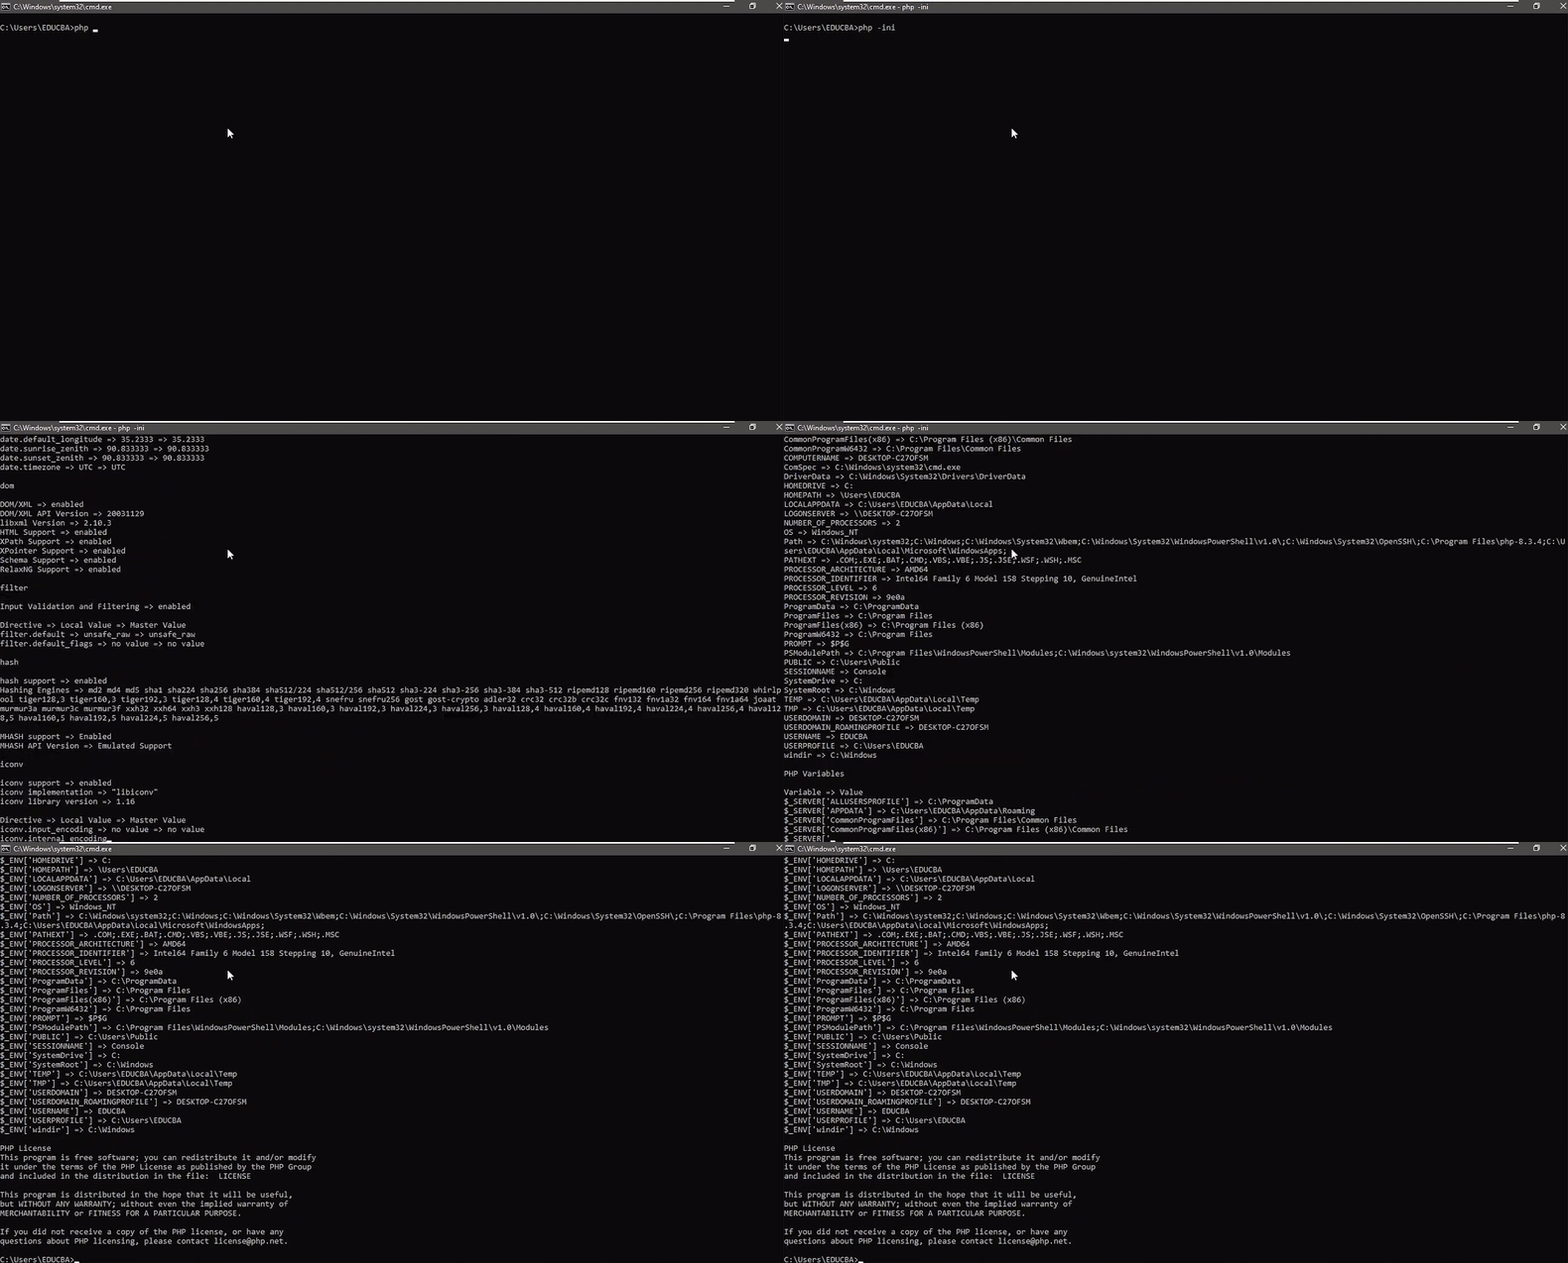
- Configuring PHP-
Now configure PHP using the command.
php –ini
- Installing composer
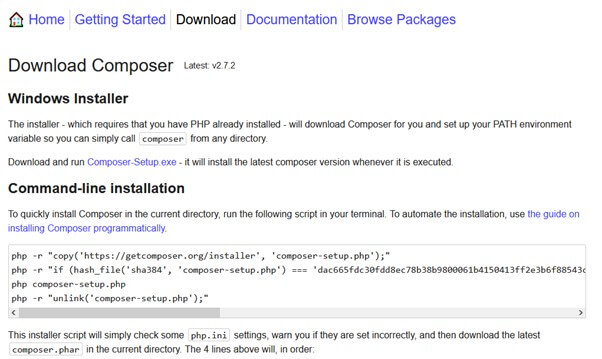
Go to getcomposer.org/download, download the Windows installer, and install it.
- Checking composer version
Confirm the composer installation using the command.
composer –version
Step 2- Creating a new project using Composer
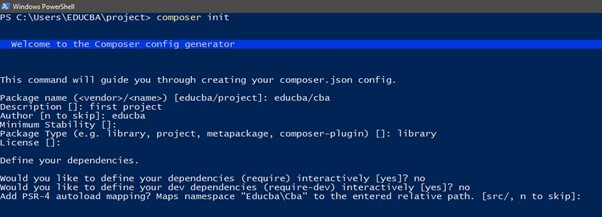
Go to your project directory in the terminal and create a “composer,json” file. Run the following command.
composer init
When you run this command, Composer will prompt questions about your project.
- Package name or project (vendor/package format), such as your vendor/your package.
- Project description.
- Author name- project’s primary maintainer.
- Minimum Stability: The minimum stability of the packages you’re willing to accept. You can choose from options like stable, beta, dev, etc.
- Package Type: The type of package. For a typical PHP project, you would choose a project.
- License: The license that distributes your project. Common choices include MIT, Apache-2.0, etc.
- Dependencies: it defines your project’s dependencies. It is an optional step.
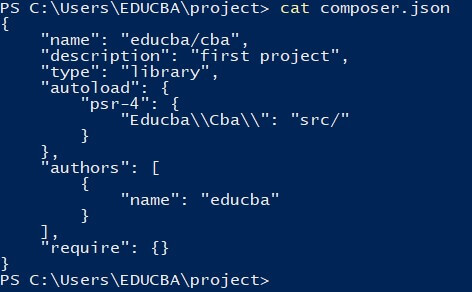
After answering, Composer will generate a composer.json file based on your responses.
It will create a composer.json file based on your response.
To confirm the content of the composer.json file, run the command.
cat composer.json
Step 3- adding dependencies
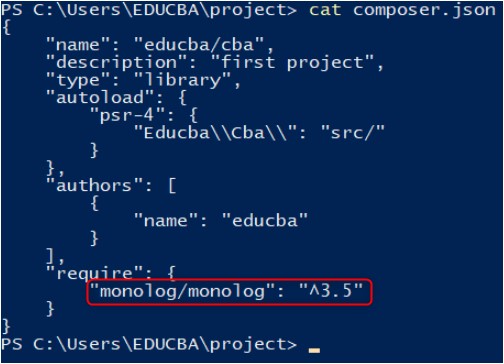
After setting the composer.json file, you can add your project’s dependencies. For example, run the following command to add a monolog library to your project.
composer require monolog/monolog
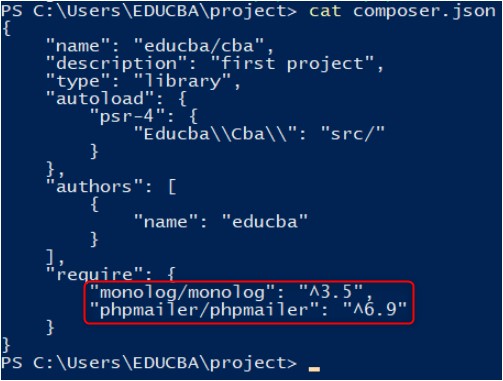
Now, you can see the added dependencies in the composer json file.
It lets the composer fetch the monolog package from Packagist and install it in your project. The composer will automatically update your composer.json file and download the necessary files to a project directory.
Step 4- autoloading classes
The composer inhibits autoloading functionality. It will automatically generate an autoloader for your project with all necessary files and classes. To autoload, add the following code at the start of PHP scripts.
require ‘vendor/autoload.php’;
For example, include the phpmailer/phpmailer library in your code without including it manually, and run the following code.
composer require phpmailer/phpmailer
Now check the composer.json file.
Step 5- updating dependencies
Run the following command to update your existing dependencies to their latest version.
composer update
It will update the dependencies and composer and lock them to the latest versions.
Step 6- Installing Dependencies
If you want to deploy your project to a new environment, you can install all dependencies listed in the composer.lock file by running.
composer install
Benefits of Using Composer
Below are the benefits of being a composer.
- Composer simplifies dependency management by enabling users to specify project dependencies in a human-readable format.
- It automates generating and managing class autoloading, eliminating the need for manual include or require statements.
- Composer supports semantic versioning. It allows users to define specific version constraints for each package to ensure compatibility and prevent unexpected breaking changes.
- It offers a broad ecosystem of packages- Packagist, the default package repository for Composer.
Beyond the Basics
1. Autoloading
Autoloading allows you to autoload required libraries or packages for projects without manually using include or require statements.
The composer will create an autoloader file (autoload.php) based on the dependencies listed in the composer.json file. This autoloader file includes mappings between class names and their corresponding file paths, allowing automatic class loading.
For example, we have installed the monolog, phpmailer, and guzzlehttp packages. Their entries are in the vendor folder.
2. Custom Repositories
You can add custom repositories, such as GitHub packages, without using Git repositories or symlinking. To do so, you can provide the type and URL of the Gitlab where you have hosted your packages.
For example-
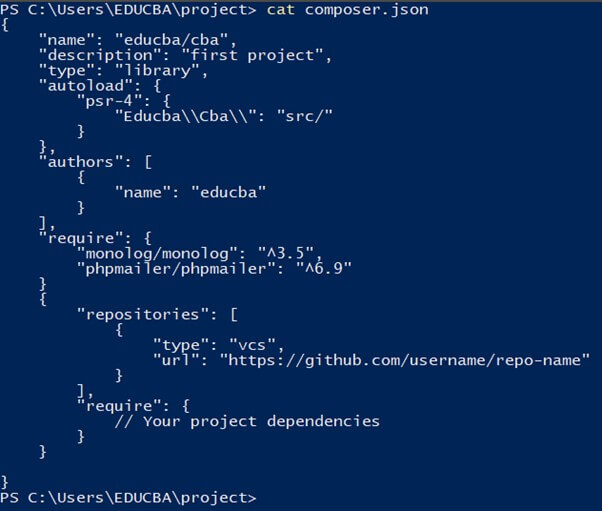
We have added the below code to our composer.json file.
"repositories": [
        {
            "type": "vcs",
            "url": "https://github.com/username/repo-name"
        }
    ]
Replace “https://github.com/username/repo-name” with the actual custom repository URL.
**To reflect the dependencies, run the “composer install” or “composer update” command.
Advanced Usage and Integration
1. Composer scripts
You can define and execute custom scripts from the composer.json file using composer scripts. You can add code to automate tasks like testing scripts, deploying apps, or performing quality checks.
For example,
We are trying to deploy a shell script. We have created a shell script “test.sh” that will print “HELLO” on the screen.
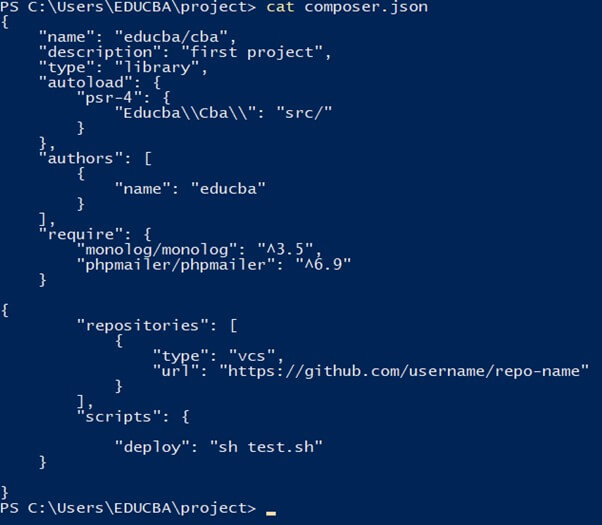
Add the script section below to your composer.json file.
{
    "scripts": {

        "deploy": "sh test.sh",
            }
}
Execute the file using the “composer run-script” command.
Composer run-script deploy
You can see the output of the “test.sh” file.
2. Composer plugins
Composer plugins extend Composer’s functionality by providing additional features or behaviors. Plugins can perform dependency resolution, package installation, and custom validation tasks.
For example-
{
    "require": {
        "composer-plugin-name/plugin": "^1.0"
    },
    "extra": {
        "plugin-config": {
            "key": "value"
        }
    }
}
In this example,
- The composer-plugin-name/plugin package is a Composer plugin.
- The extra section of the composer.json file stores the plugin’s configuration.
You can install the composer plugins like any other dependency using the “require” command. It automatically integrates with Composer and can be configured via the extra section.
Troubleshooting and Common Issues
Below are some common issues and troubleshooting tips.
- Dependency Conflict: You might encounter dependency conflicts while installing or updating packages.
Solution: To resolve this, you can run a composer update with the –dry-run flag to simulate the update and display potential conflicts. You can also update the version constraints in your composer.json file or include compatible versions of conflicting packages.
- Missing Autoloader: It might be possible that Composer’s autoloader (autoload.php) is not created or is missing.
Solution: You can run composer dump-autoload to regenerate the autoloader according to the rules defined in your composer.json file. Ensure you namescape your project’s source files and locate them in the appropriate directories according to the PSR-4 conventions.
- Slow Installation or Update: Sometimes, you might encounter slow installation or update processes.
Solution: To resolve this, you can use Composer’s –prefer-dist flag to download package distributions. Or you can use Composer’s –no-dev flag to skip the installation of development dependencies and speed up the process.
- Permission Errors: You might encounter permission errors while running Composer commands.
Solution: Ensure you can write to the project and vendor directories where Composer installs dependencies. You can also adjust file permissions or run Composer commands using sudo.
- Outdated Composer Version: You have an outdated version of Composer.
Solution: Upgrade to the latest version using composer self-update.
- Invalid or Corrupted composer.lock File: Your composer.lock file is invalid or corrupted.
Solution: You can delete it and run composer install to regenerate it based on the dependencies specified in your composer.json file. This ensures consistency between development environments and resolves potential dependency conflicts.
Conclusion
Composer is a valuable tool for PHP developers. It makes managing dependencies easier and helps keep PHP projects organized and maintainable. With Composer, developers can install packages, handle autoloading, and manage versions efficiently, leading to smoother development workflows and better project management.
Frequently Asked Questions (FAQs)
Q1. How can I speed up Composer installations and updates?
Answer:
- Use the –prefer-dist flag to download package distributions.
- Or, using the –no-dev flag skips installation of development dependencies, further reducing installation time.
Q2. Can I specify PHP extension requirements in Composer?
Answer: Composer allows you to specify PHP extension requirements in the composer.json file under the required section. It ensures that the necessary PHP extensions are installed before installing the package.
Q3. Is Composer dependency management limited to packages available on Packagist?
Answer: PHP has Packagist, the default package repository for Composer. Still, you can also define custom repositories in the composer.json file to fetch packages from other sources, such as private repositories or alternative package managers.
Recommended Articles
We hope that this EDUCBA information on “PHP Composer” was beneficial to you. You can view EDUCBA’s recommended articles for more information,
